I tried adding storage to my mini PC, and here's how to reconnect the Wi-Fi cable if it comes loose during the process.
Mini PCs, which take up less space than desktop PCs and offer greater expandability than laptops, are attracting attention as a 'third option' for business computers. When considering adopting such a mini PC as a work computer, we actually expanded its storage capacity, taking advantage of its expandability, and checked its performance with benchmark tests.
◆Selection of a PC model for work
The following are the points I prioritized when selecting a work PC for this project:
- Space-saving
- A moderate level of CPU and GPU performance is sufficient.
- It has 32GB of memory.
- It has 2TB of storage.
- The manufacturer's product warranty should be as long as possible.
- Windows 11 Pro must be pre-installed.
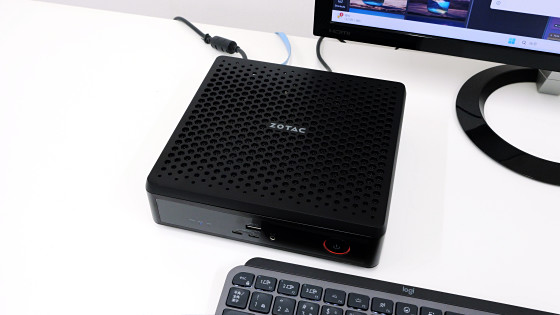
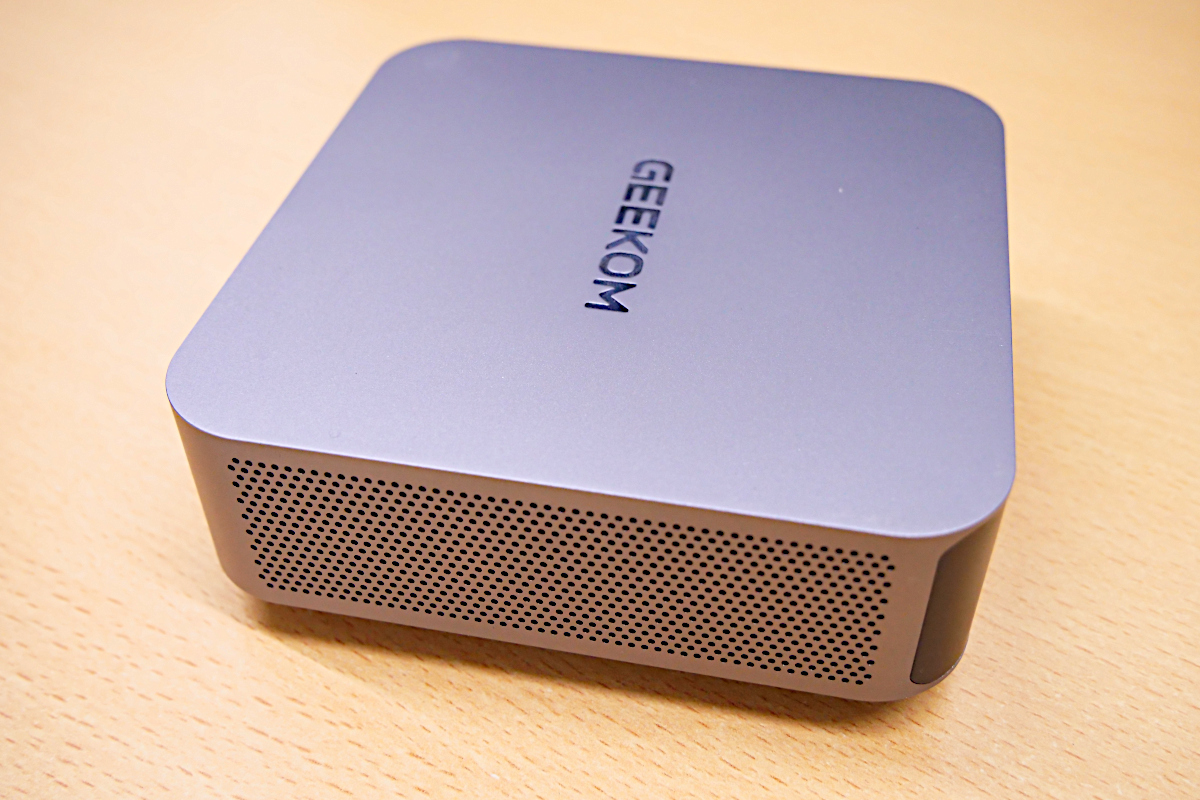
The one I ultimately chose was the ' GT13 Pro ' from GEEKOM.
13th Generation Intel GT13 Pro Mini PC | Core i7/i9 & Expandable 4 USB Ports | GEEKOM
The GT13 Pro features a 13th generation Intel Core i9-13900HK processor, 32GB of memory, and a 1TB NVMe SSD as standard. It also has a total of six USB ports and interfaces such as HDMI and DisplayPort. While the storage requirements were not met in the initial model selection, there is an empty slot for an M.2 2242 SATA SSD, so we decided to address this by adding a 1TB SSD. Regarding the product warranty, if purchased from the GEEKOM official website, a standard 3-year warranty is included. Since overseas-made mini PCs often have a warranty period of only 1-2 years, having a 3-year warranty is a reassuring point.
◆Exterior
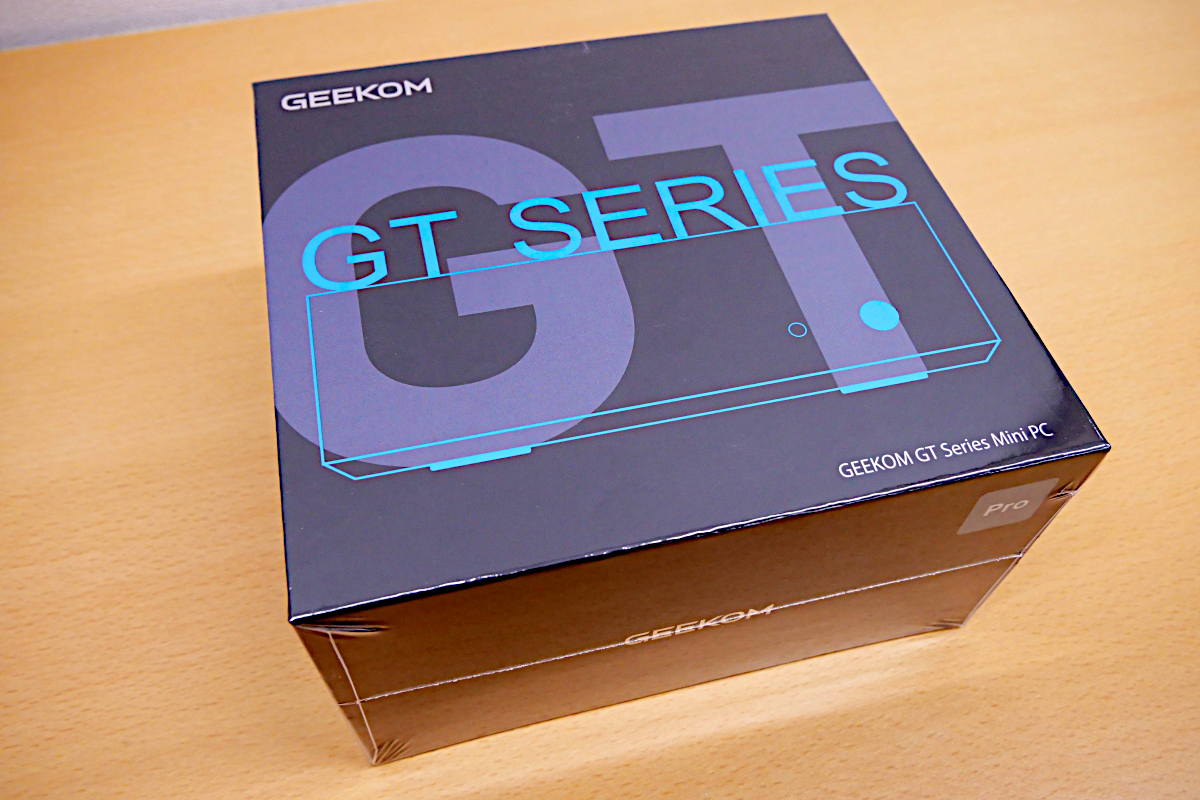
I ordered it from the GEEKOM website and it arrived in 3 days.

When I opened the cardboard box, a presentation box appeared.
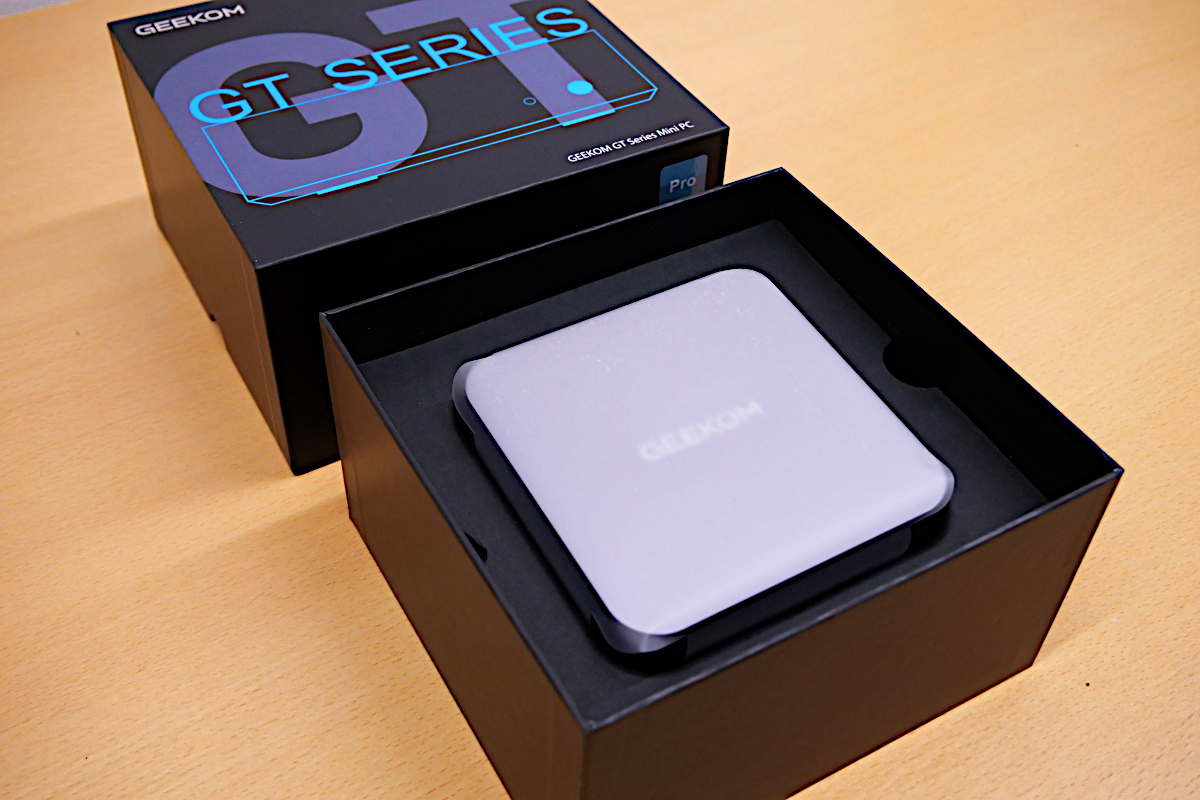
Upon opening the presentation box, the main unit is revealed.
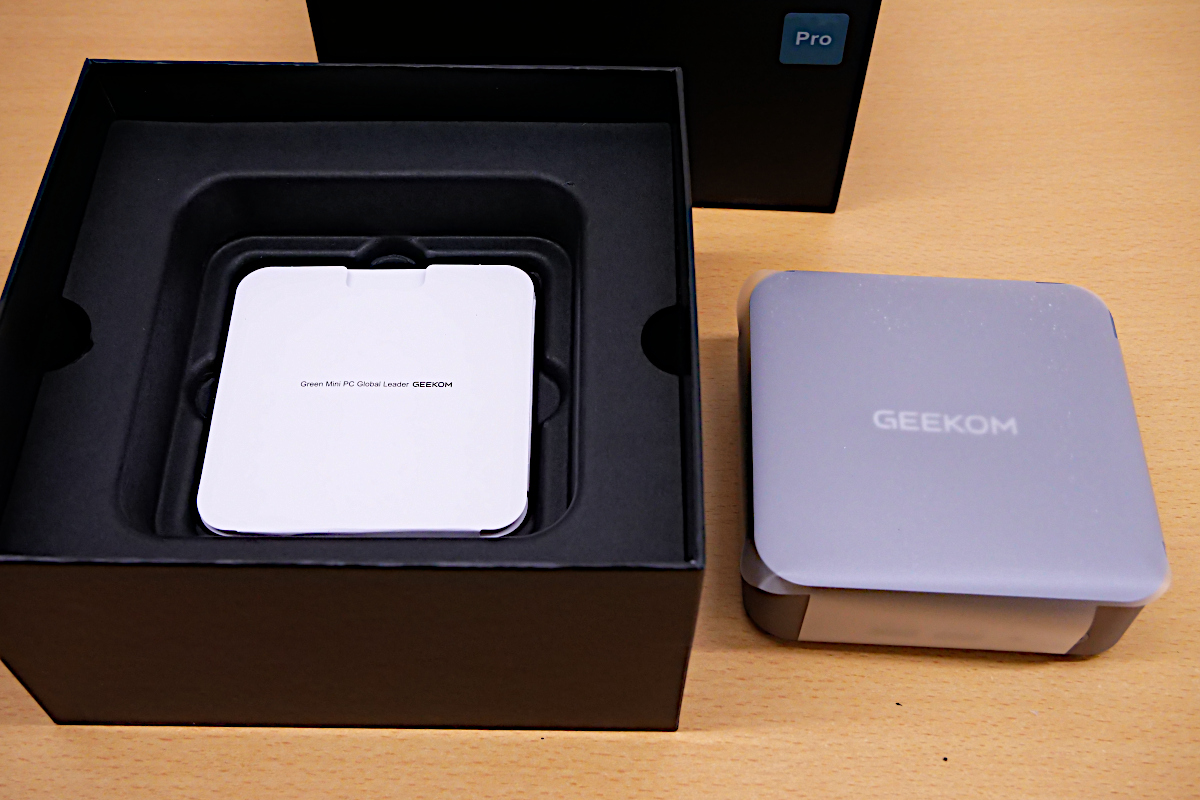
When you take the main unit out of the box, you'll find the instruction manual underneath.
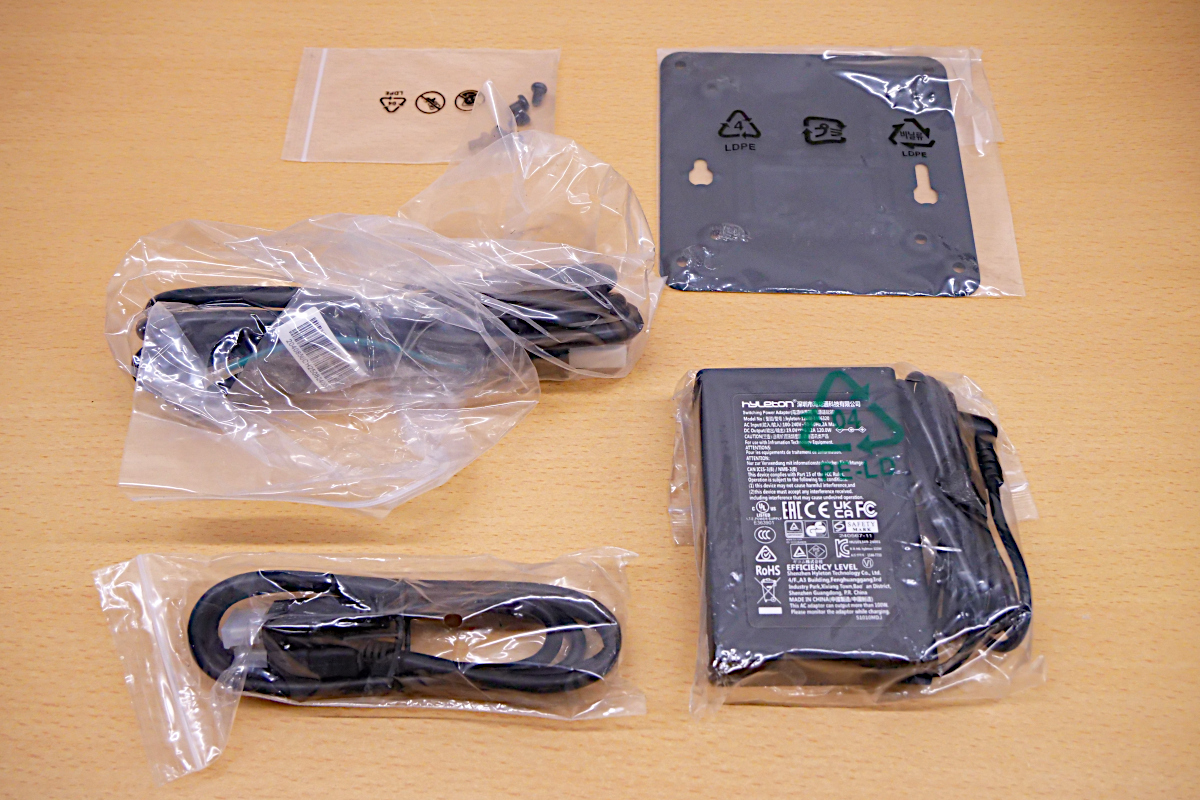
Upon removing the inner cover, I found the accessories inside. These included a power adapter, various cables, a VESA mount bracket, and the screws for securing it.
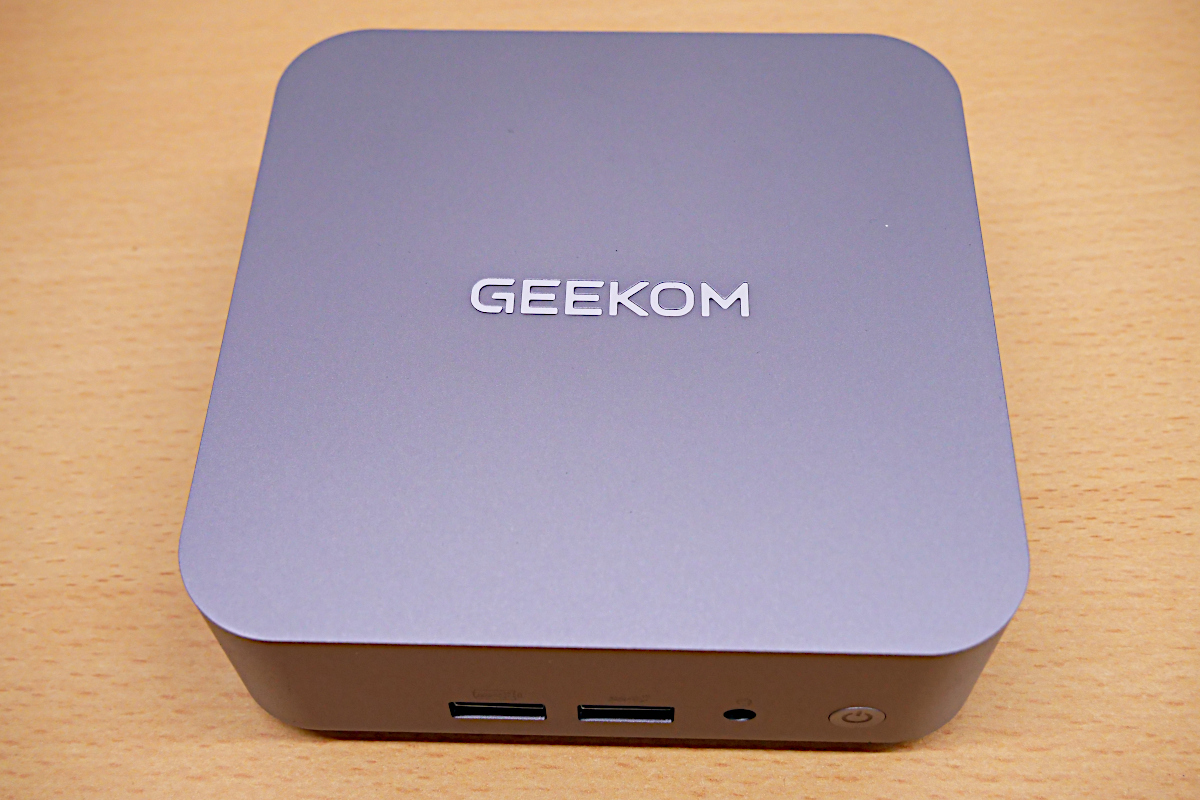
The top of the device. The GEEKOM logo is engraved on it.
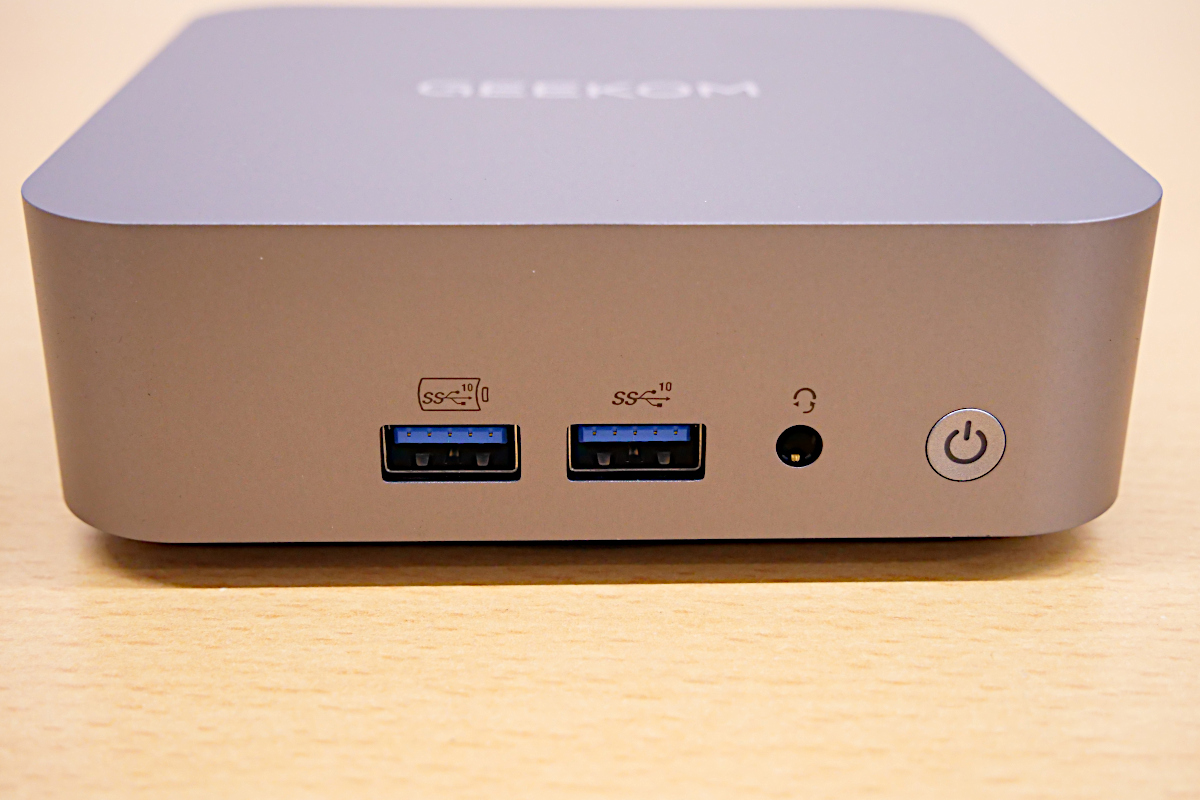
The front of the unit has two USB 3.2 Gen2 Type-A ports, an audio jack, and a power button.
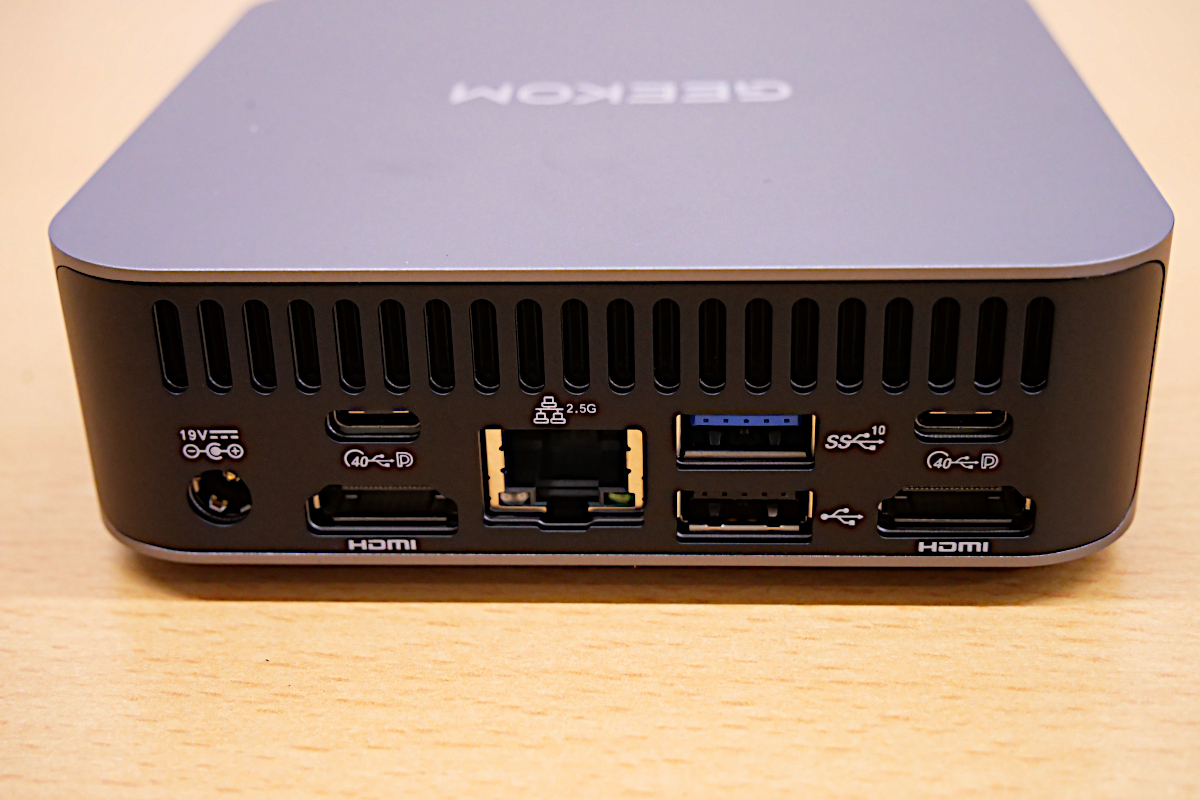
The back of the unit has a power connector, two HDMI ports, two USB 4 Type-C ports, one USB 3.2 Gen2 Type-A port, one USB 2.0 Type-A port, and a wired LAN port.
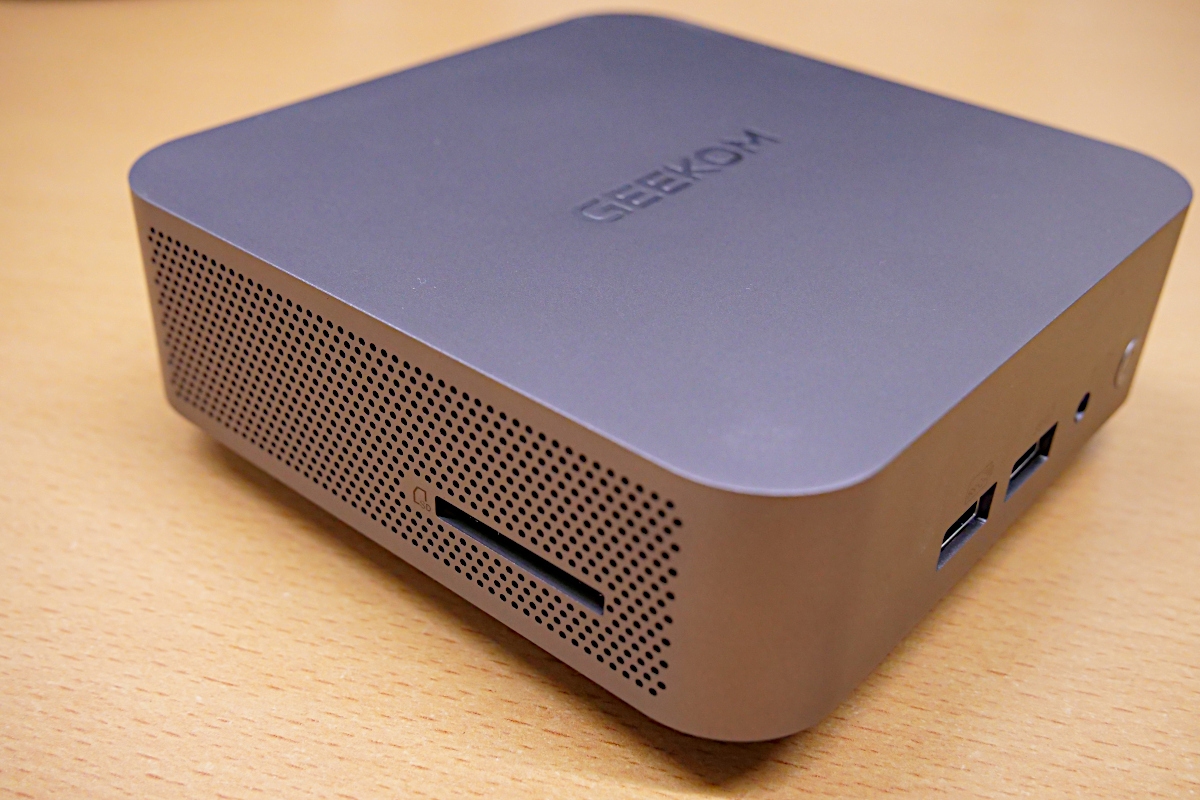
The left side of the device. There is an SD card slot.
There is nothing on the right side of the main unit.
◆ Adding an SSD
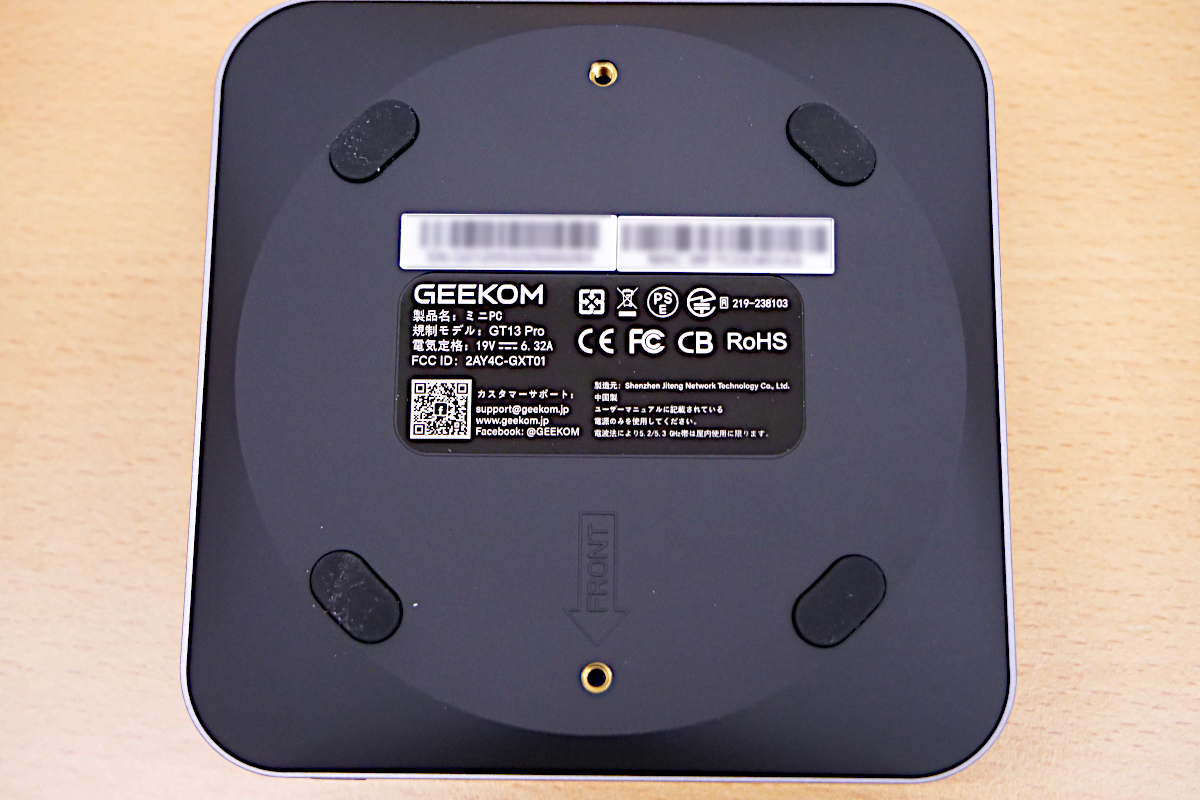
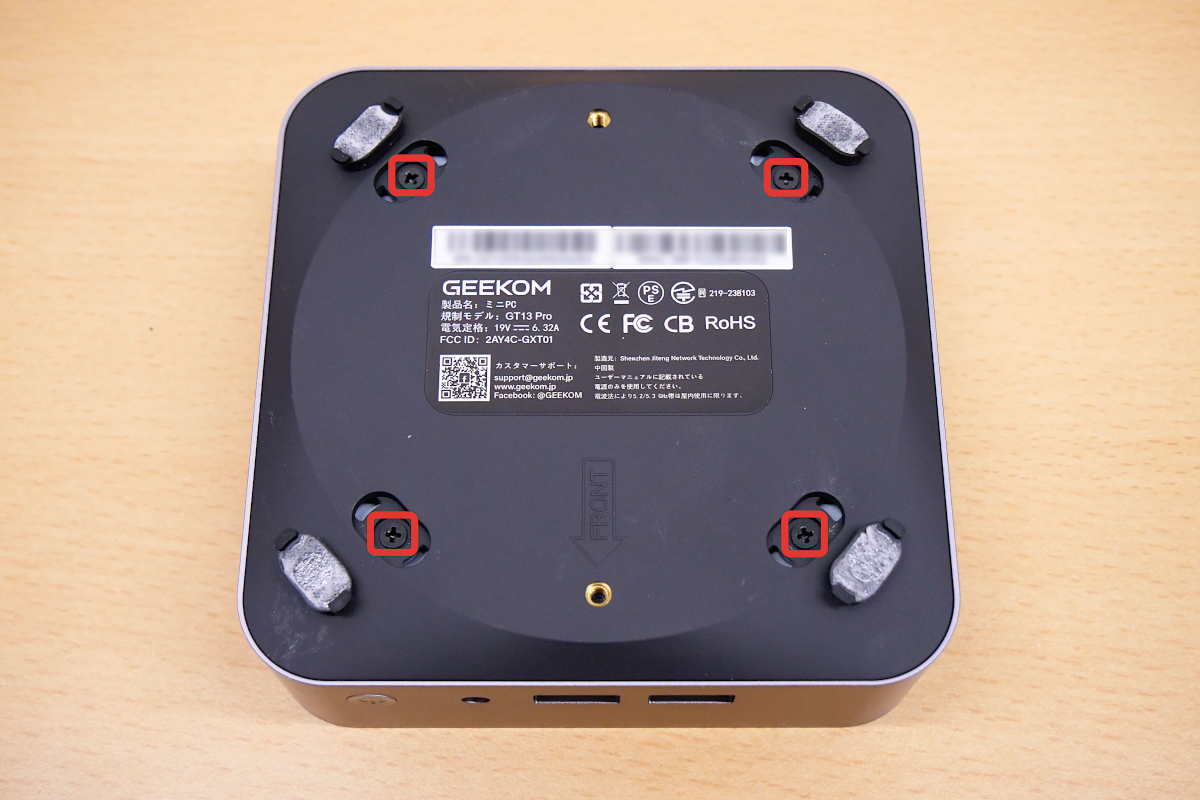
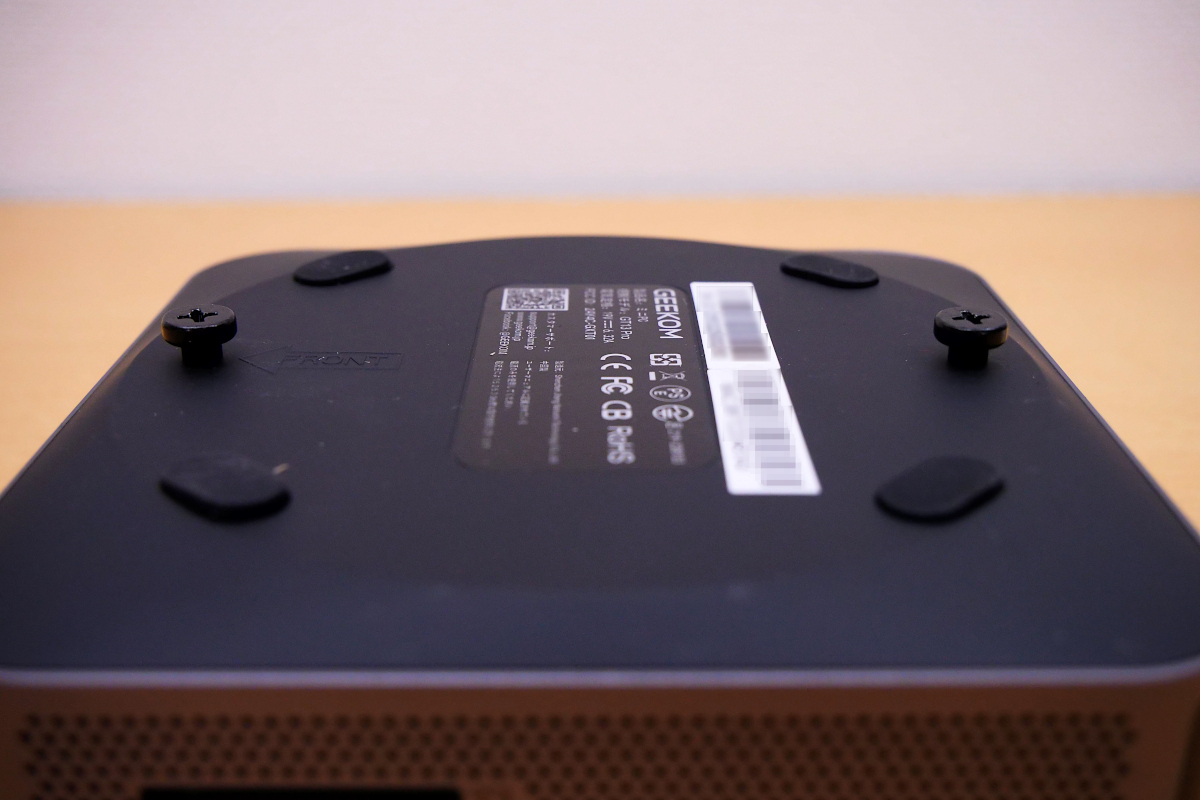
The back of the unit. There are four decorative rubber feet, and separately, two screw holes for fixing it to a VESA mount.
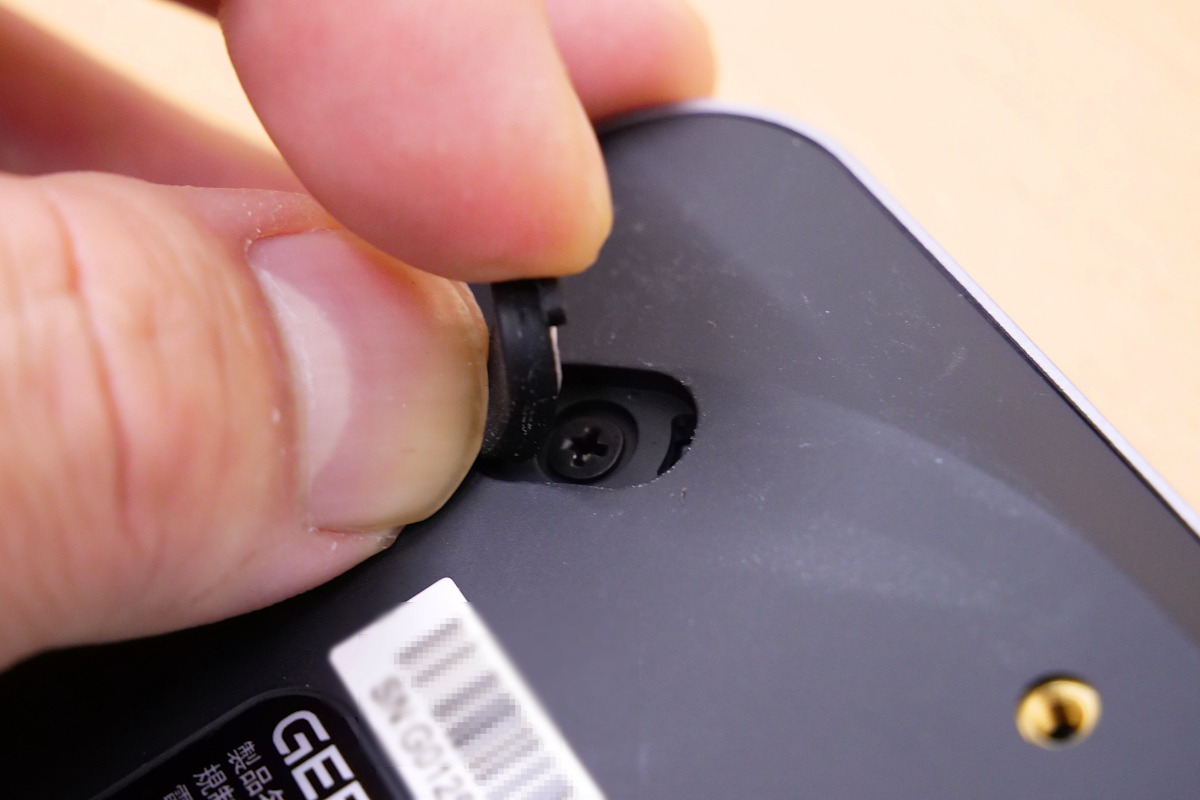
First, to add storage, remove the four screws on the bottom of the GT13 Pro. The screws are hidden by the rubber feet, so you need to remove the rubber feet first. The rubber feet are secured not only by adhesive tape but also by small protrusions on both sides that hook onto the bottom surface, so you need to take these protrusions into consideration when removing them. You can remove the rubber feet relatively easily by placing your fingers on the protrusions and scratching them.
This is what it looks like after completely removing the decorative rubber feet. You can clearly see the protrusions on both sides.
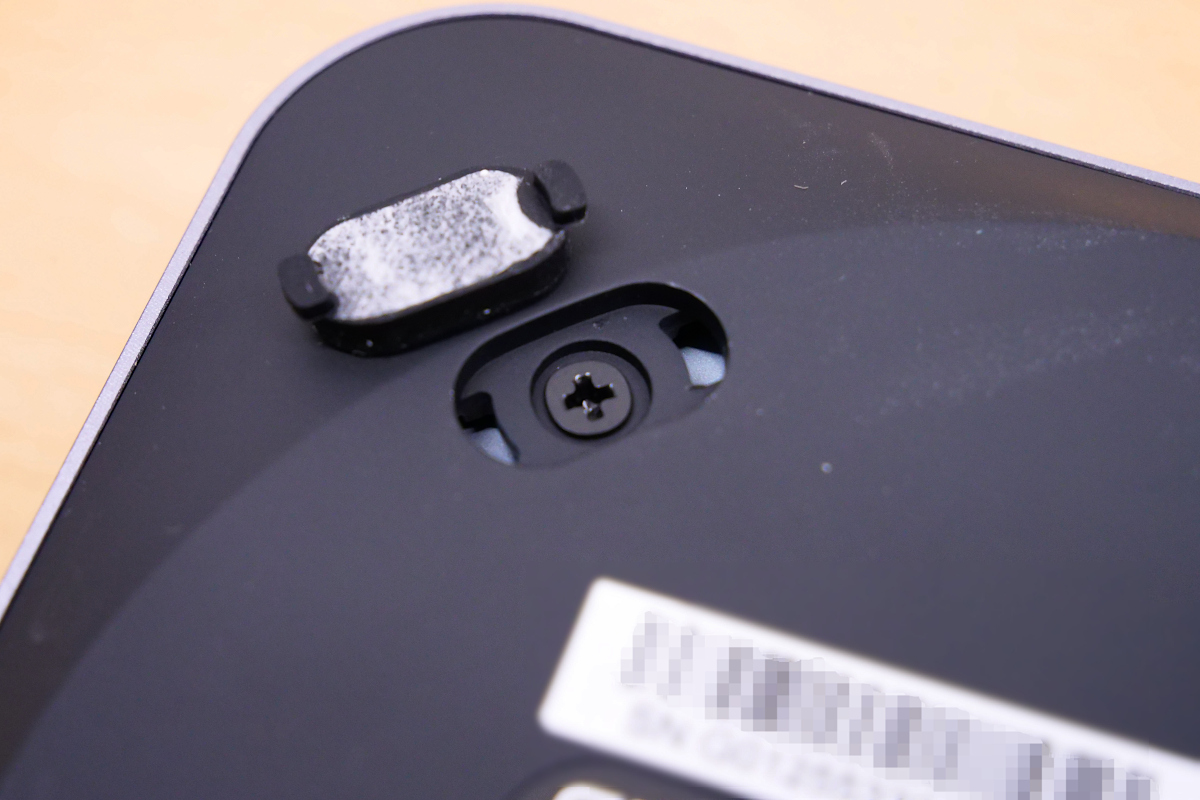
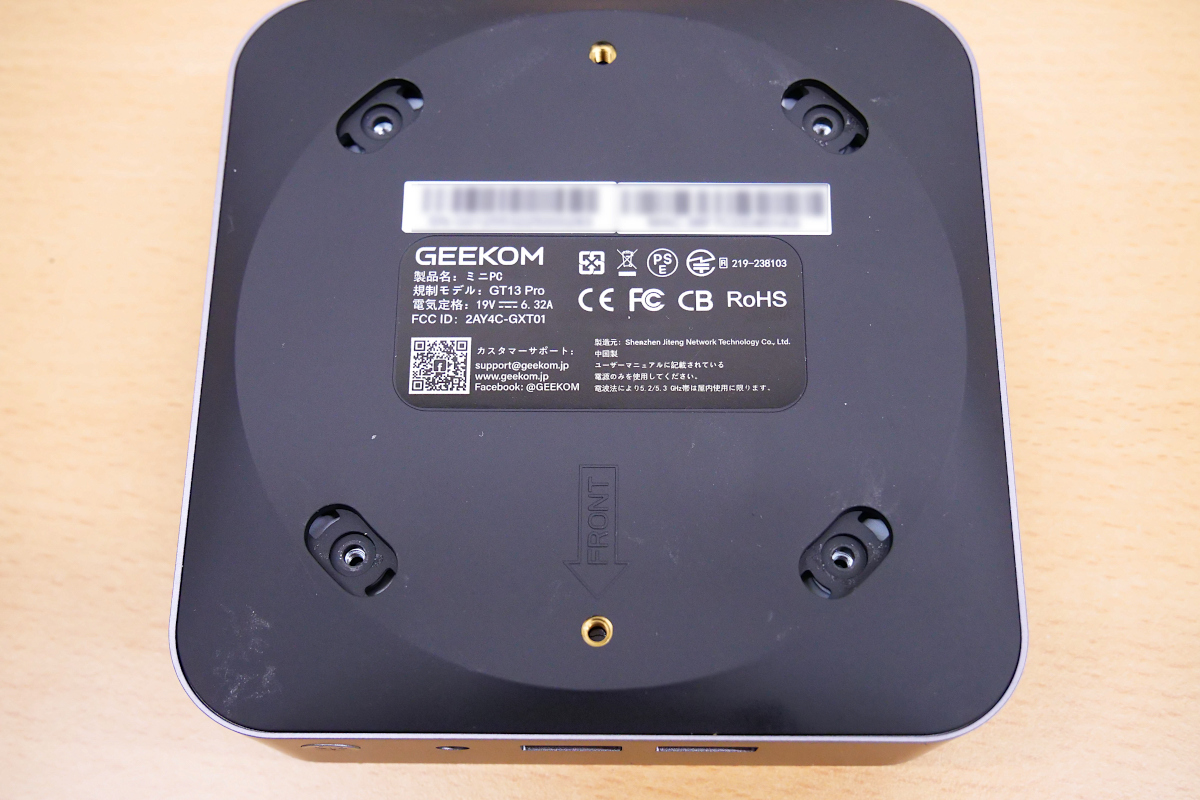
Similarly, after removing all four decorative rubber feet, four screws securing the base were revealed.
I removed the four screws.
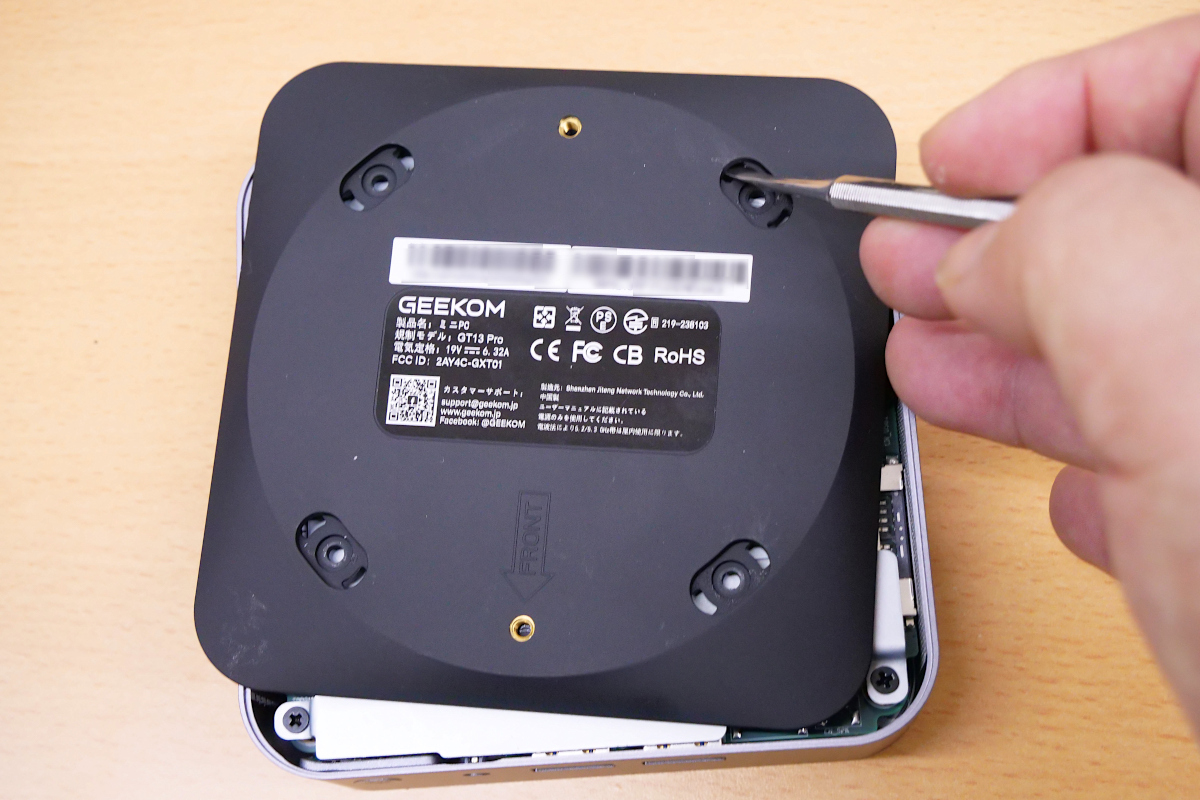
The bottom panel can be easily removed by using a precision screwdriver or similar tool to pry it open.
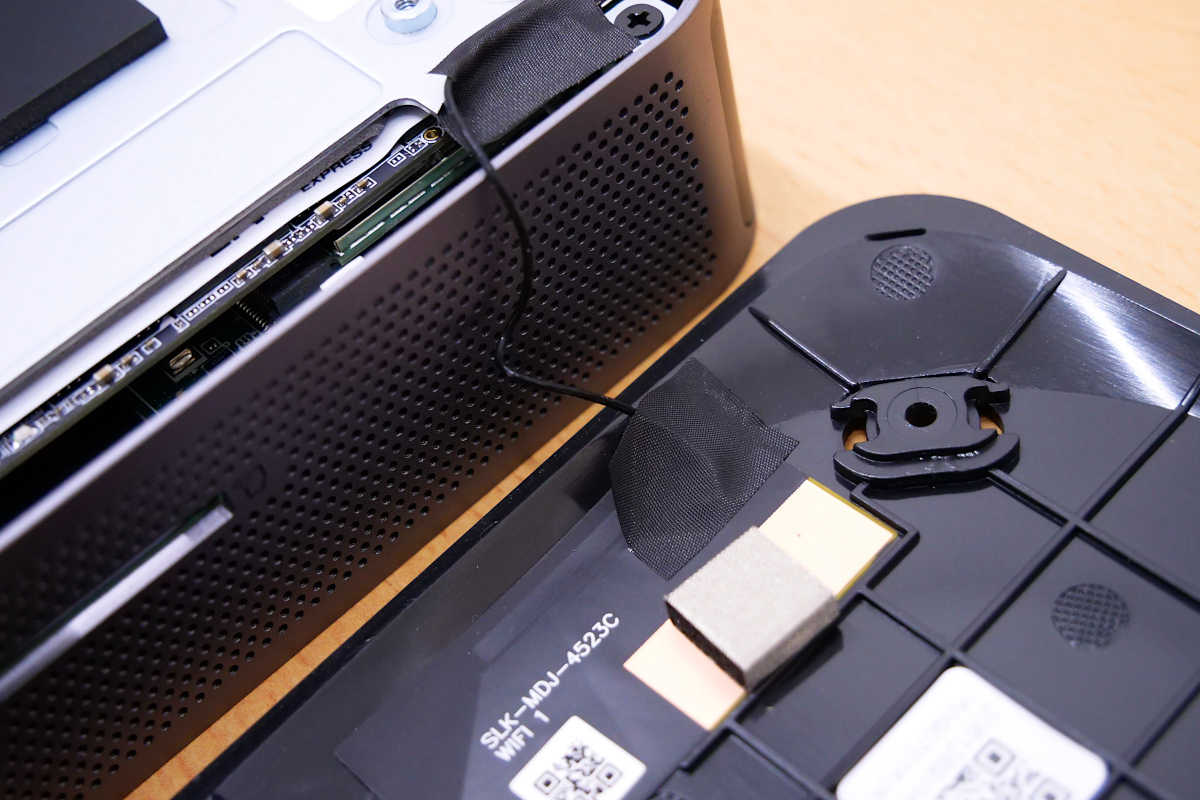
This is what it looks like with the bottom panel completely removed. The Wi-Fi antenna cable extends from the main unit to the bottom panel, so be careful not to pull it too hard.
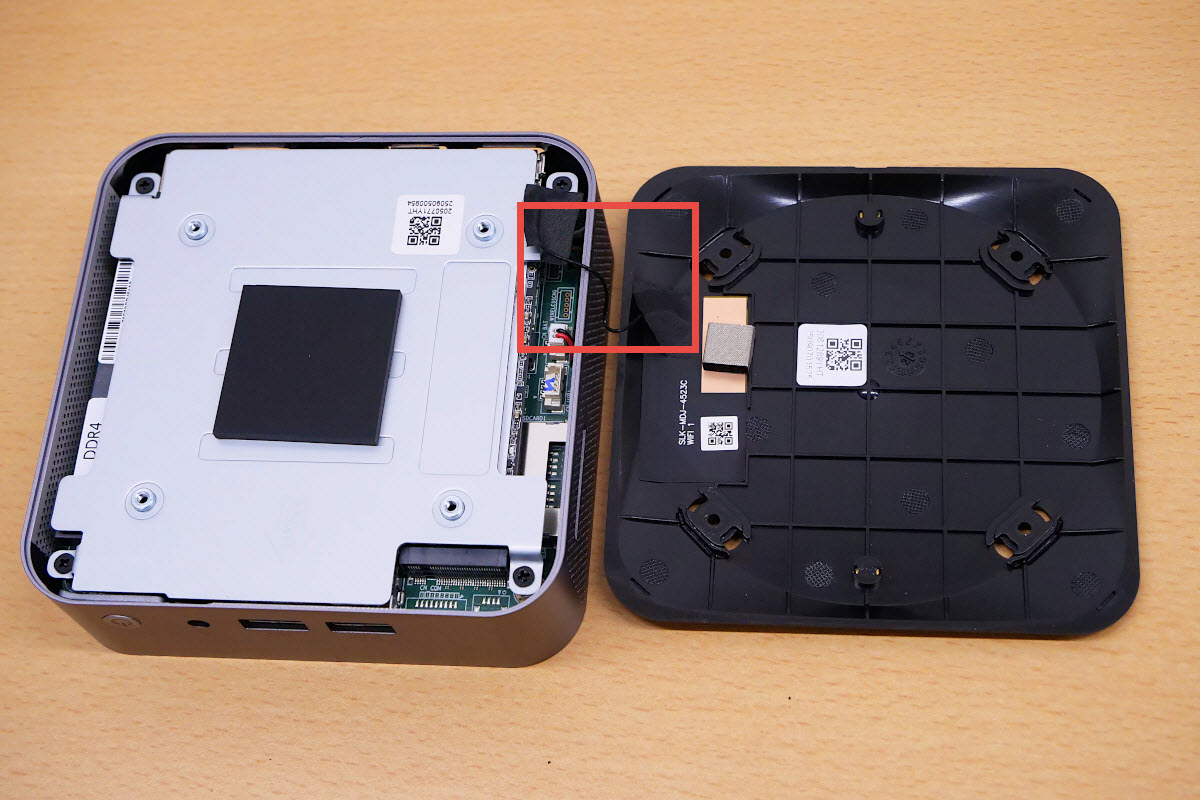
Magnifying the antenna wire.
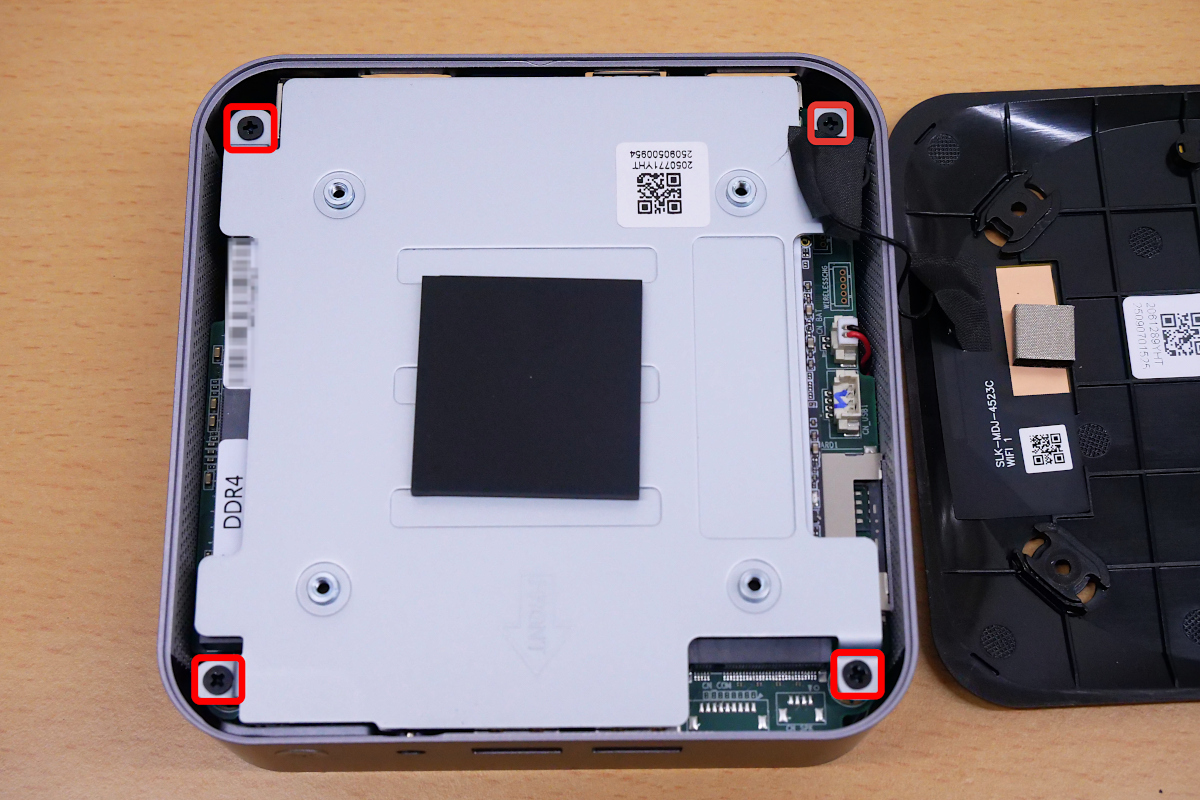
To access the M.2 slot, you will need to remove an additional metal plate inside. This plate is secured in place by four screws.
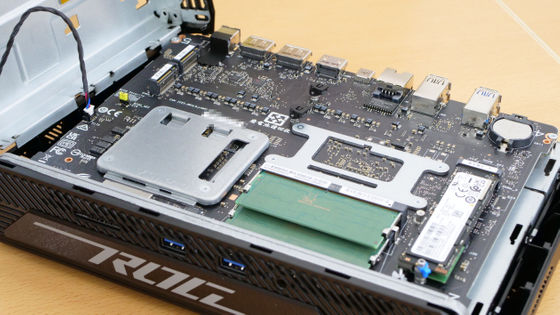
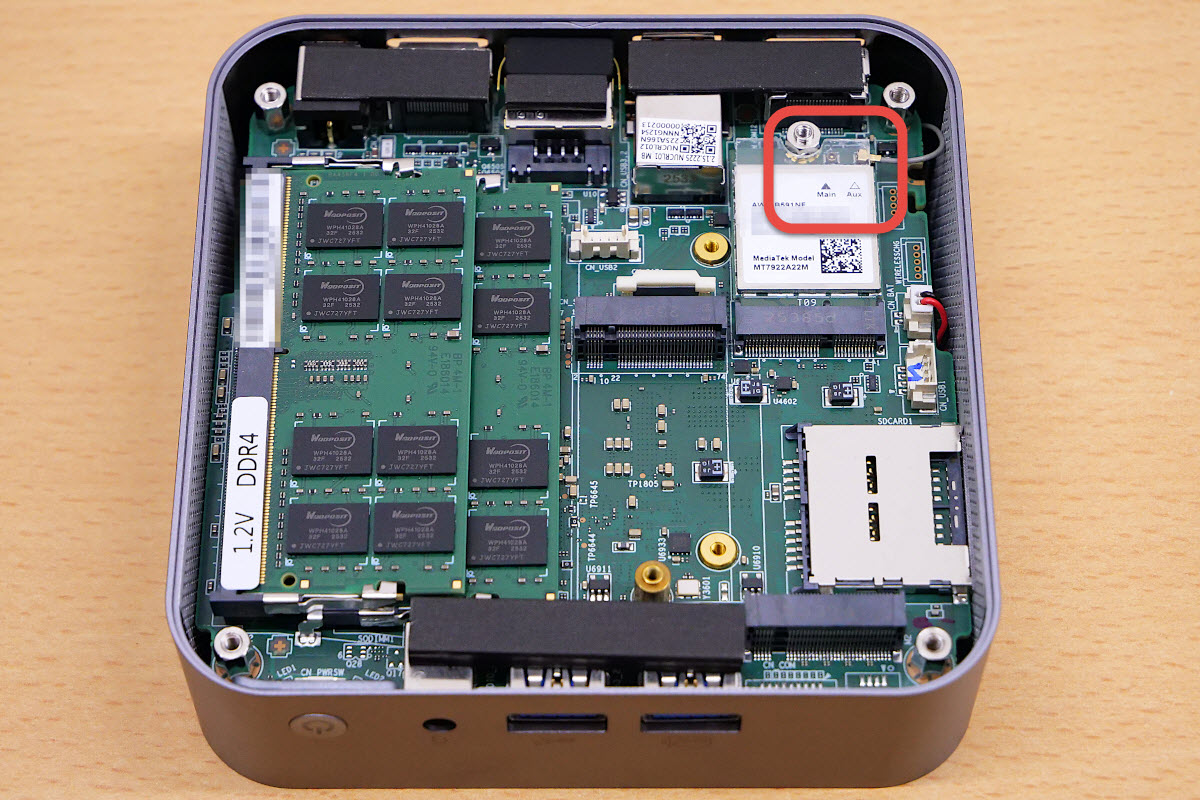
Removing the metal plate reveals the circuit board. Care must be taken not to pull the Wi-Fi antenna cable during this process... however, it came off without any resistance whatsoever, even though I didn't pull it, which meant I later needed to connect it to the connector.
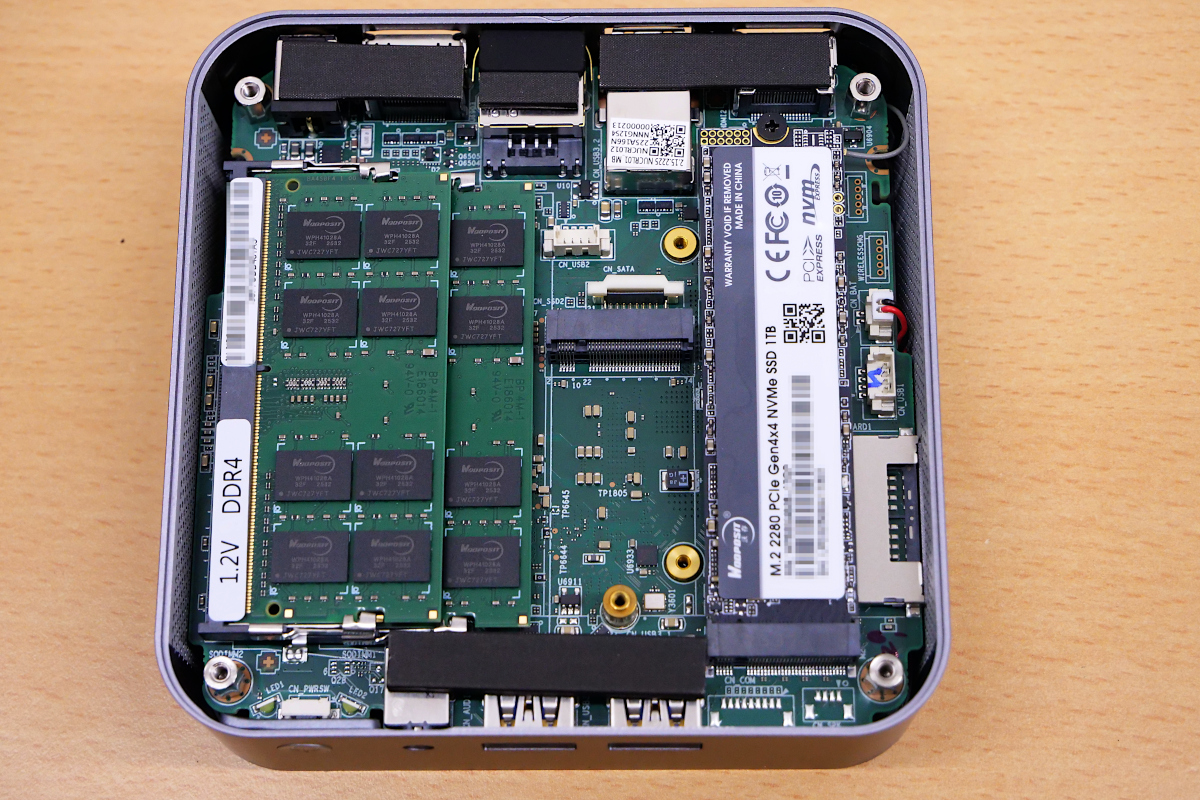
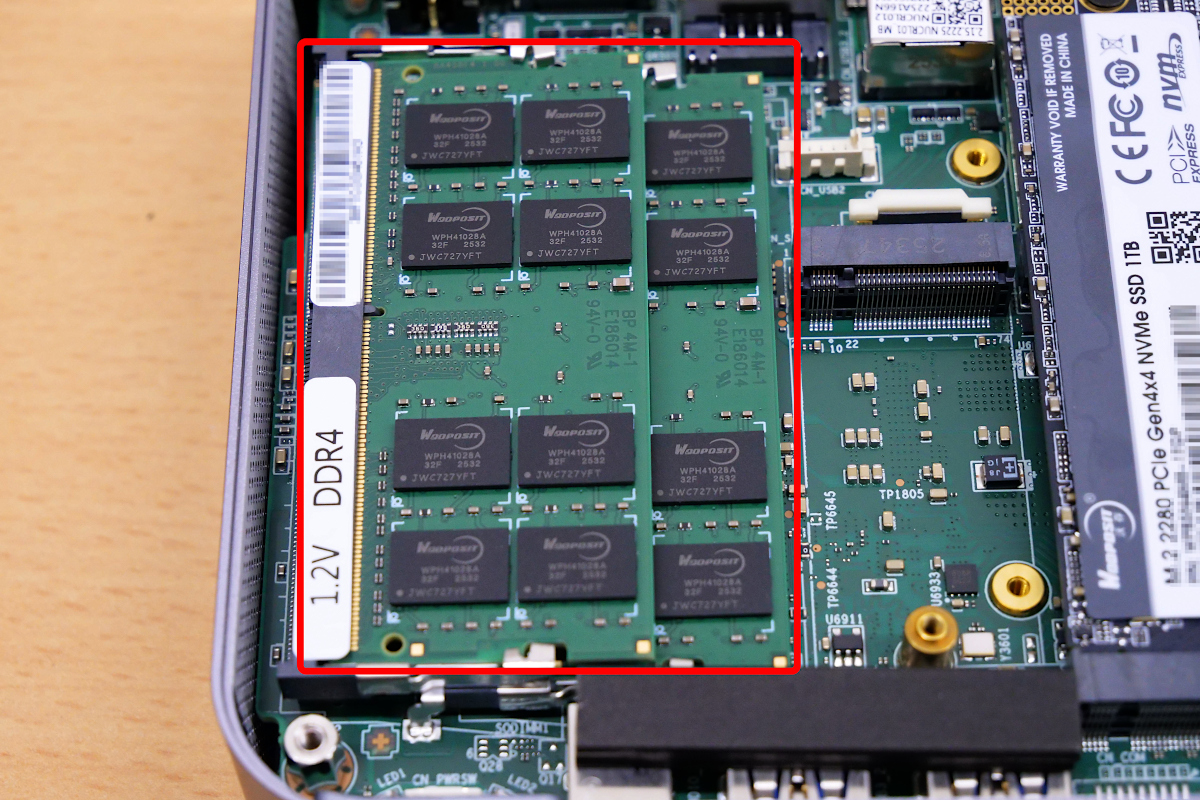
The system comes with two 16GB dual-channel DDR4 260-pin SODIMM modules. This can be upgraded to 64GB by replacing them with two 32GB modules.
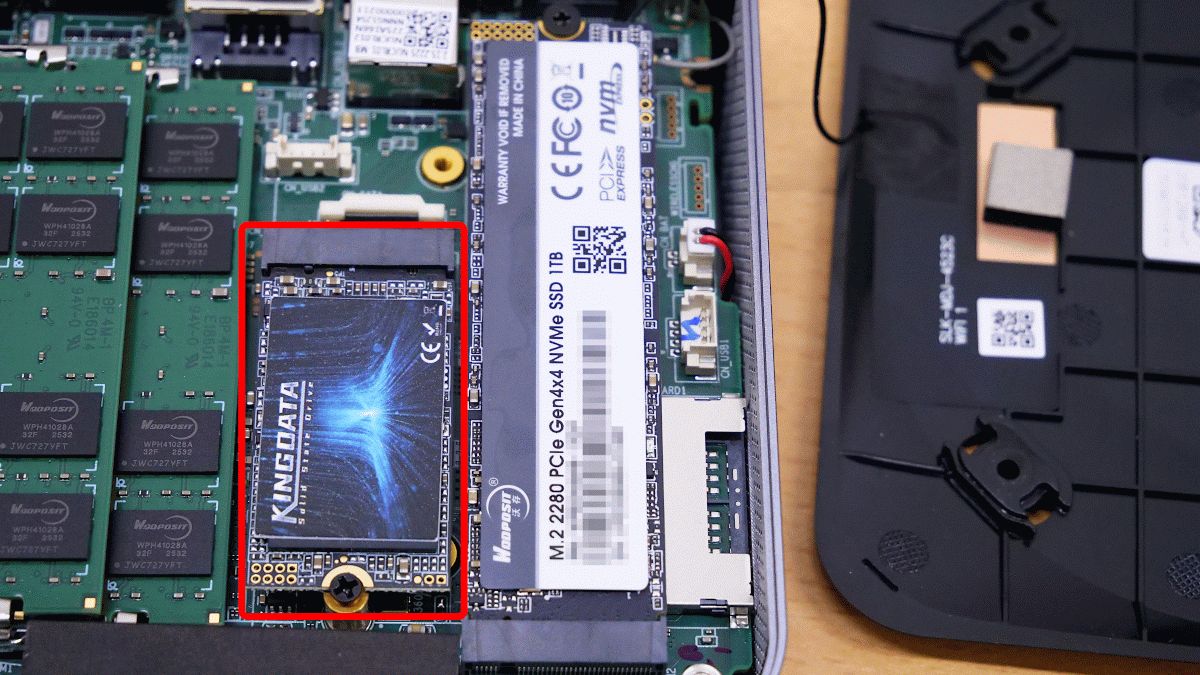
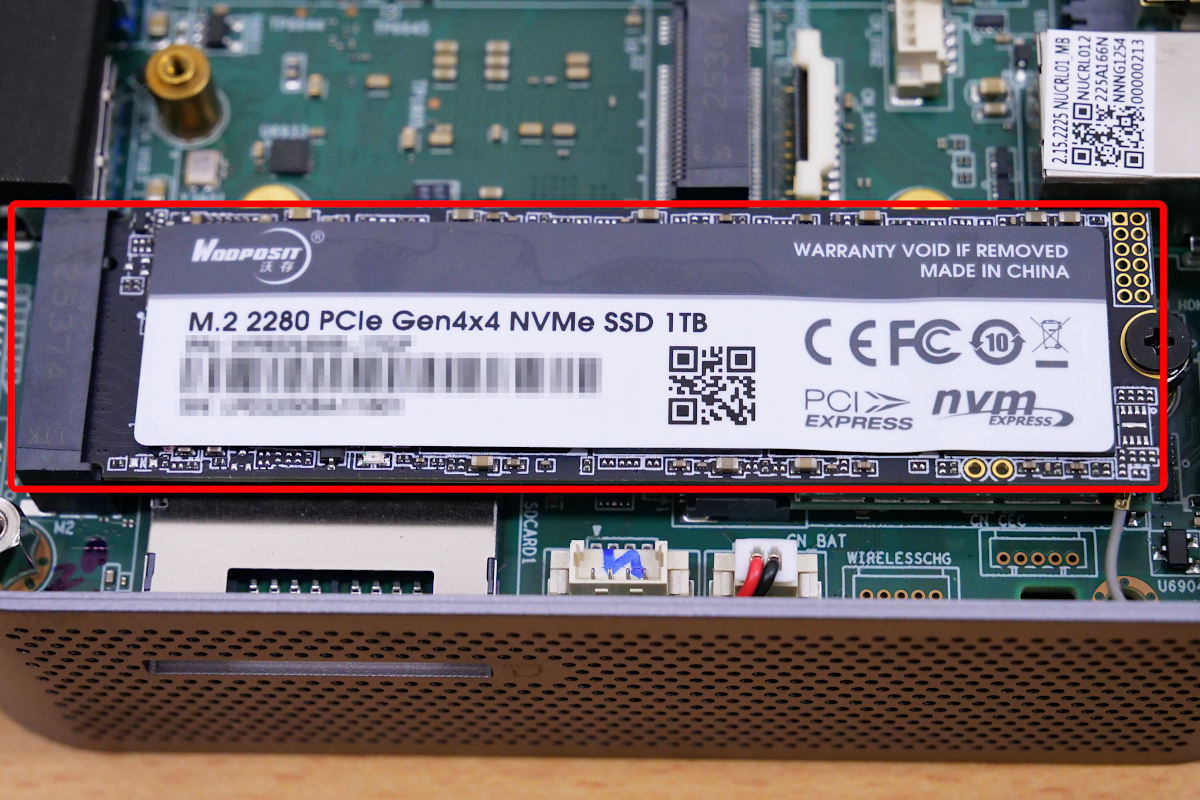
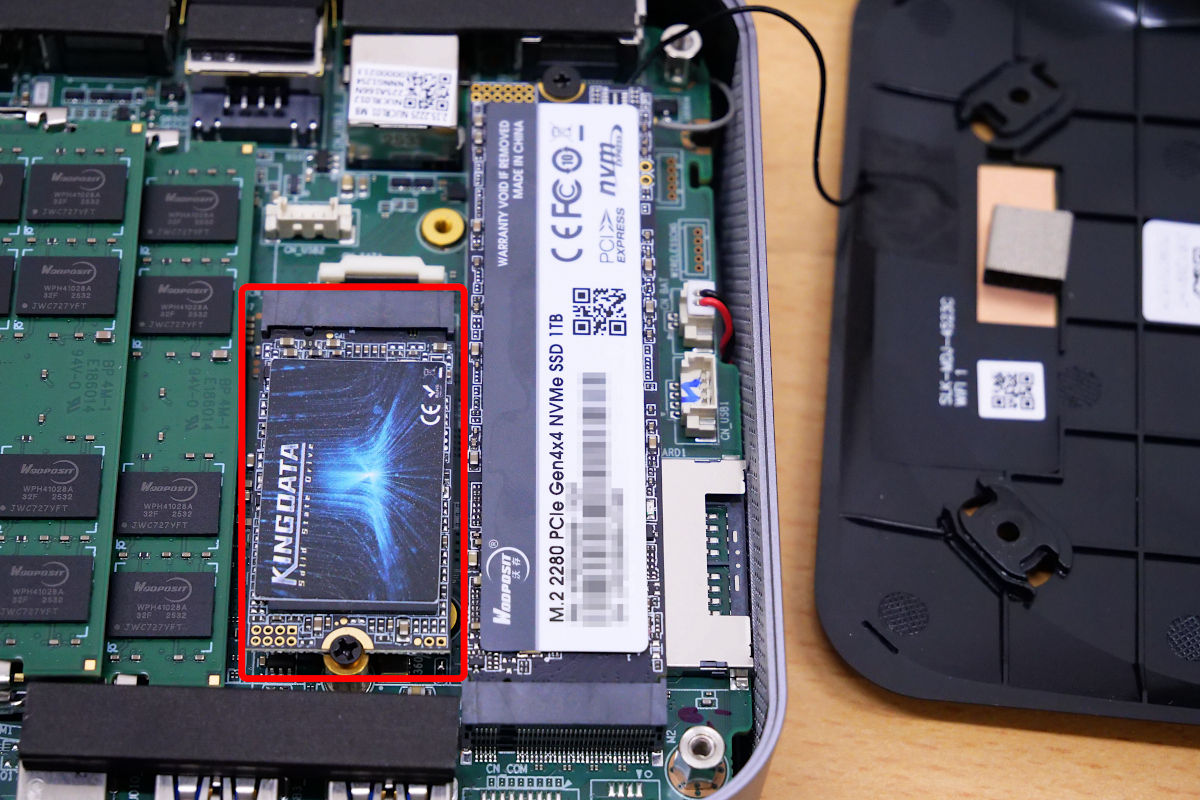
The M.2 2280 PCIe Gen4x4 NVMe SSD slot currently has a 1TB SSD installed. This SSD can be upgraded to a 2TB SSD.
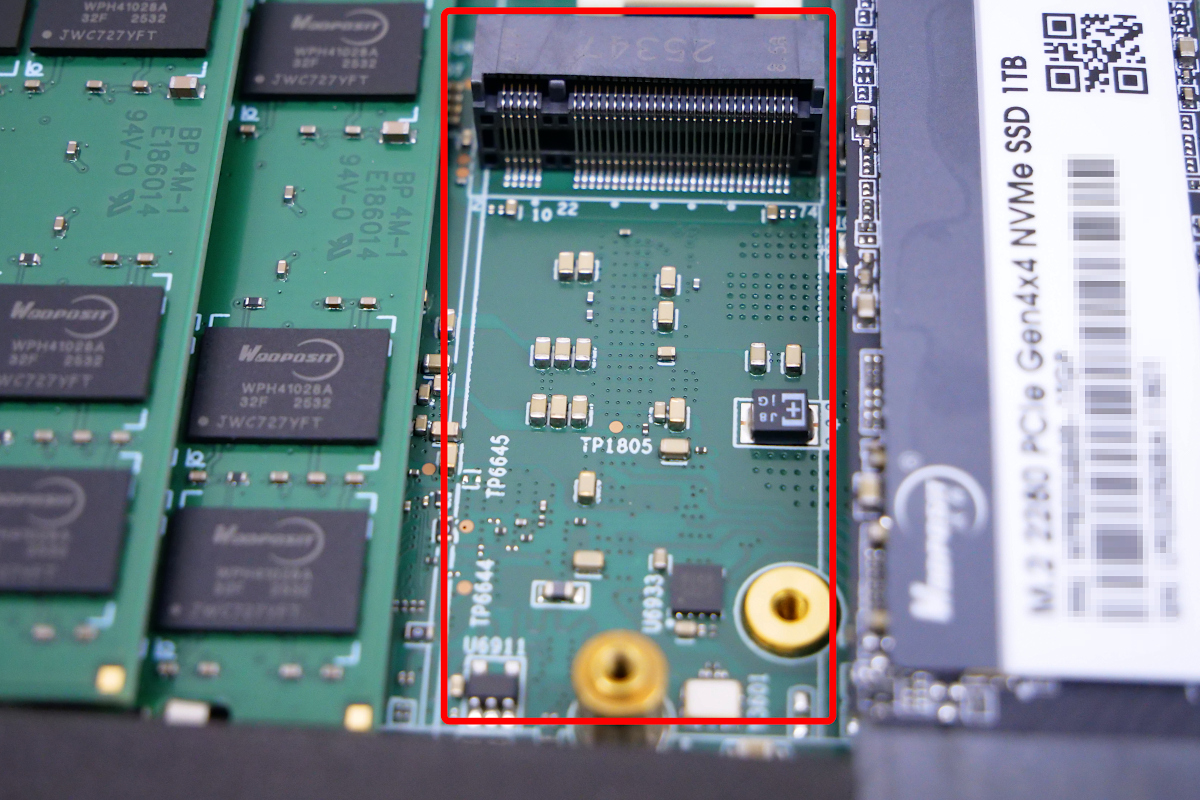
In the empty space in the center of the circuit board, there is a slot for an M.2 2242 SATA SSD. We will install a 1TB SATA SSD here to expand the storage.
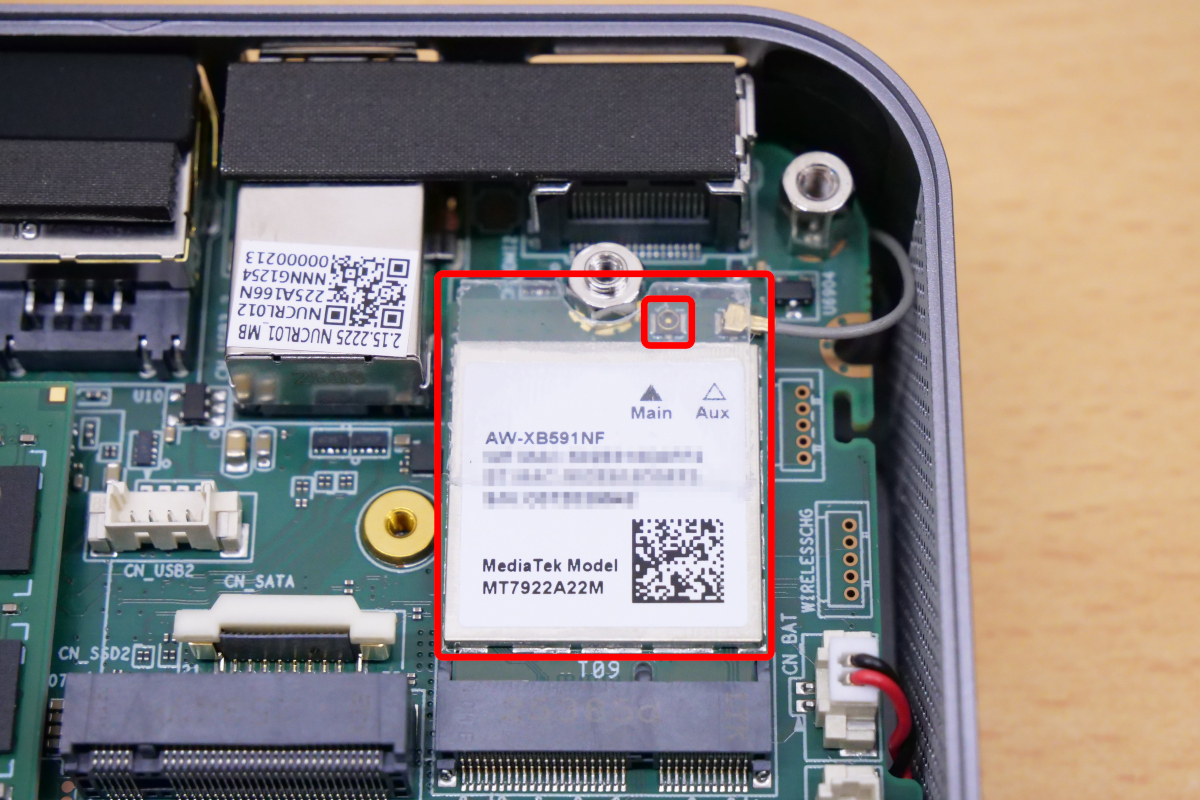
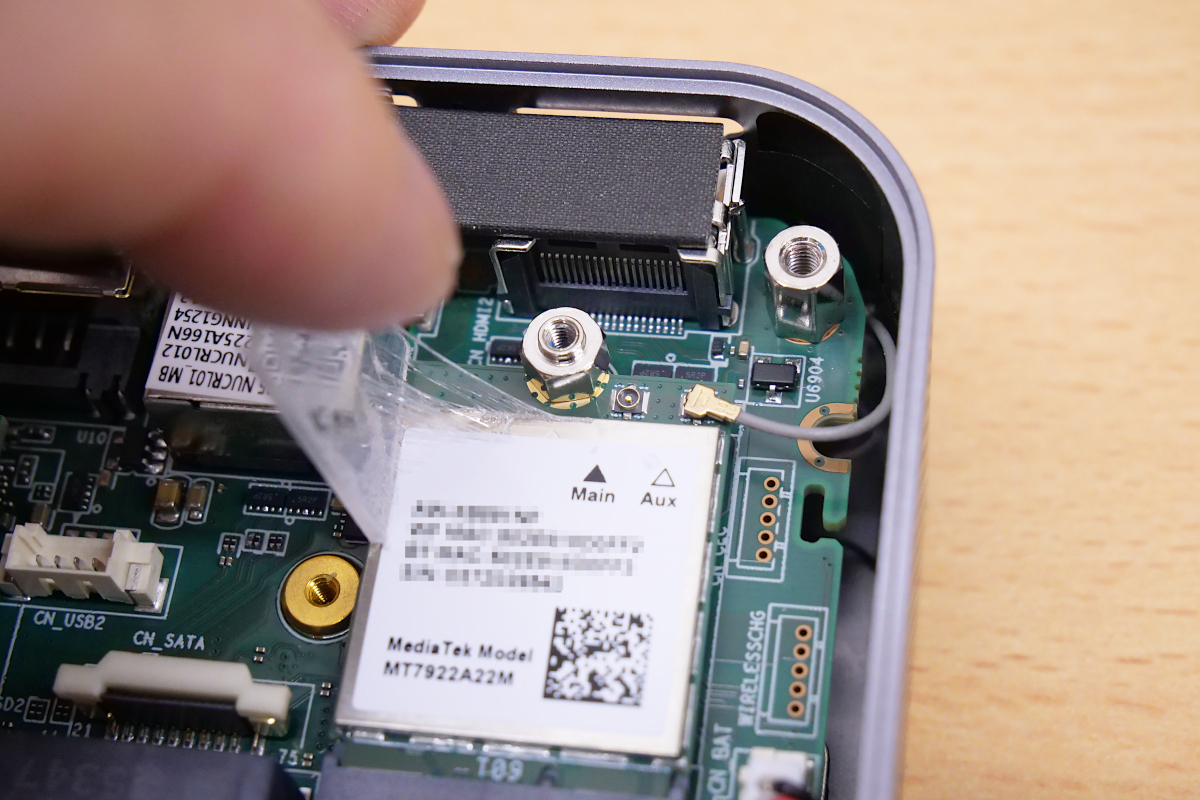
Before that, reconnect the Wi-Fi antenna cable to the connector. The connector is located on the back of the M.2 2280 PCIe Gen4x4 NVMe SSD, so you will need to remove the SSD first.
A transparent plastic plate for insulation is attached to the back of the SSD. Looking at the area marked 'Main,' I quickly found the antenna cable connector.
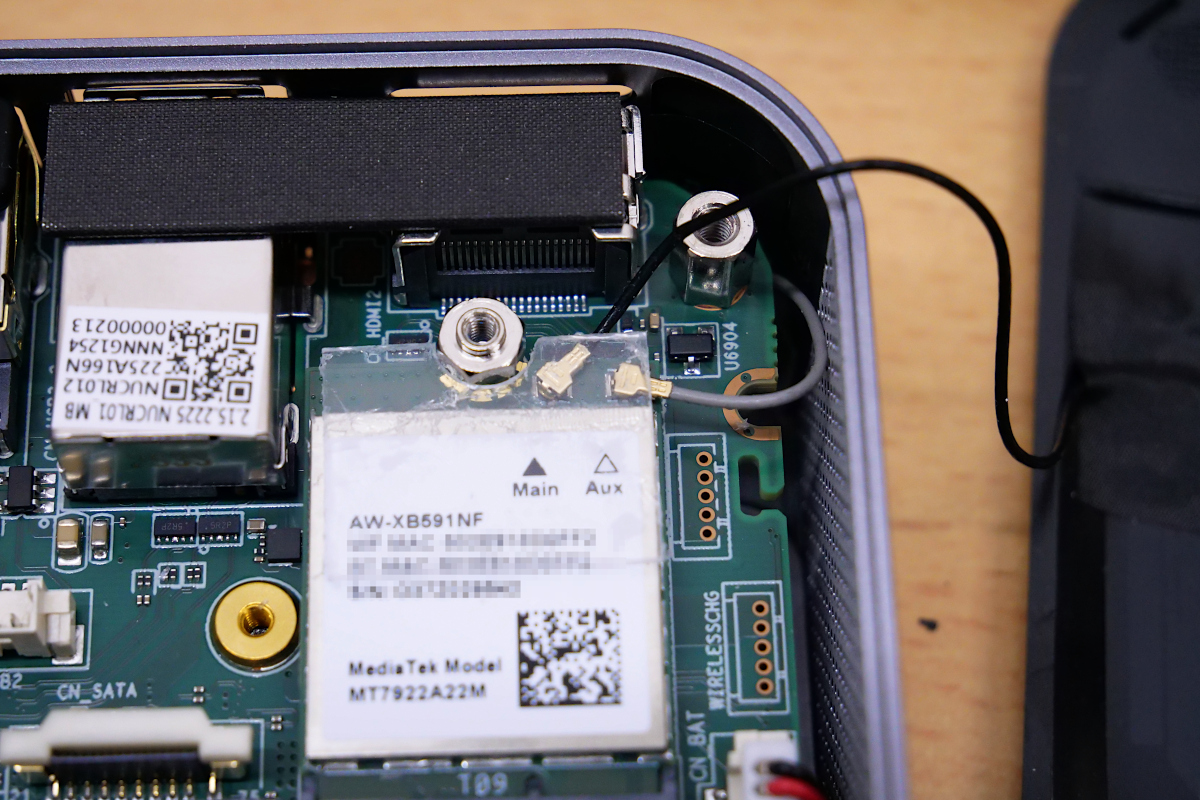
I removed the plastic plate and connected the antenna wire to the connector.
After reconnecting the antenna cable, reattach the plastic plate and reinstall the SSD that was removed.
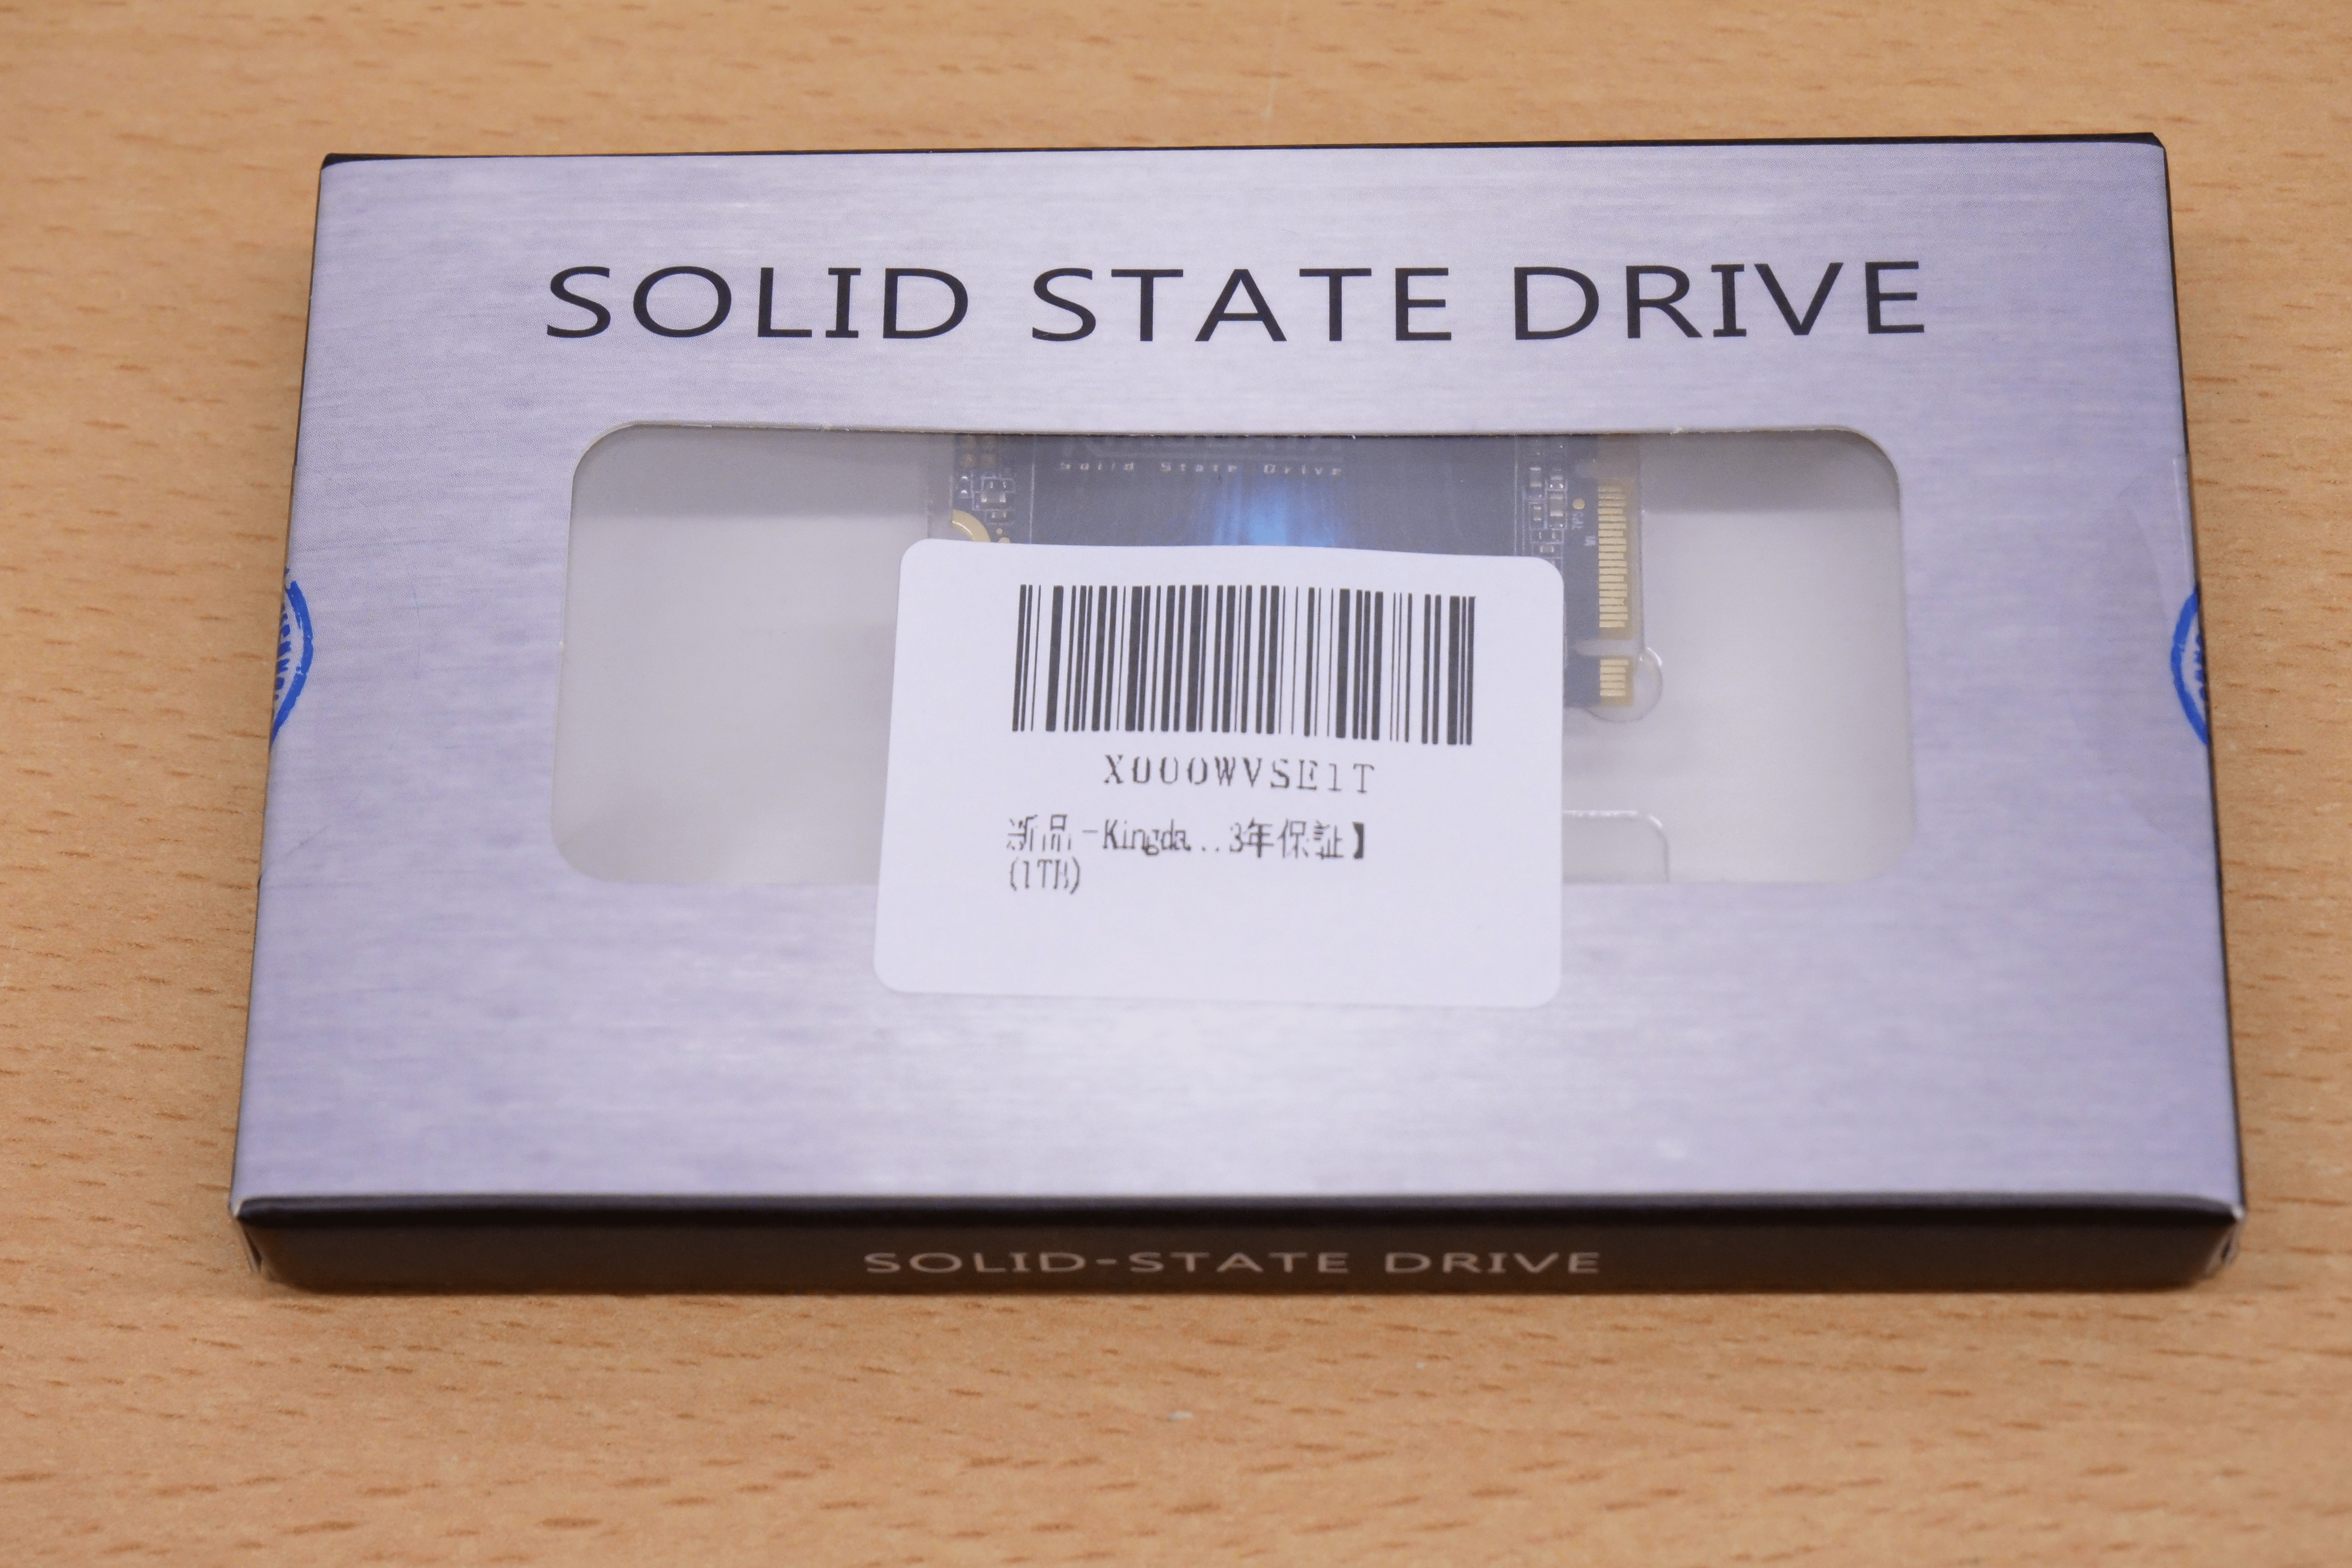
I prepared an M.2 2242 SATA SSD for this project. I looked for one from a reliable manufacturer, but couldn't find one, so I chose a reasonably priced one.
Install the SATA SSD into the M.2 2242 SATA SSD slot. Align the SSD with the screw holes, insert it diagonally, and then push the SSD down and secure it with the screws.
After installation, simply reattach the metal plate and bottom panel to complete the job. Be careful not to disconnect the antenna wire when attaching the bottom panel.
◆ VESA mount installation
Remove the VESA mount bracket and screws from the included accessories.
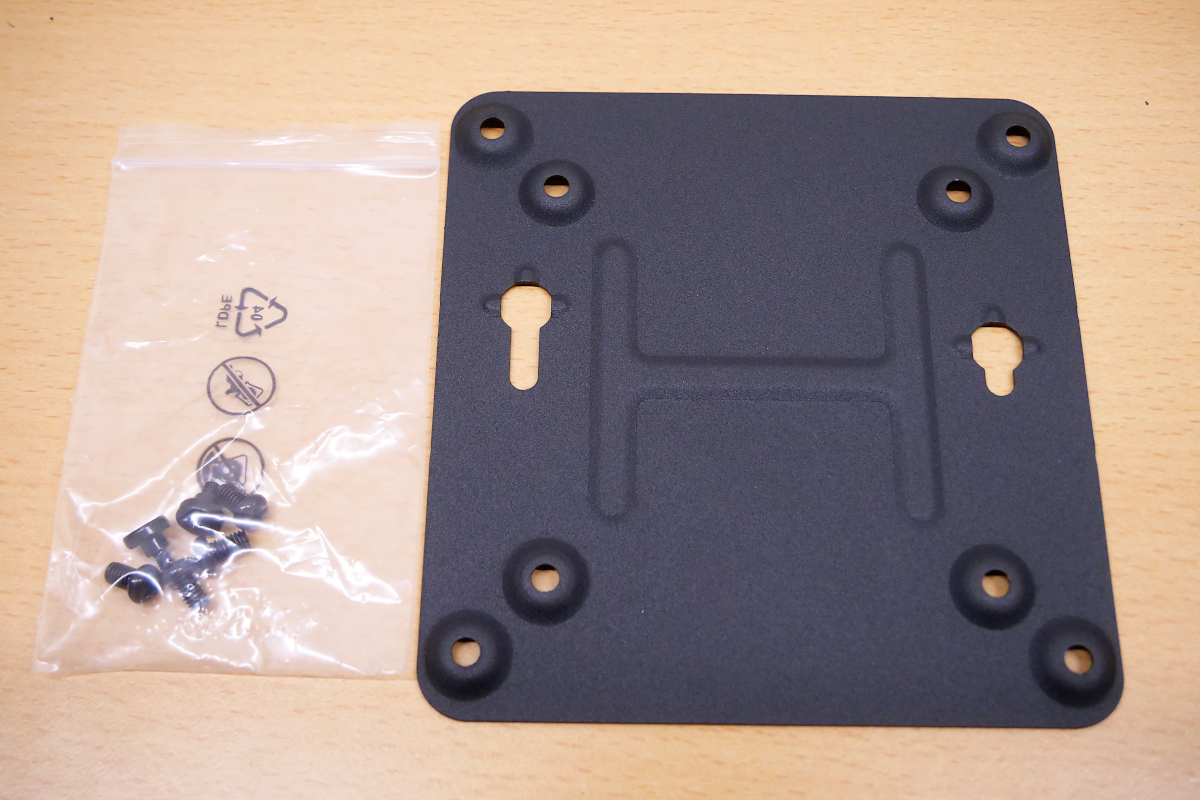
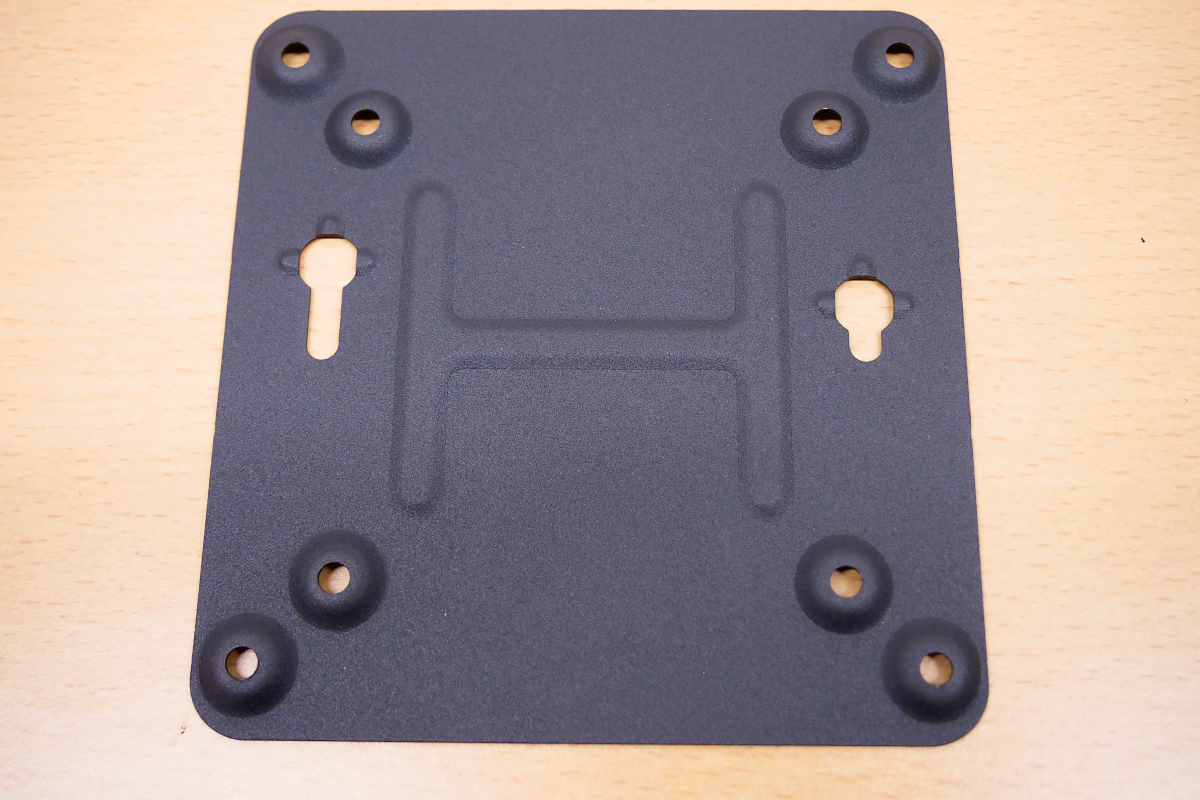
A bracket for VESA mounting. It has eight screw holes for attaching to a monitor and two holes for securing a PC.
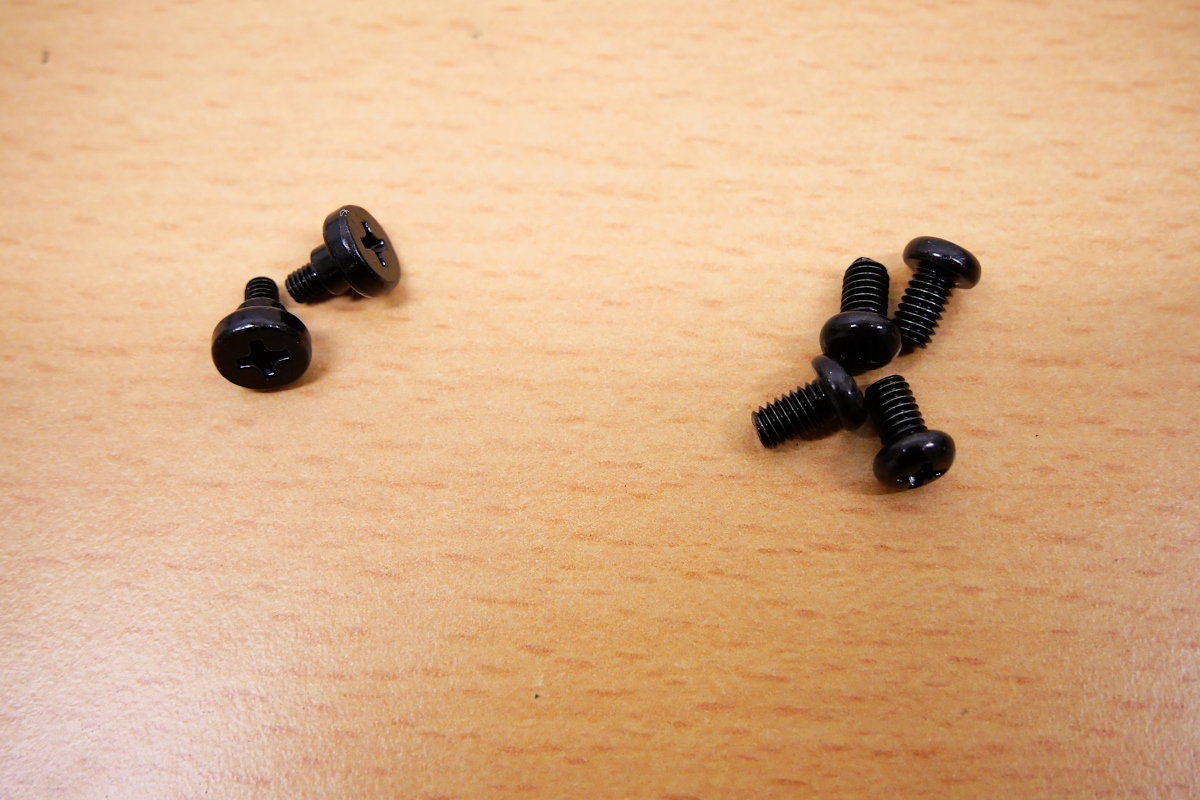
A total of six screws are included. Four of them are for attaching the bracket to the monitor, and the remaining two, which have a different shape, are for securing the PC itself. Judging from the shape of the bracket and the screws, it seems that the bracket and PC are not permanently fixed together, but rather secured by hooking them on.
Attach the pair of screws to the two screw holes on the back cover of the main unit.
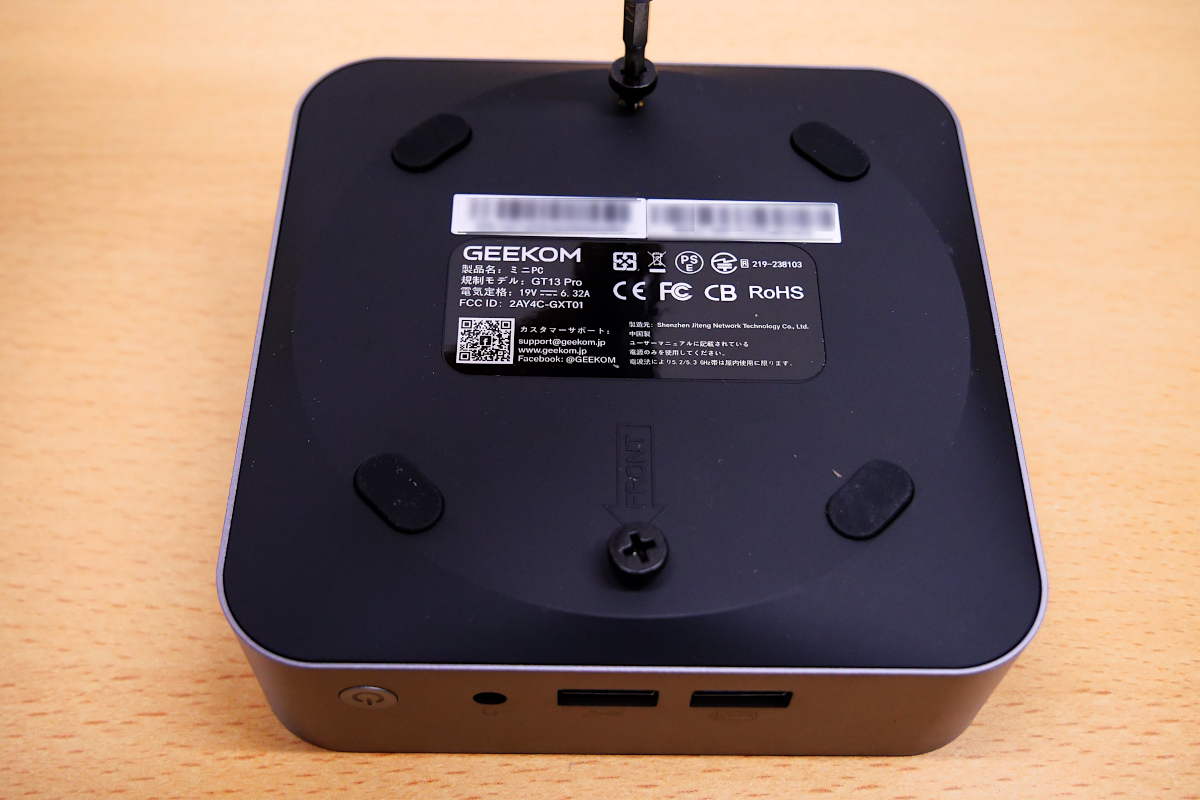
Looking at it from the side, you can see that the screw head is slightly raised, leaving enough clearance to hook onto the bracket.
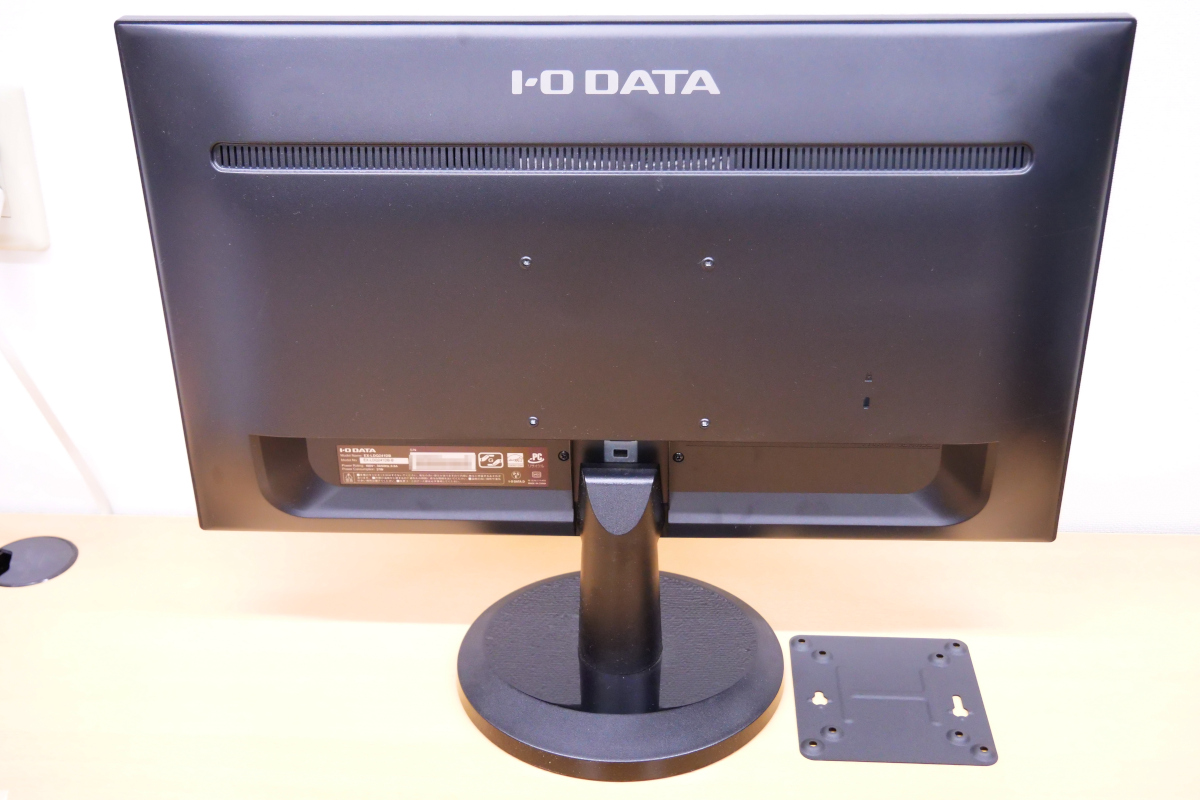
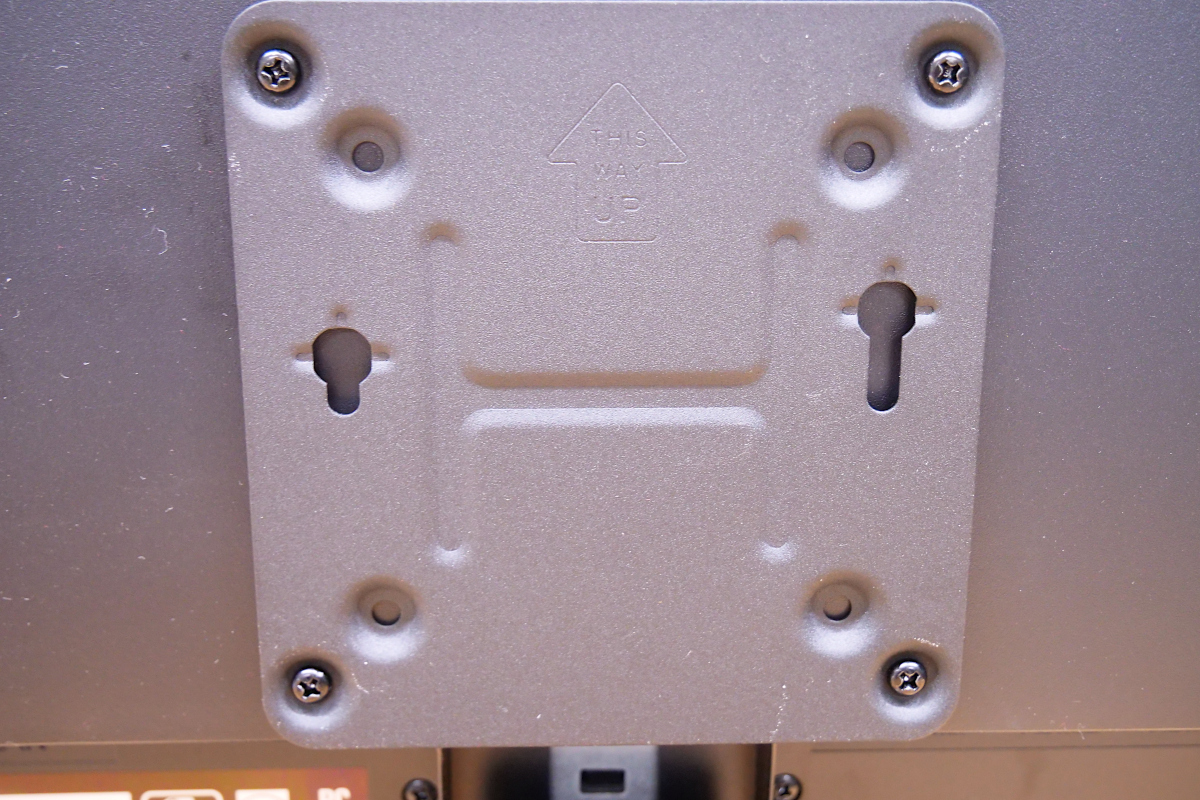
Monitors that support VESA mounting have screw holes on the back for securing the bracket. Attach the bracket using a set of four screws.
The bracket is attached to the monitor. The heads of the two screws attached to the PC body are hooked into the two holes on the left and right that are not secured with screws.
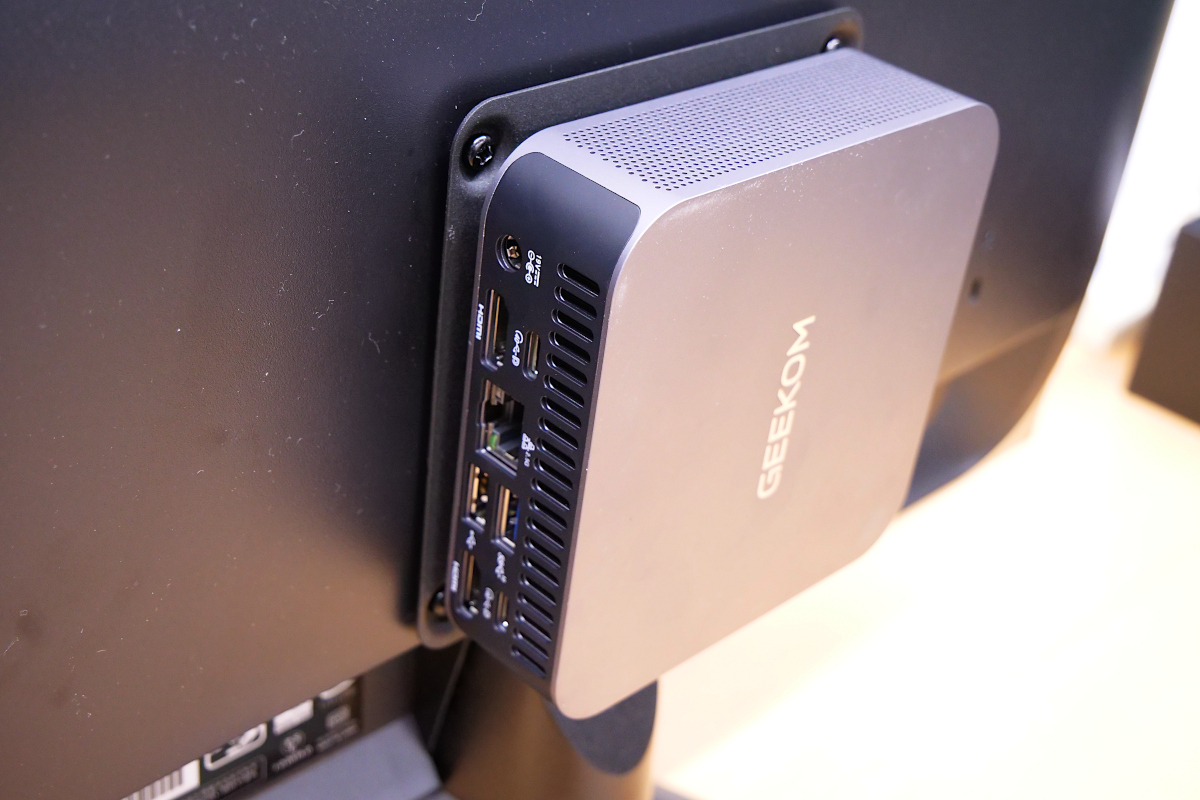
When installed, it looks like this. The sideways orientation of the logo is a bit of a concern, but since the front and back of the PC are on the left and right, it's a good placement in terms of cable management and ease of use. However, the SD card slot is positioned facing downwards, which prevents dust from getting in quite well, but makes inserting and removing the SD card a little difficult.
◆Startup and Setup
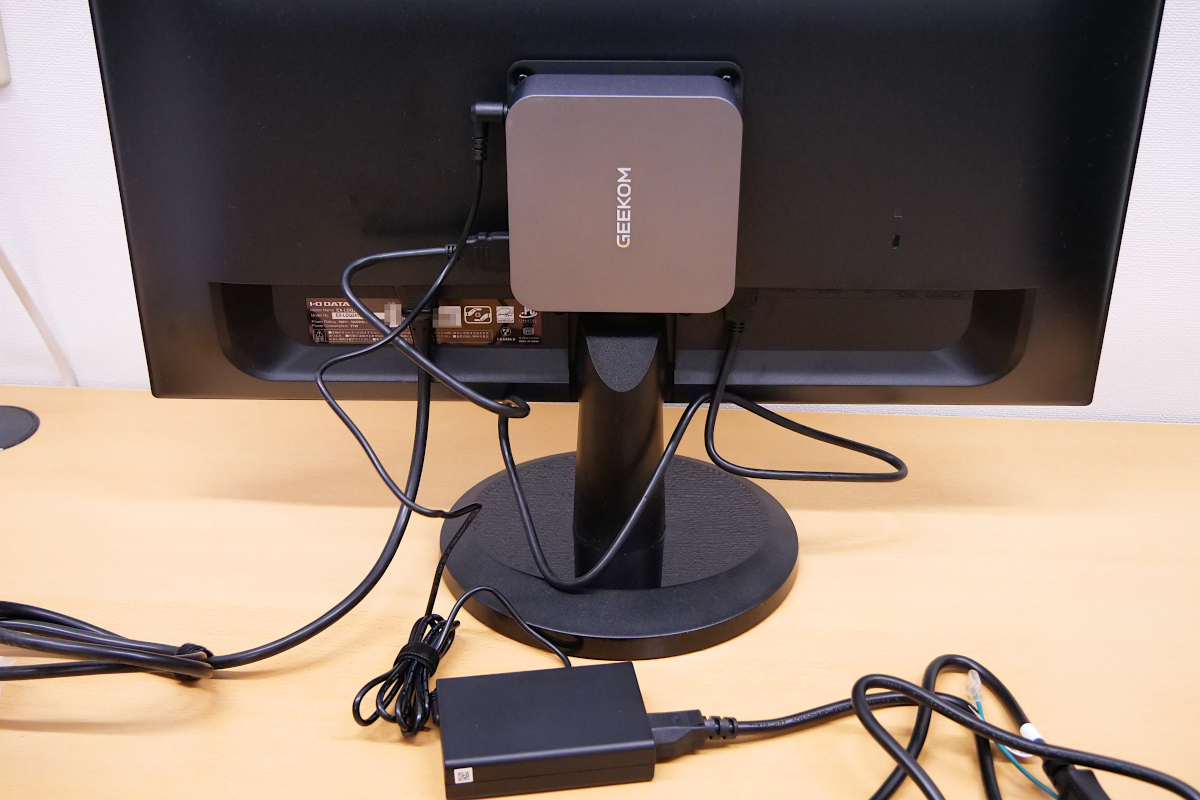
To start the PC, connect the included AC adapter and HDMI cable.
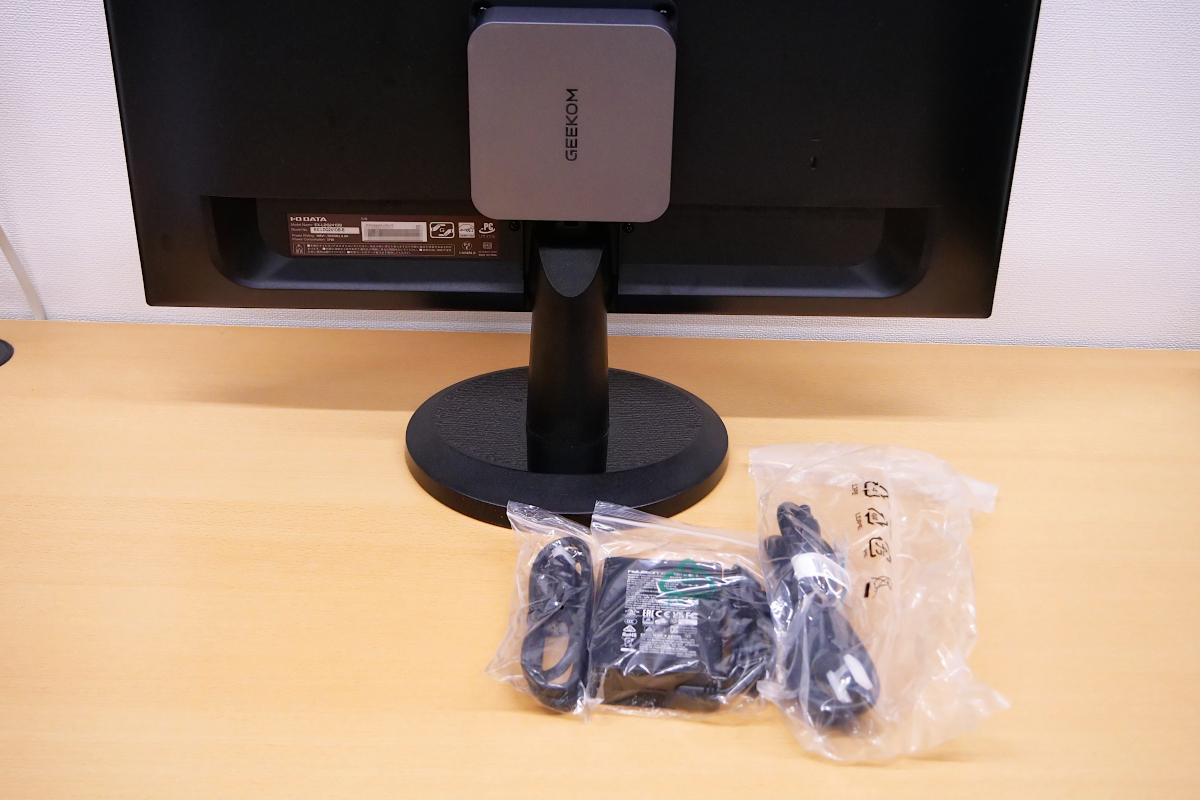
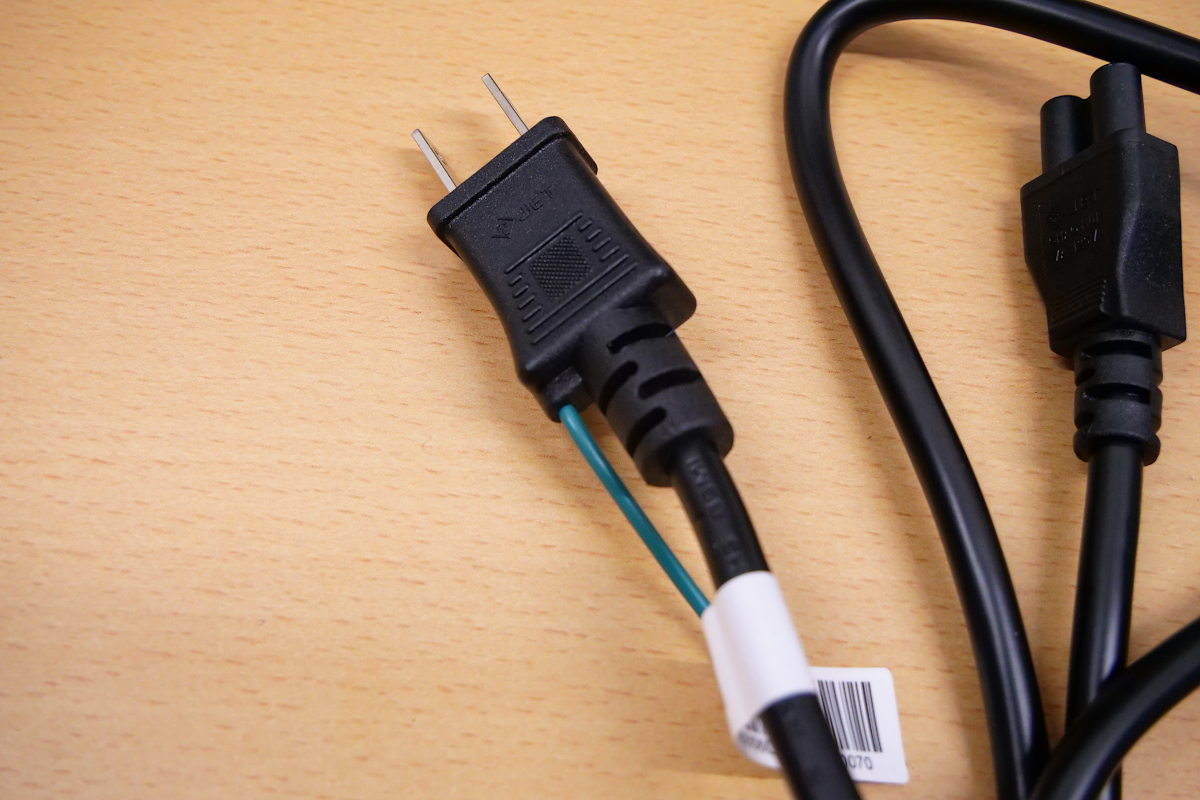
The power plug was a 2-prong type with a ground wire.
This is what it looks like with all the accessories attached.
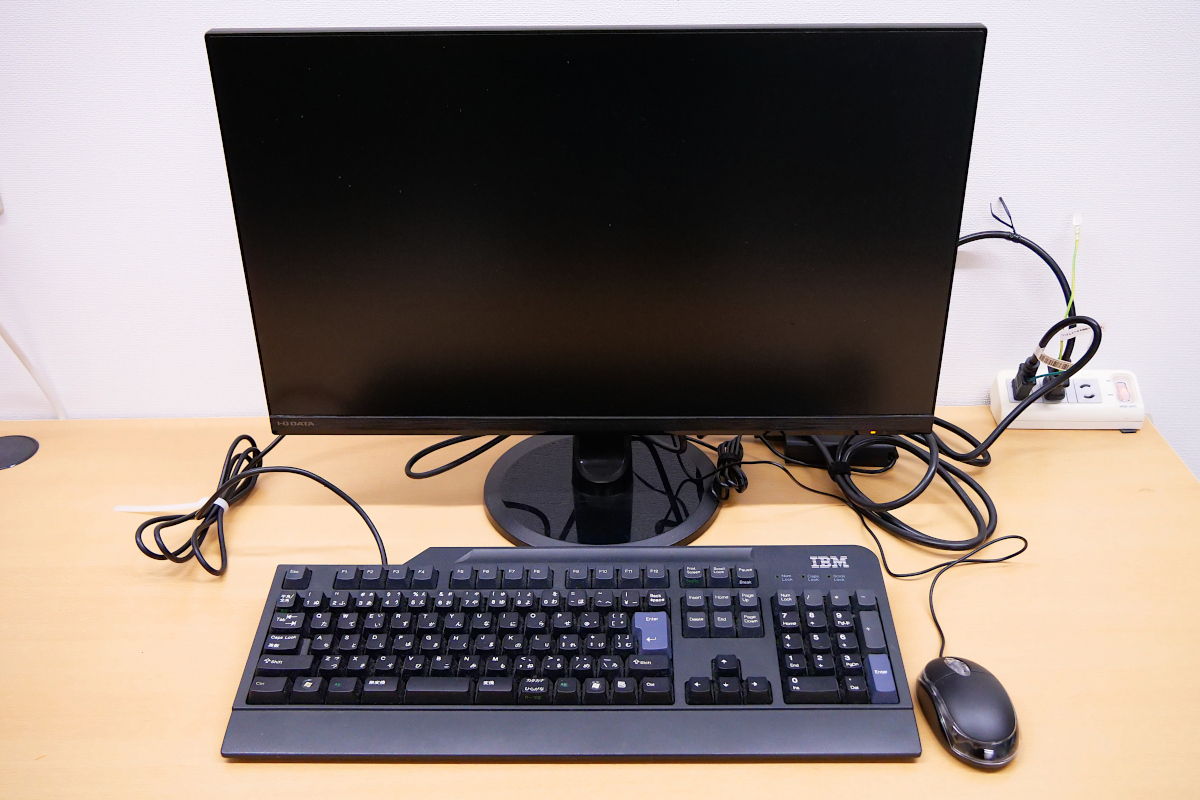
I plugged in a random keyboard and mouse that I found lying around, and it was ready to boot up.
Time to power it on. The power button is in an easy-to-press position.
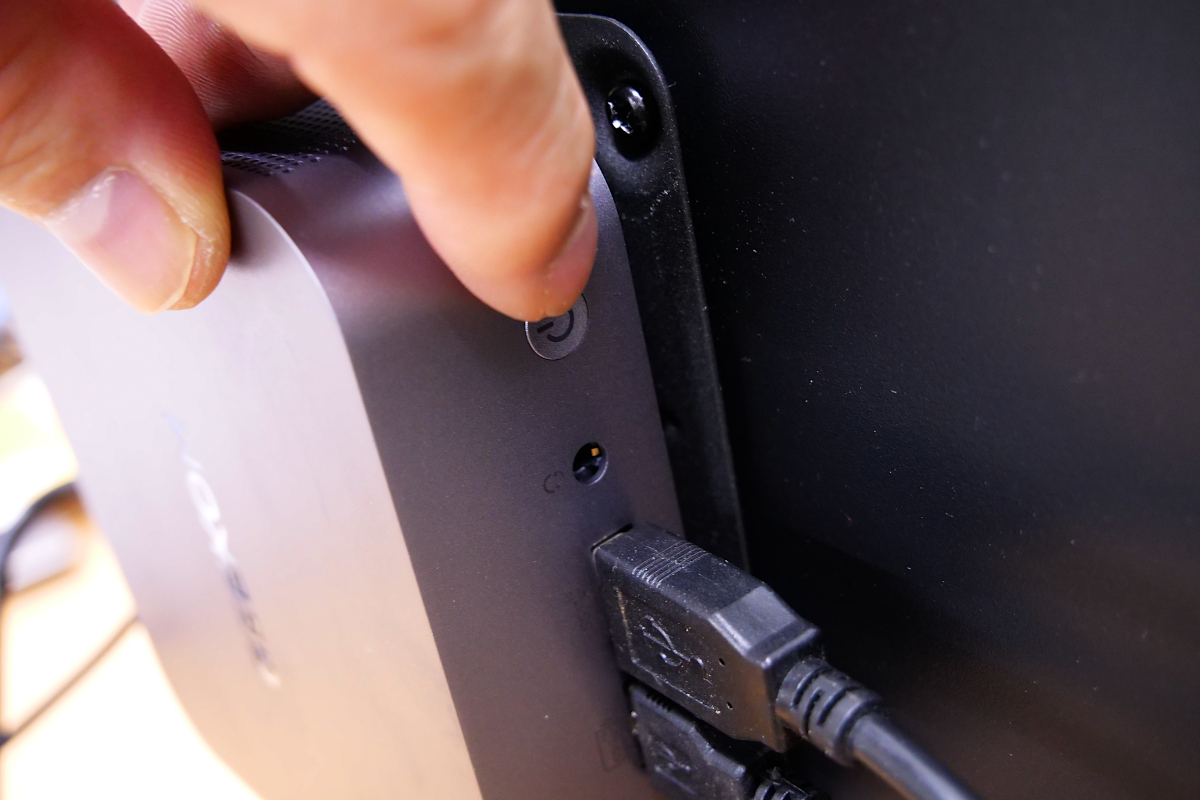
The GEEKOM logo appeared on the monitor and the system started up successfully.

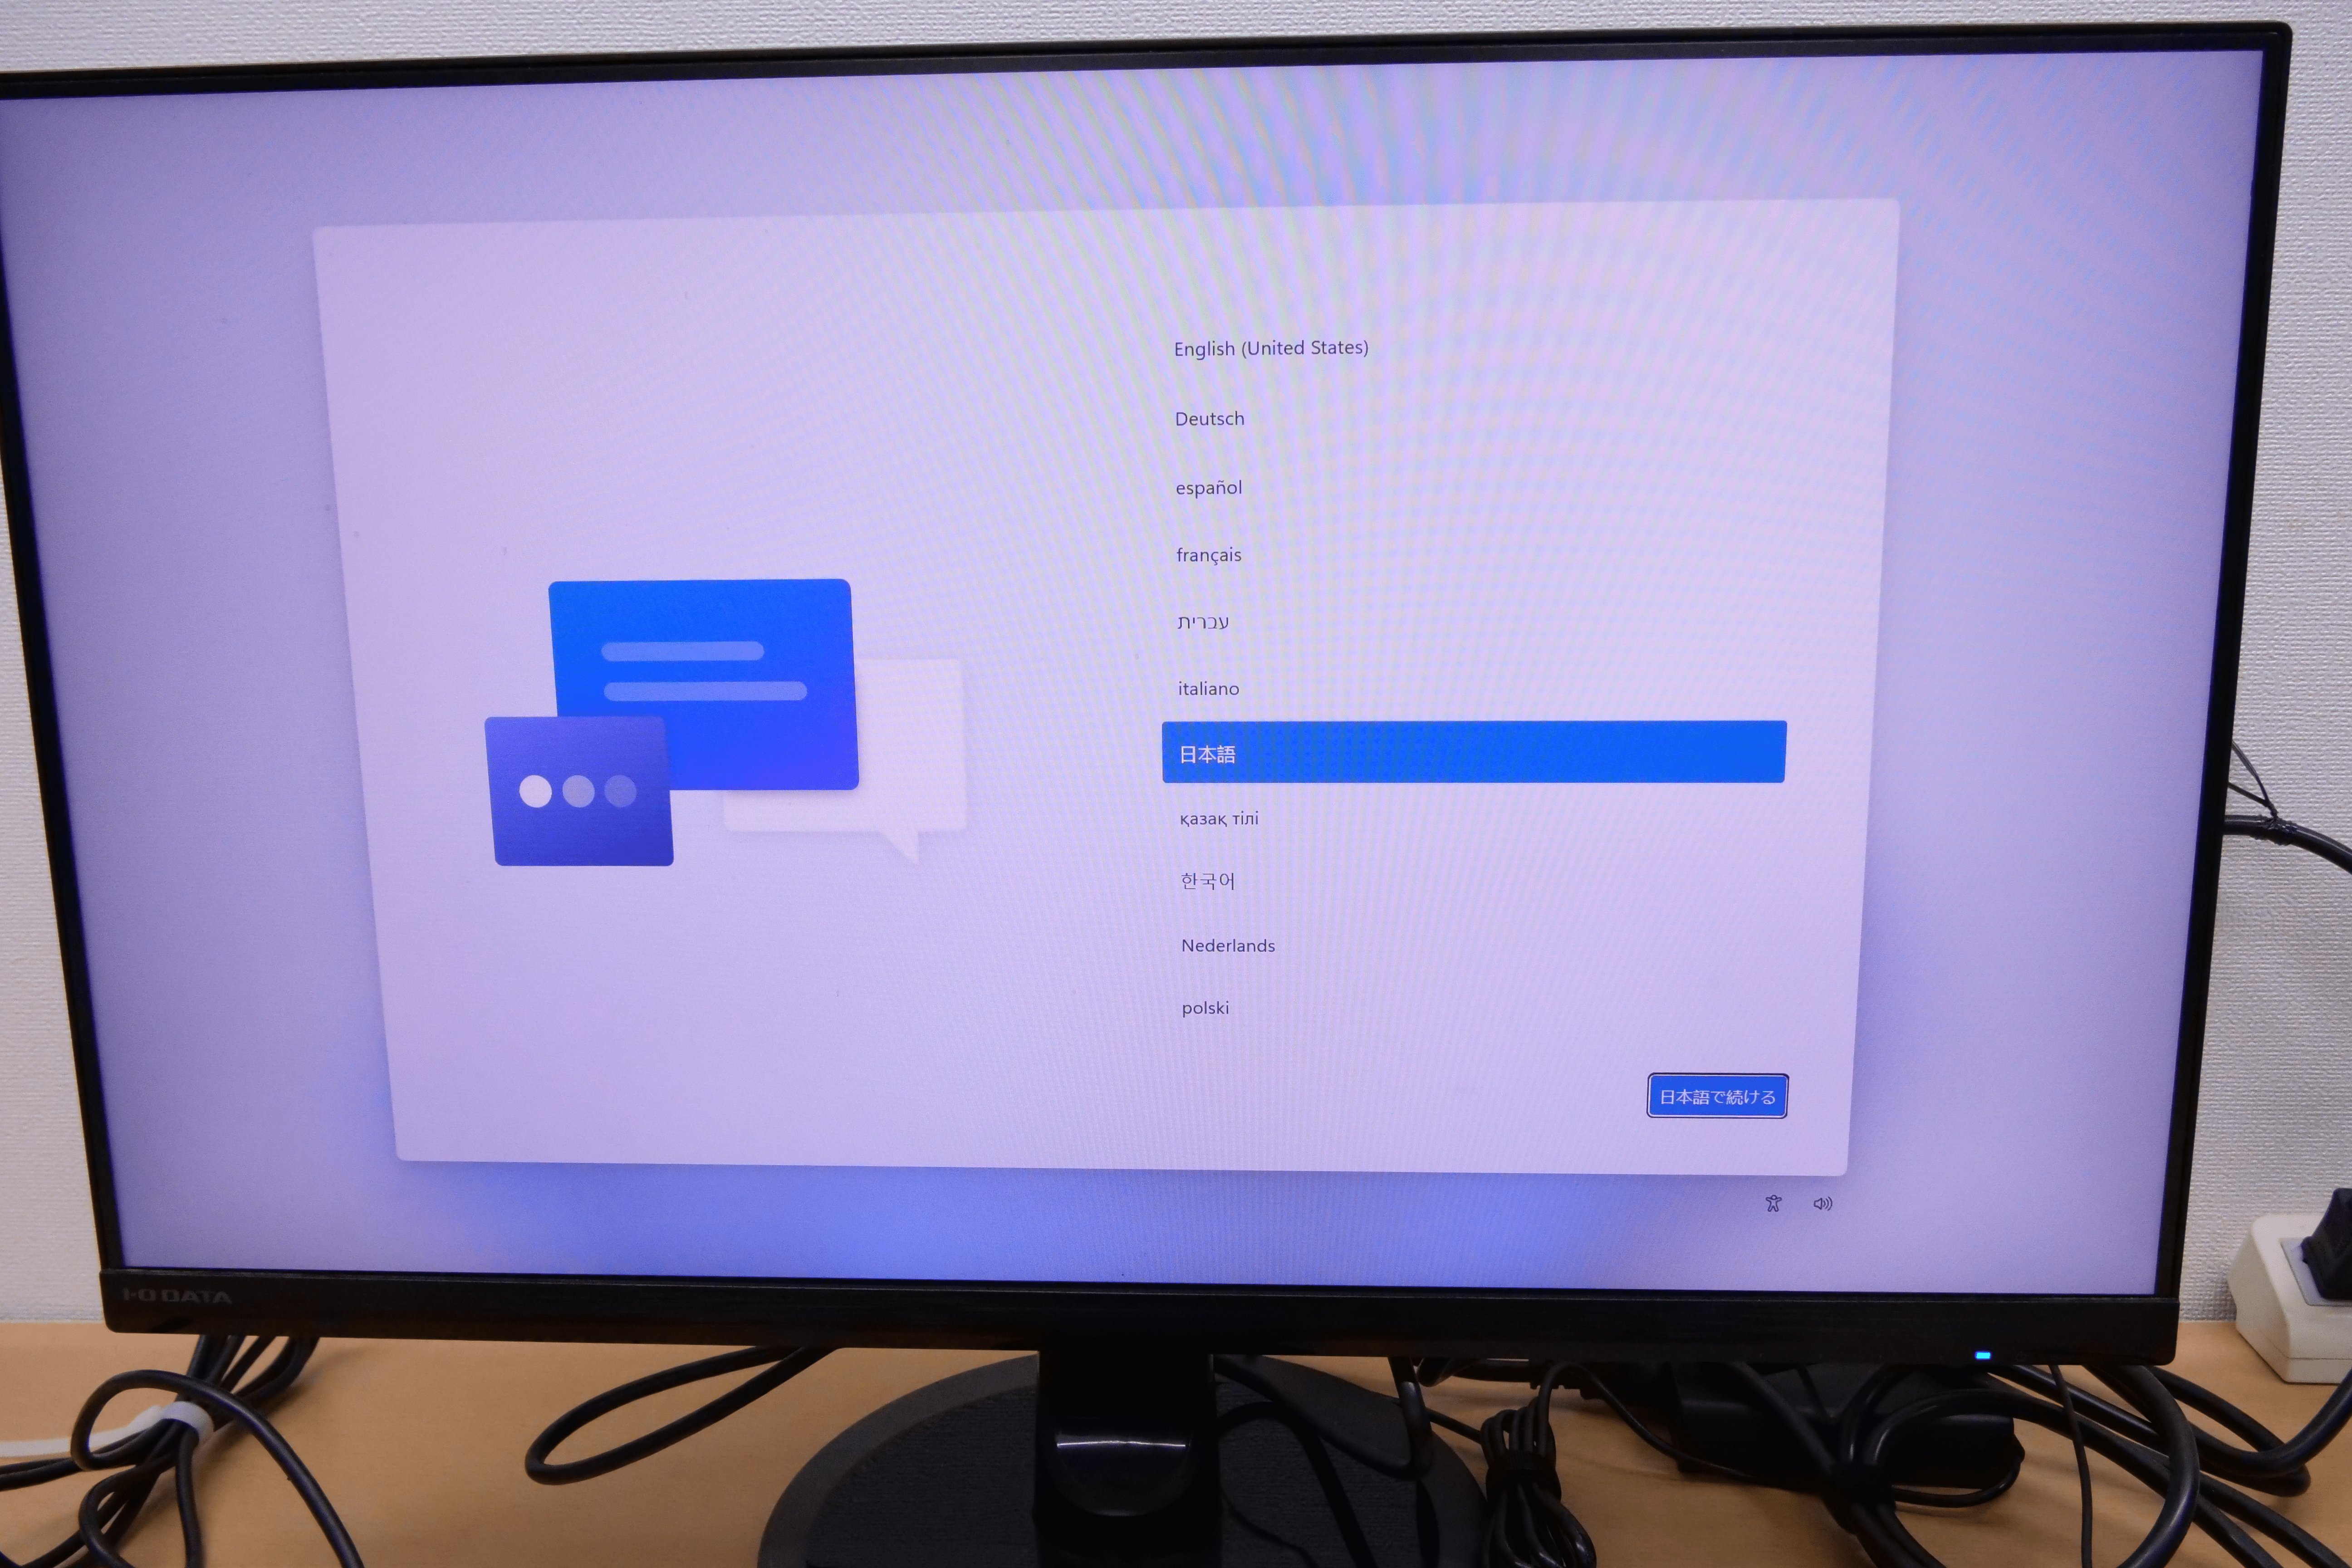
Windows 11 Pro has started, so we will begin the setup. The initial settings are in English, so we will change them to Japanese. Additionally, if you are using a Japanese keyboard, you will need to change the keyboard layout.
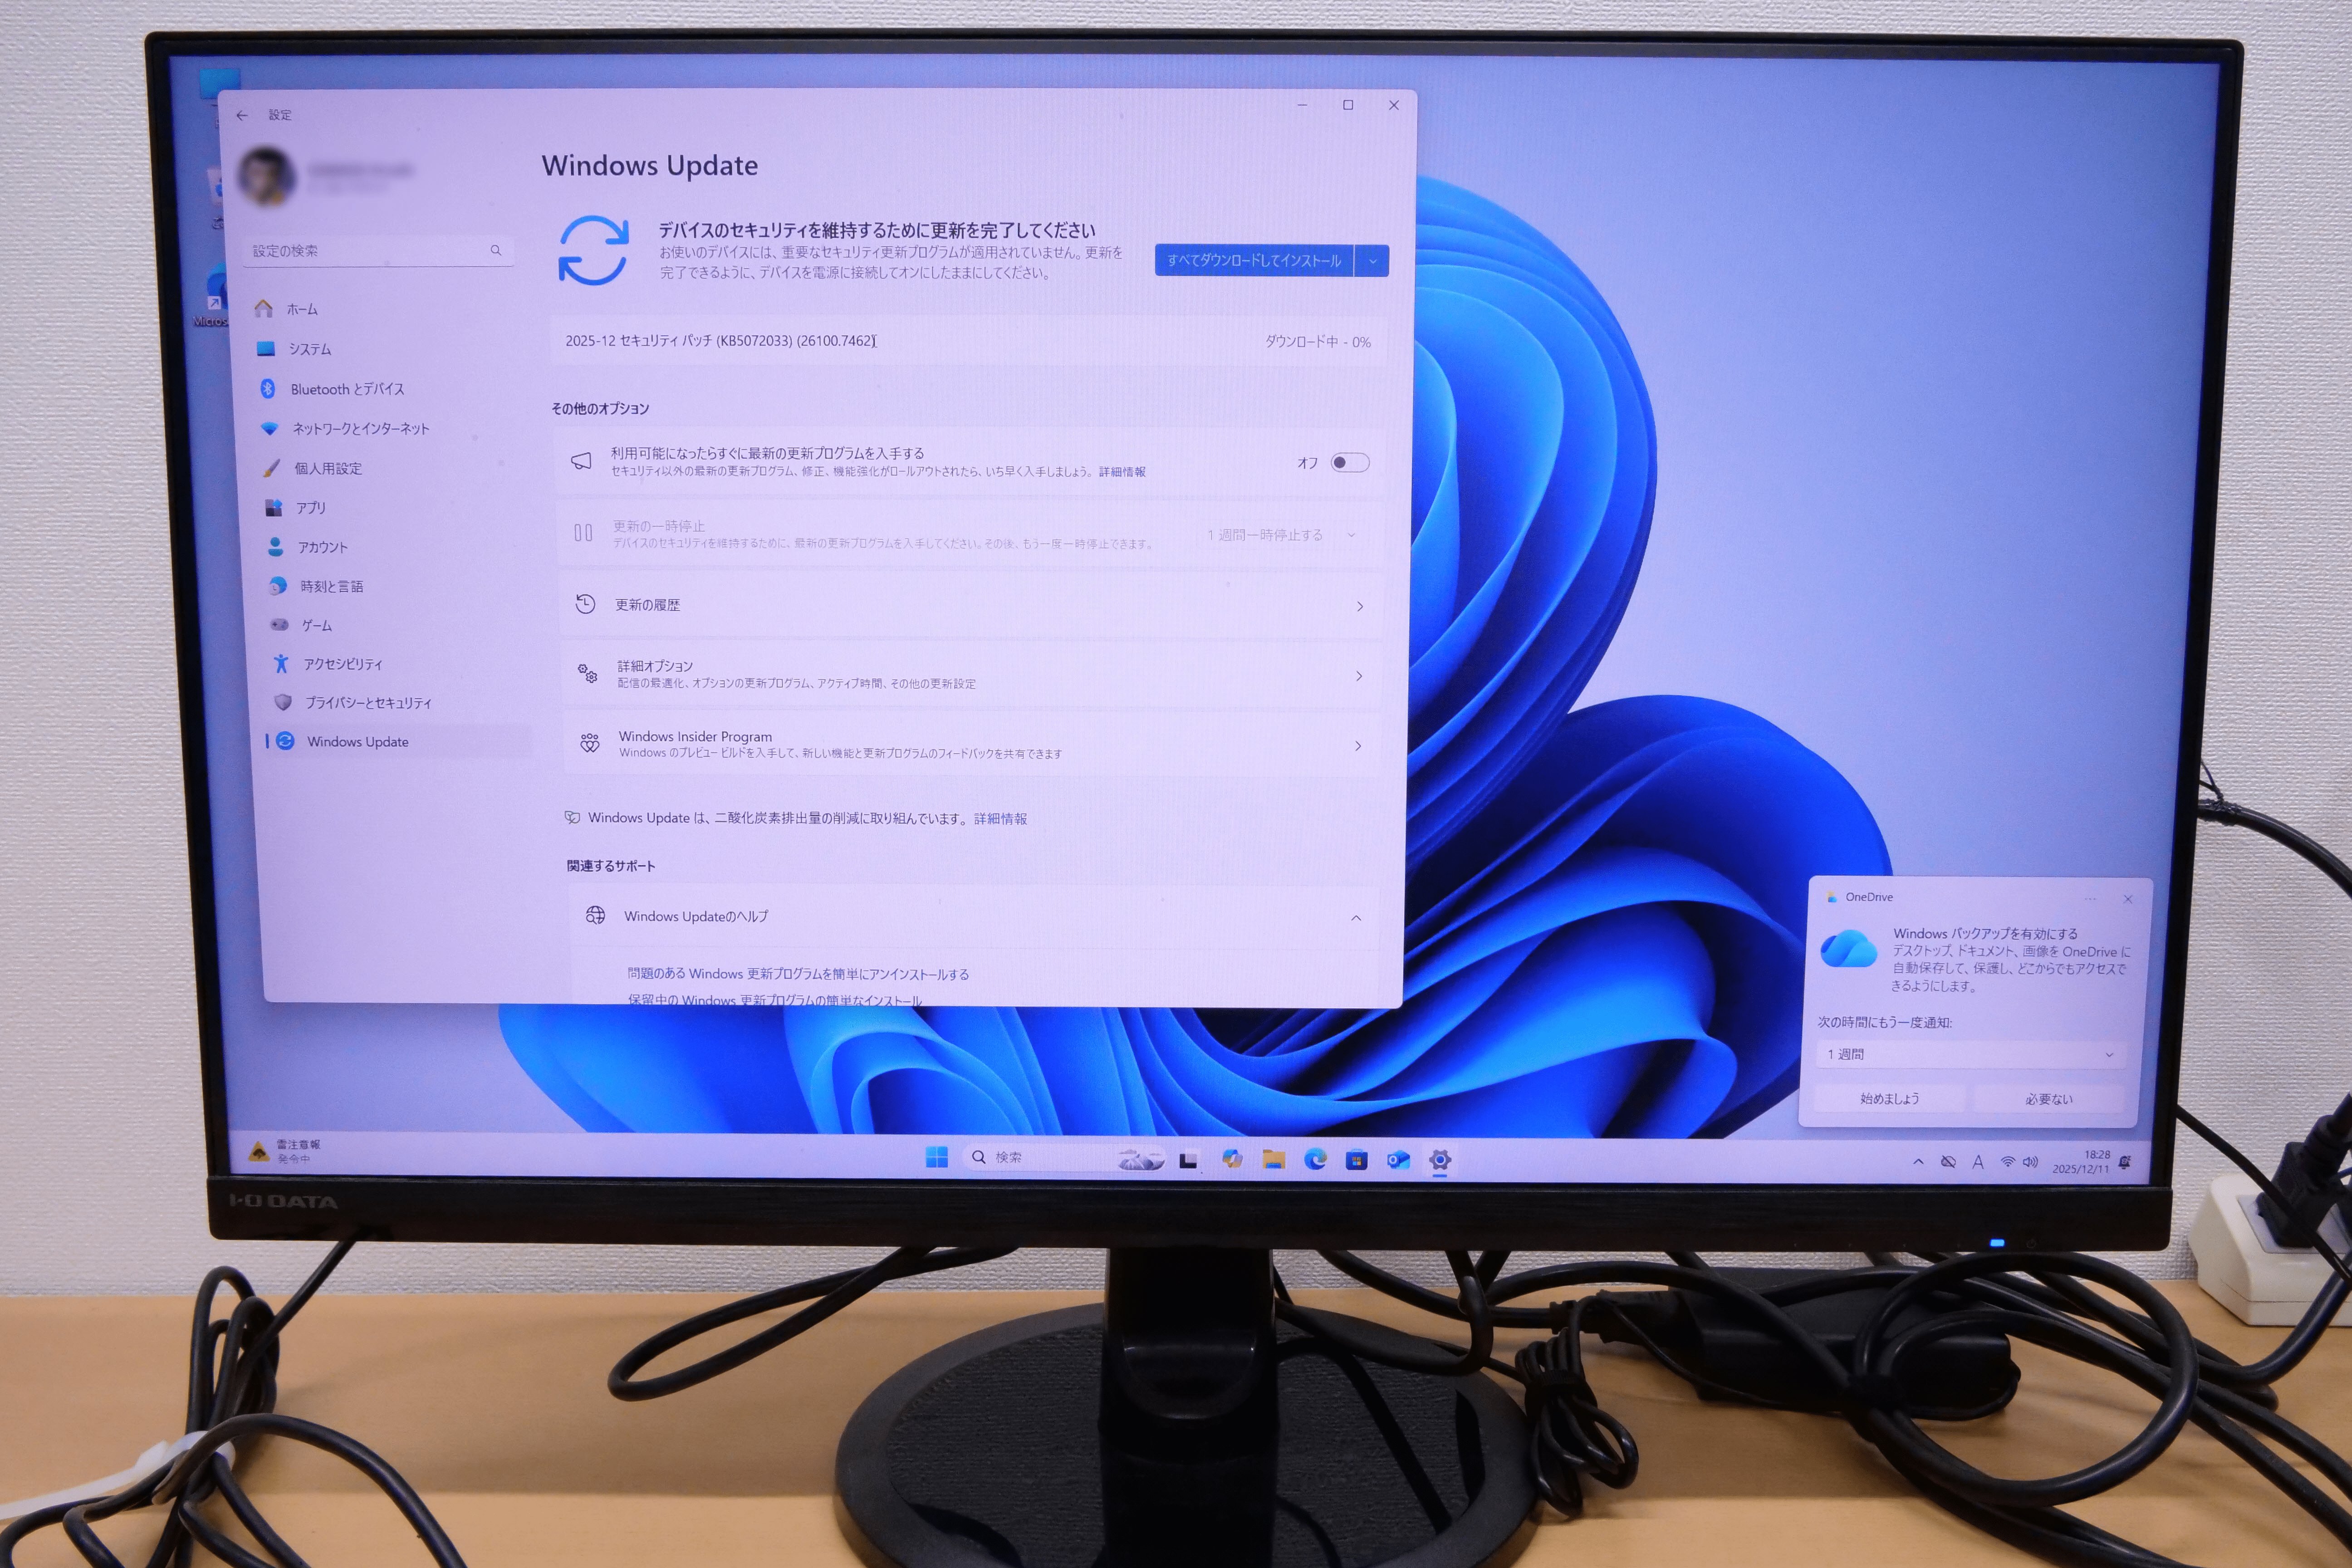
Once the setup is complete, proceed to run Windows Update. Several restarts were required to apply all updates, but I was eventually able to update to the latest version.
◆Storage formatting
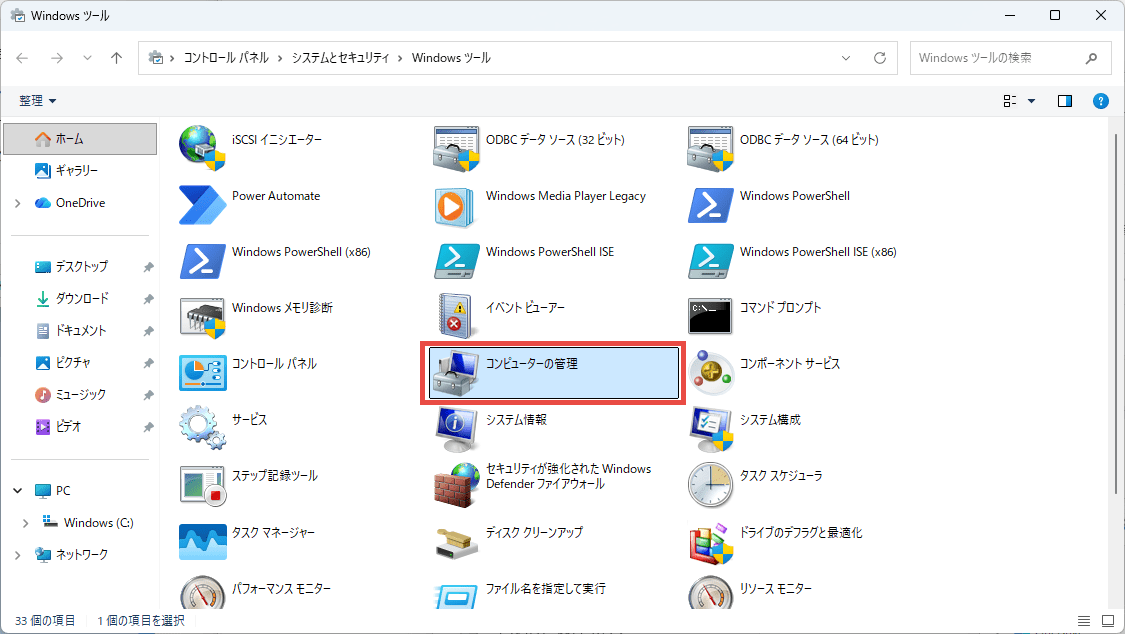
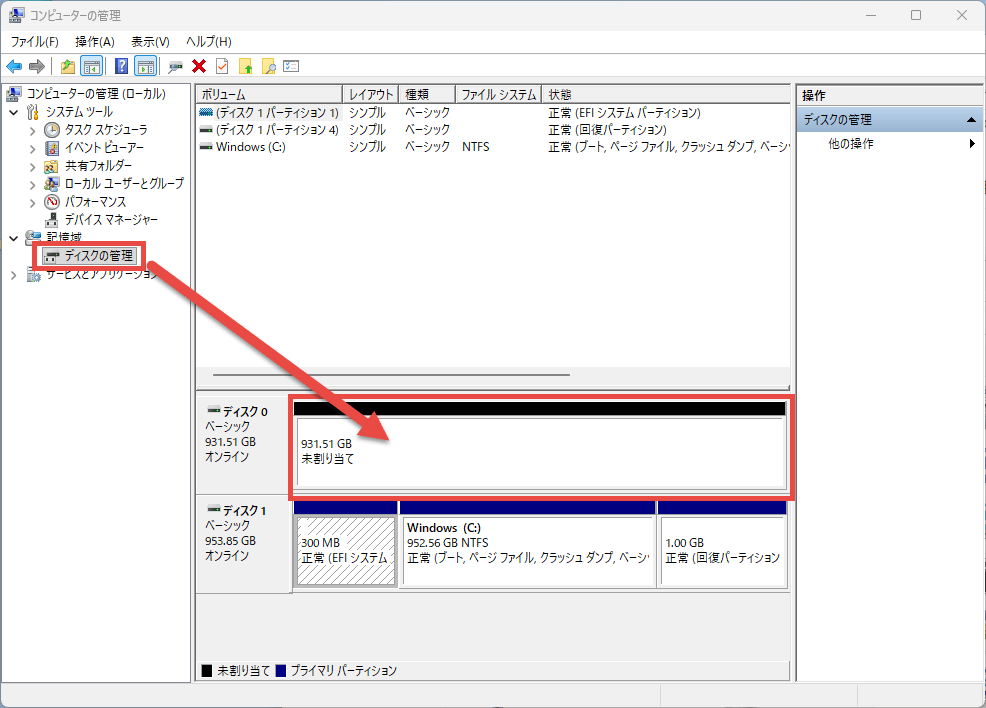
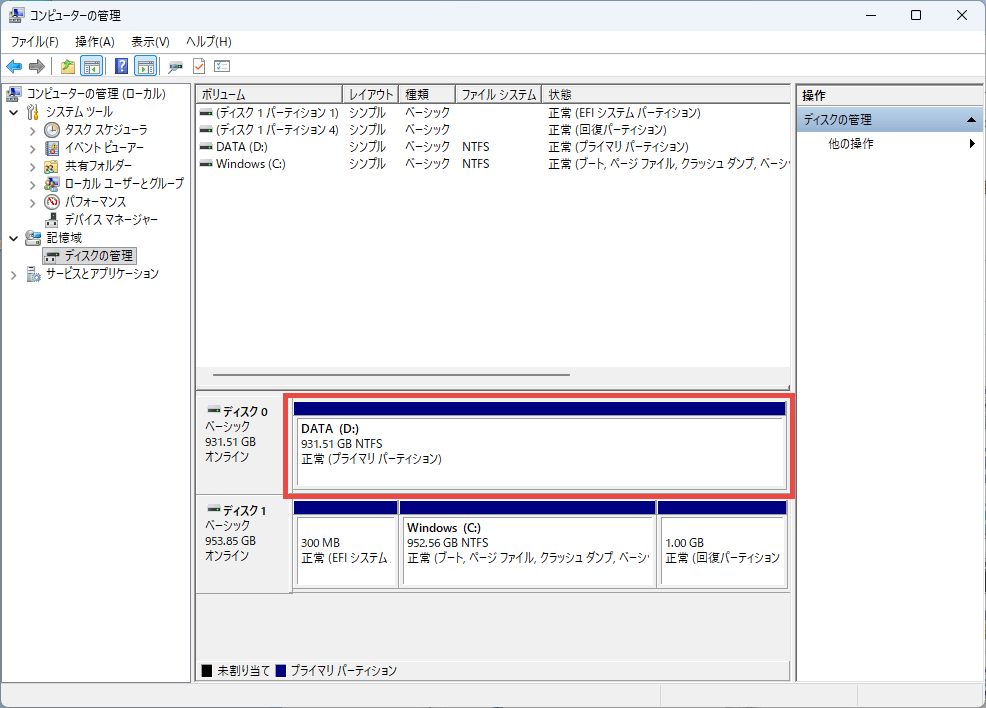
The added SSD cannot be used as is, so you need to configure the volume and format it. From the Start menu, launch 'Windows Tools' and open 'Computer Management'.
In the tree view on the left, select 'Disk Management' under 'Storage,' and a list of disks will appear in the central view. The SSD you just added is the one marked 'Unallocated.' Confirm that 'Disk 0' is unallocated and click on it.
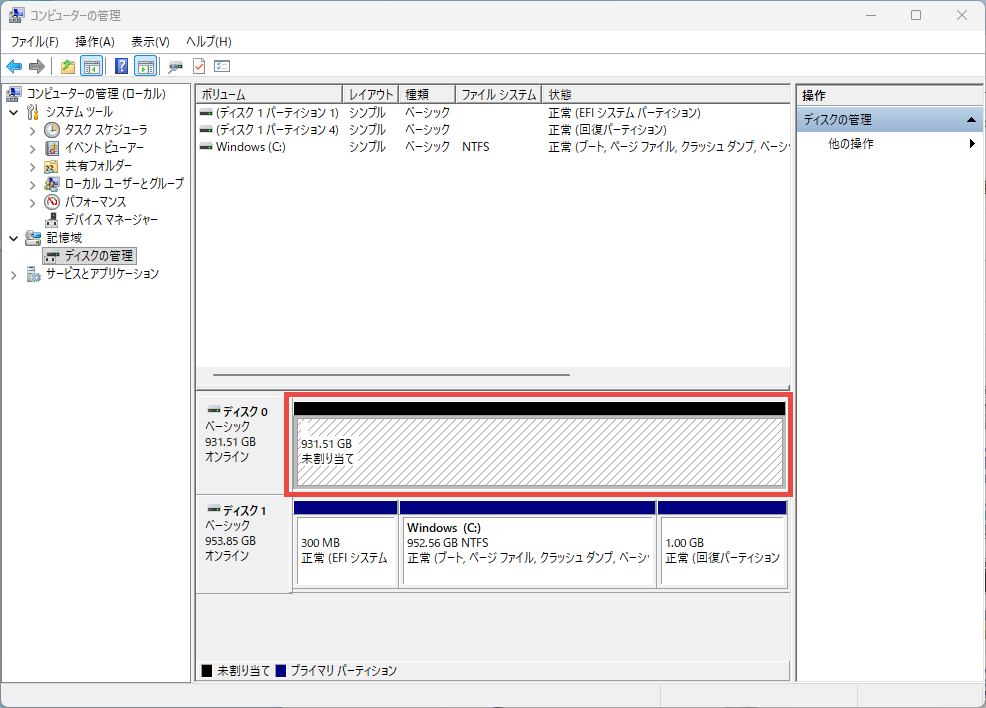
Confirm that a diagonal line has appeared, then right-click to display the context menu.
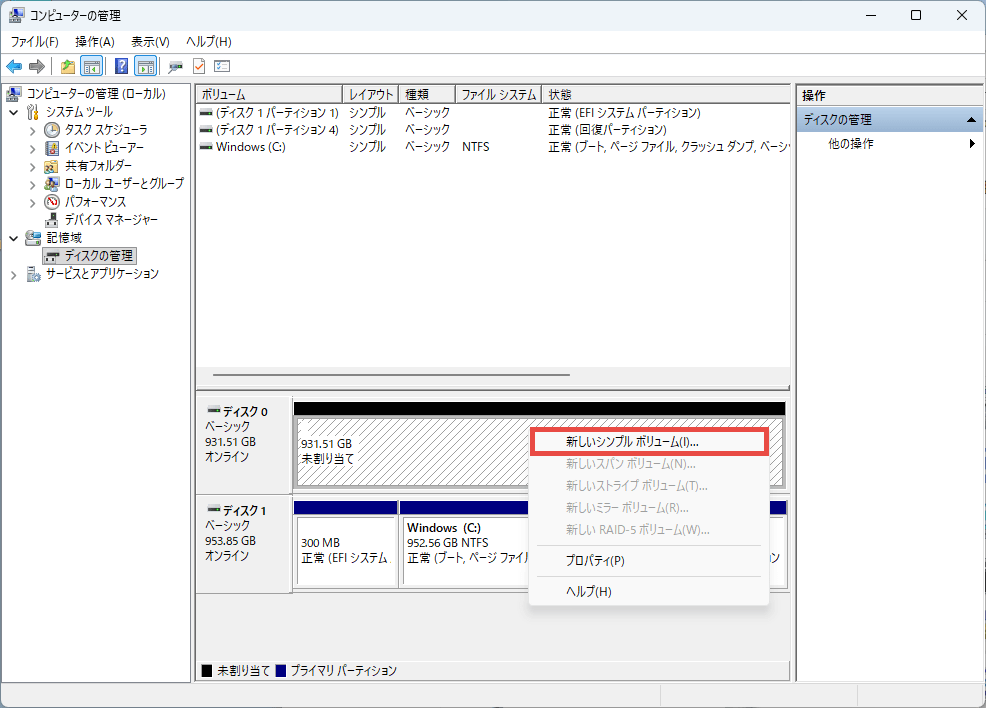
Select 'New Simple Volume' from the context menu.
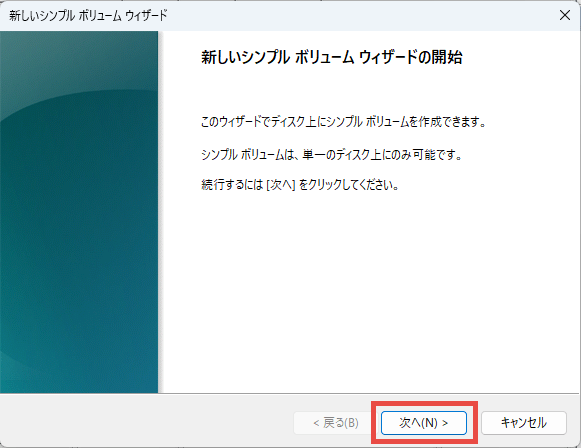
The 'Start the New Simple Volume Wizard' dialog box will appear, so click the 'Next' button.
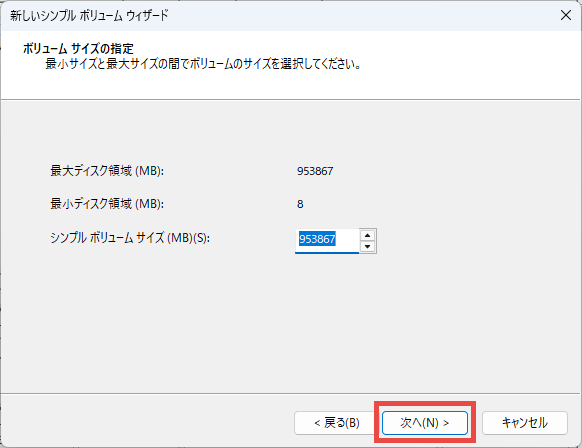
You will be taken to the 'Specify Volume Size' screen, but the maximum value should already be set, so just press the 'Next' button.
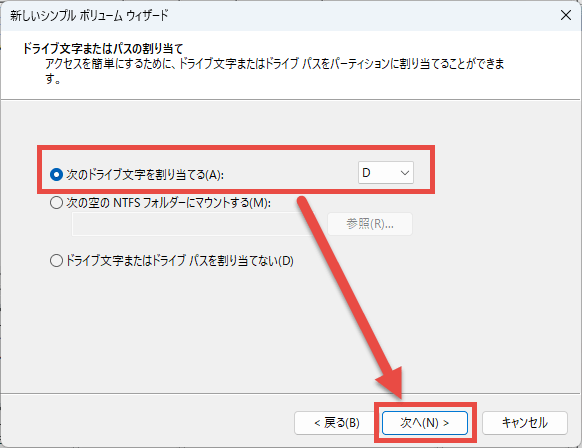
You will be taken to the 'Assign Drive Letter or Path' screen. Unless you have a specific problem or preference, assign the D drive and click the 'Next' button.
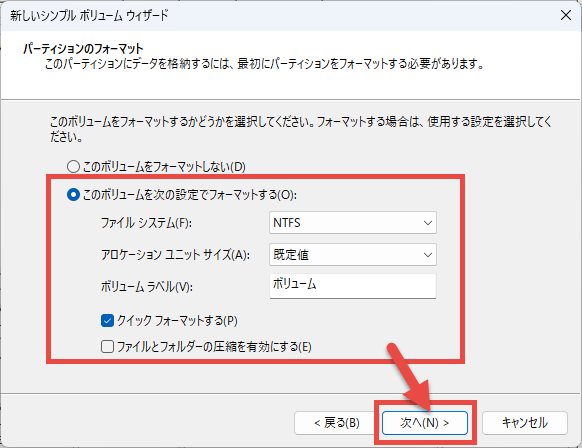
You will be taken to the 'Format Partition' screen. Select 'Format this volume with the following settings,' configure the settings as described below, and then click the 'Next' button.
File system: NTFS
• Allocation unit size: default value
Volume label: (Specify an easily recognizable string)
・QuickFee: Check
- Enable file and folder compression: Do not check
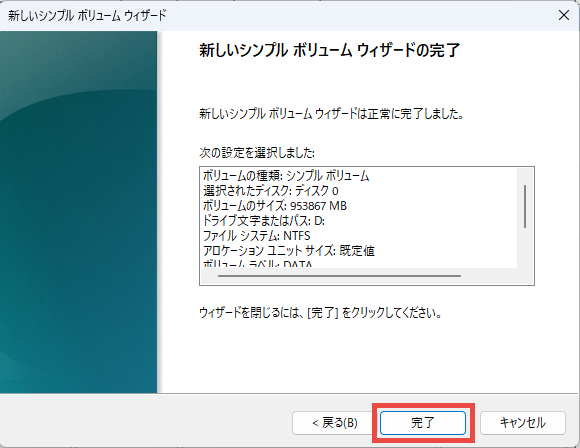
Once formatting is complete, you will be taken to the 'New Simple Volume Wizard Complete' screen; click the 'Finish' button.
Return to the 'Computer Management' screen. You can verify that the specified volume has been allocated and formatted.
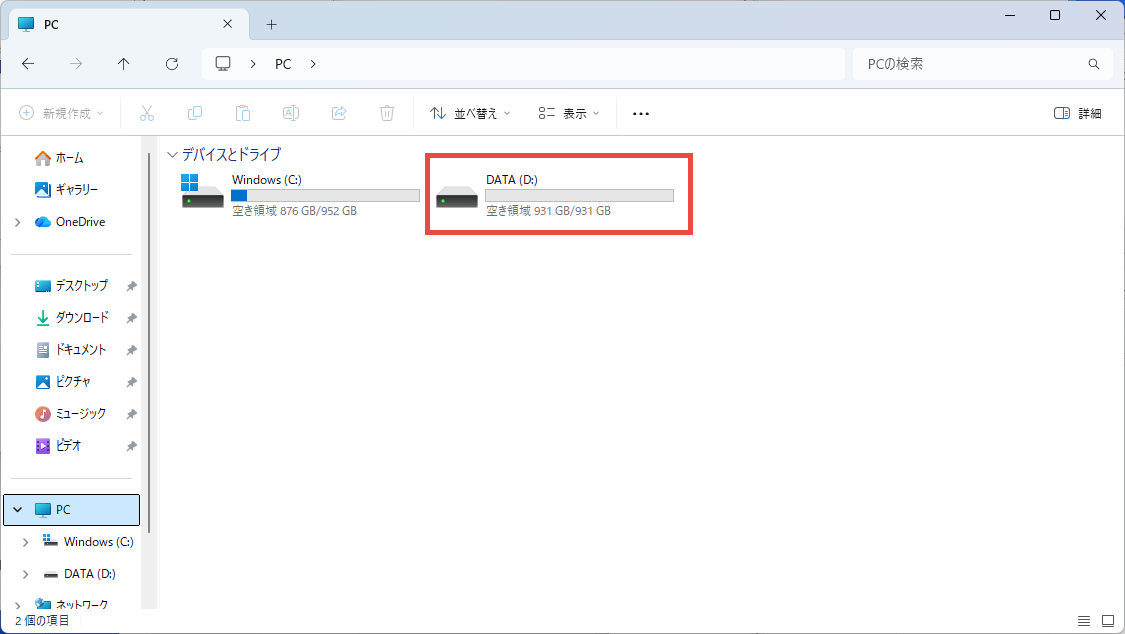
When you open File Explorer, you will see the D drive, confirming that the added SSD is available for use.
◆Benchmark Test
We will conduct various benchmark tests to measure performance.
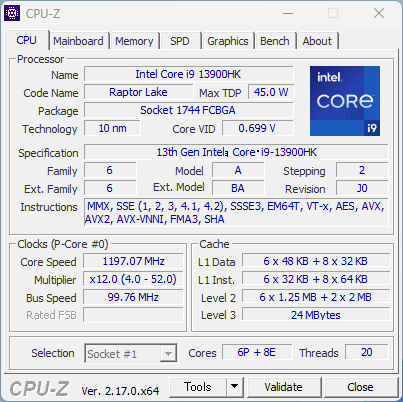
CPU-Z
I checked the CPU information using '
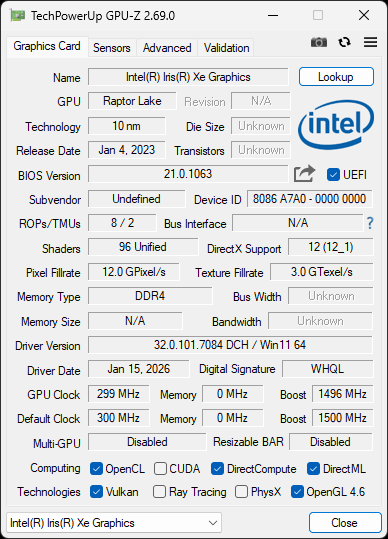
GPU-Z
When I checked the GPU information using '
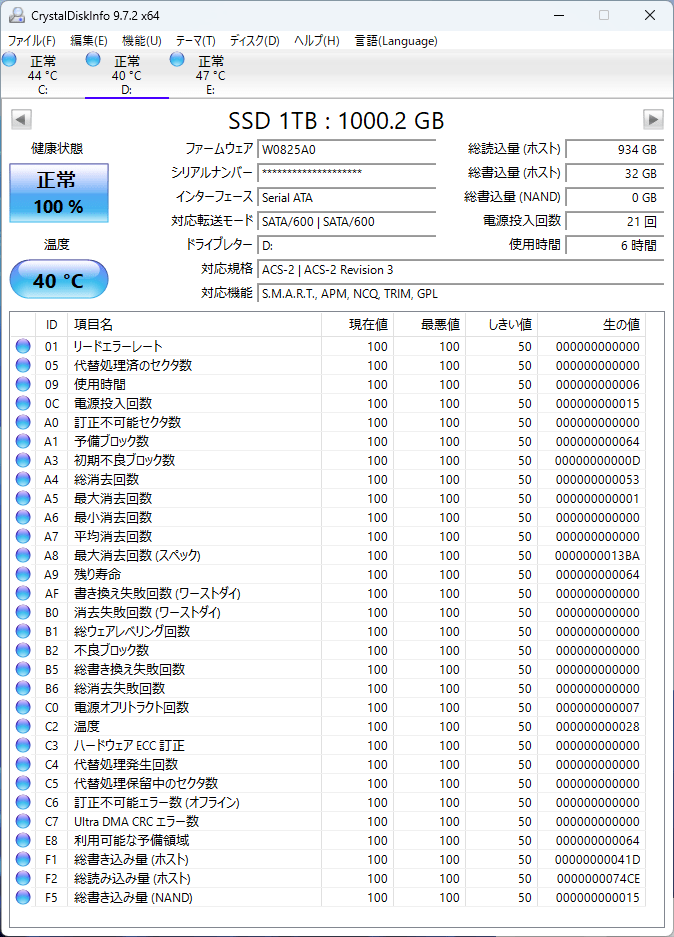
CrystalDiskInfo
The C drive is WPBSN4M8-1TGP, with a capacity of 1TB.

The added D drive has no manufacturer or storage name displayed, and its capacity is 1TB.
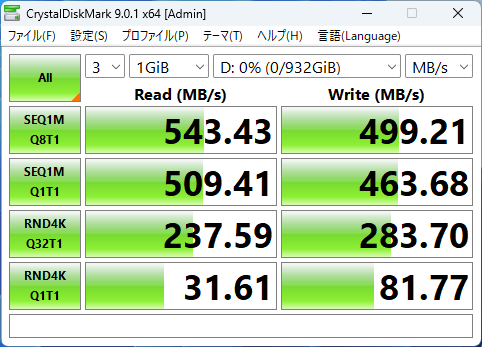
CrystalDiskMark
We ran '
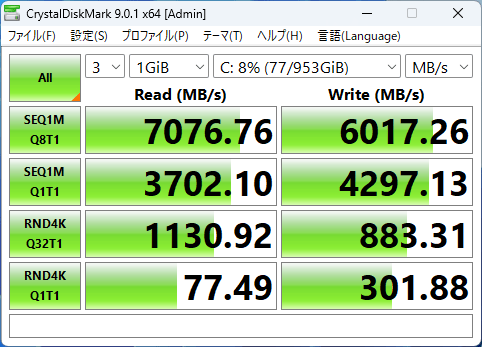
On the other hand, the following are the measurement results for the D drive. The sequential read speed was 543.43 MB/s, the sequential write speed was 499.21 MB/s, the random read speed was 237.59 MB/s, and the random write speed was 283.70 MB/s. The difference between NVMe and SATA is clearly evident, and it can be said that this drive is best suited for use primarily for data storage.
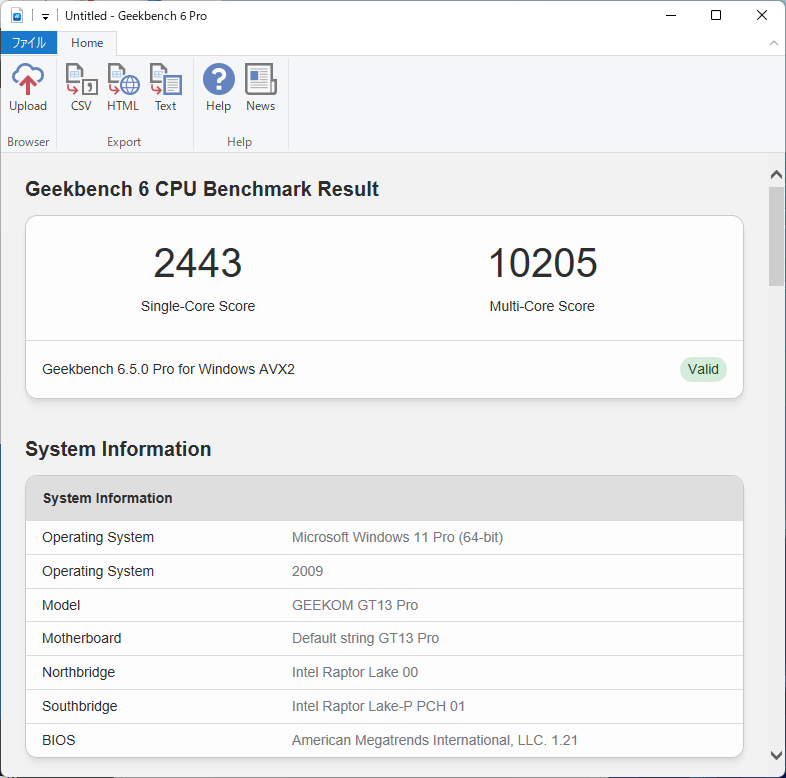
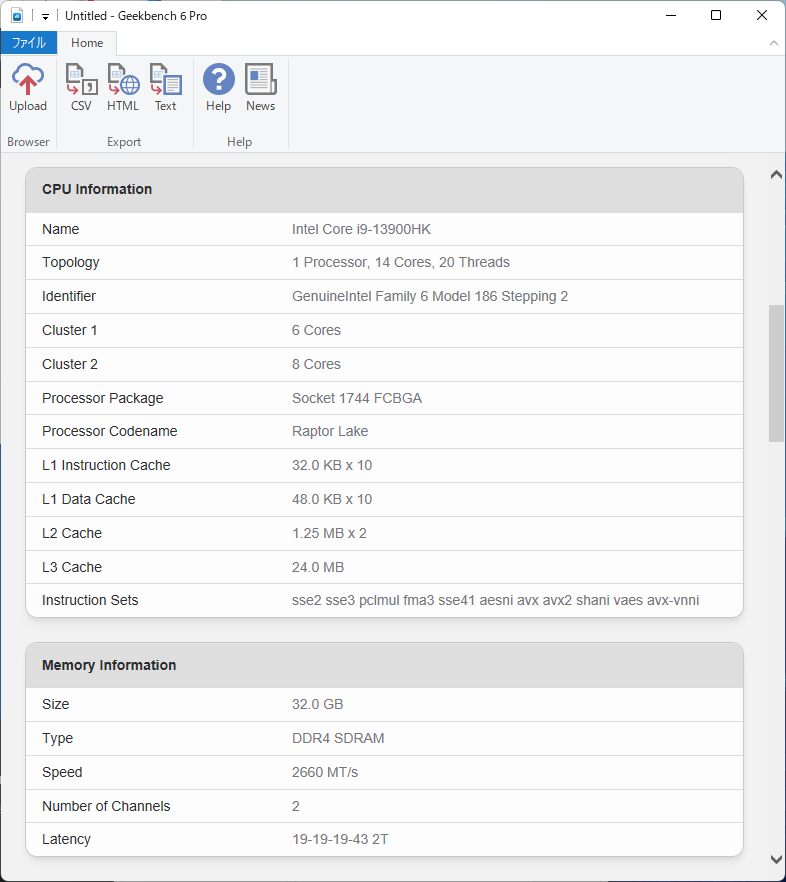
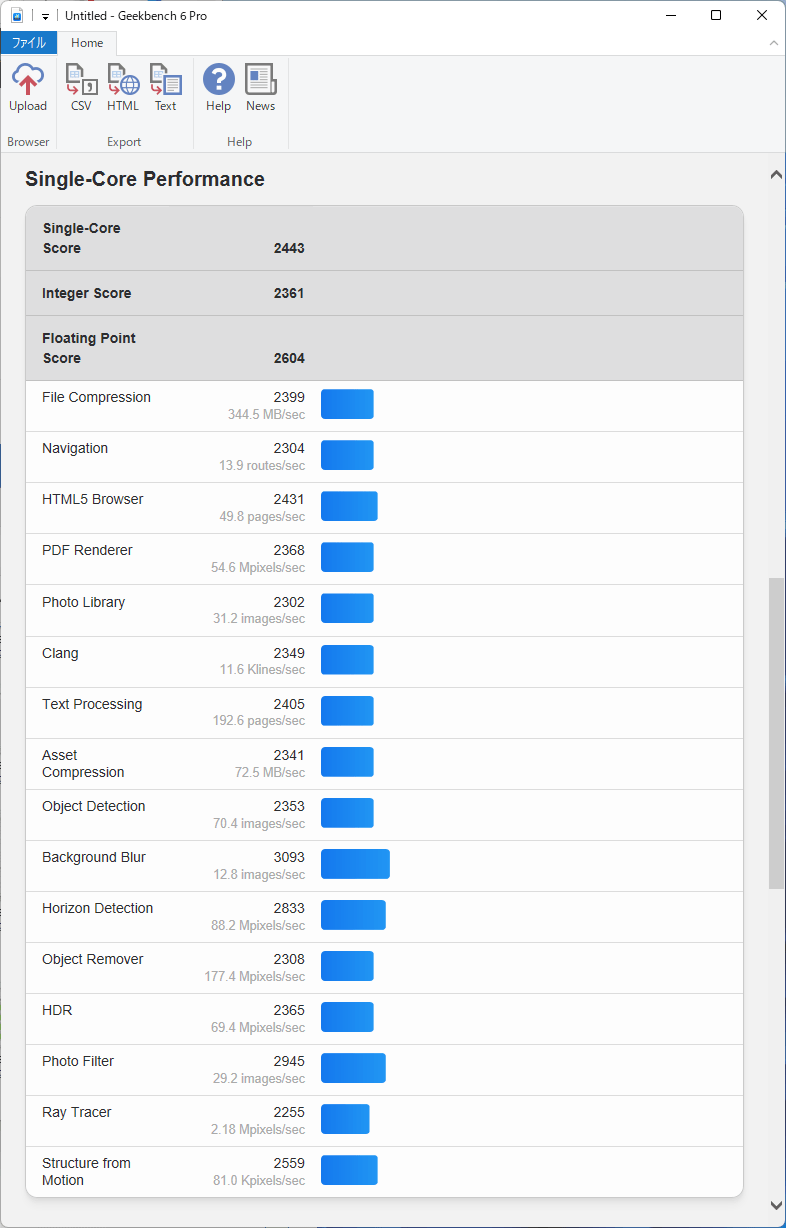
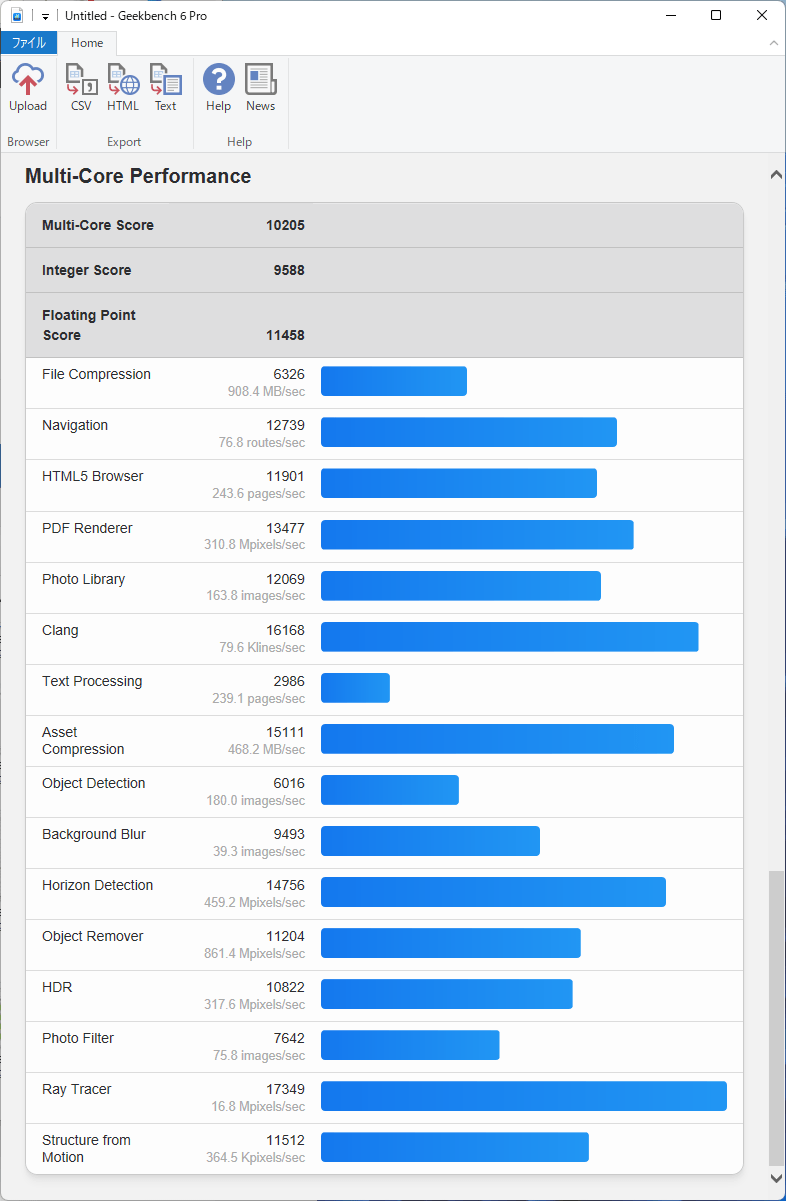
Geekbench 6 Pro
The CPU benchmark results from ' Geekbench 6 Pro ' are as follows: The single-core score was 2443, and the multi-core score was 10,205.
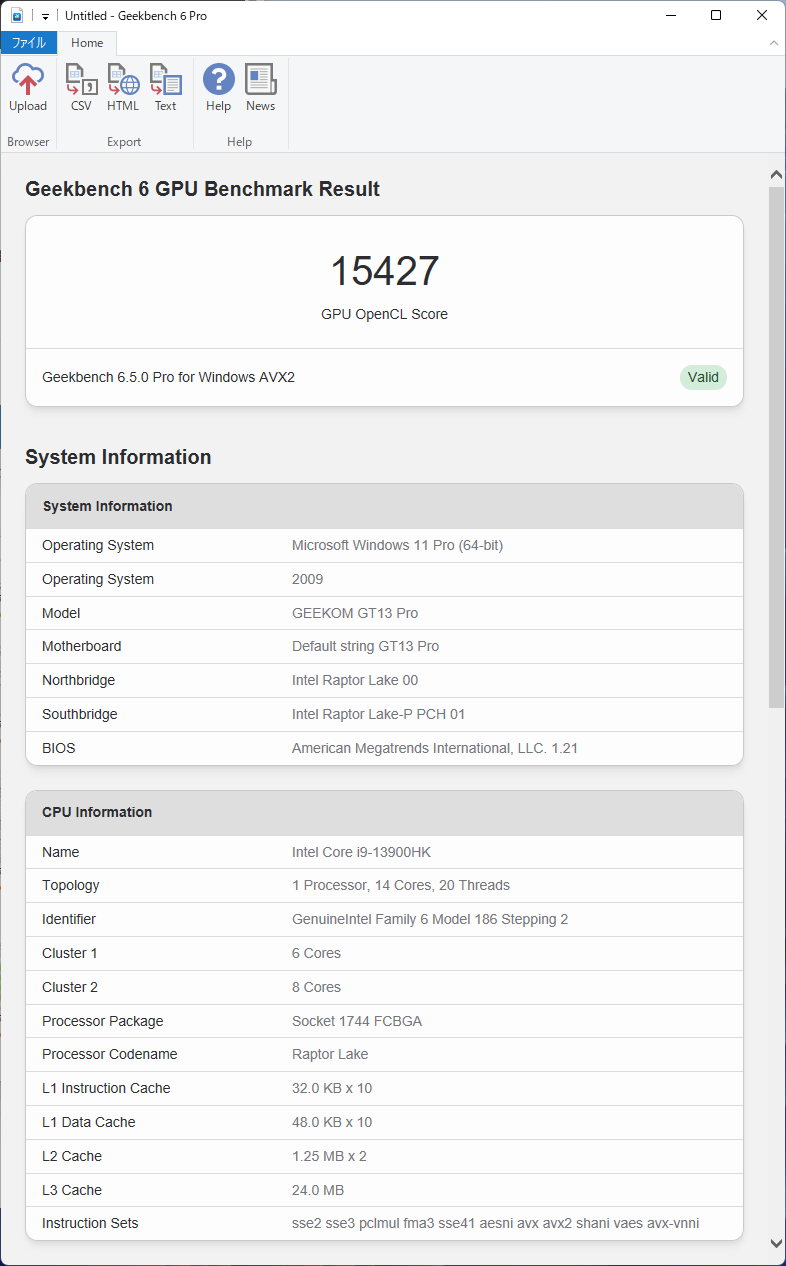
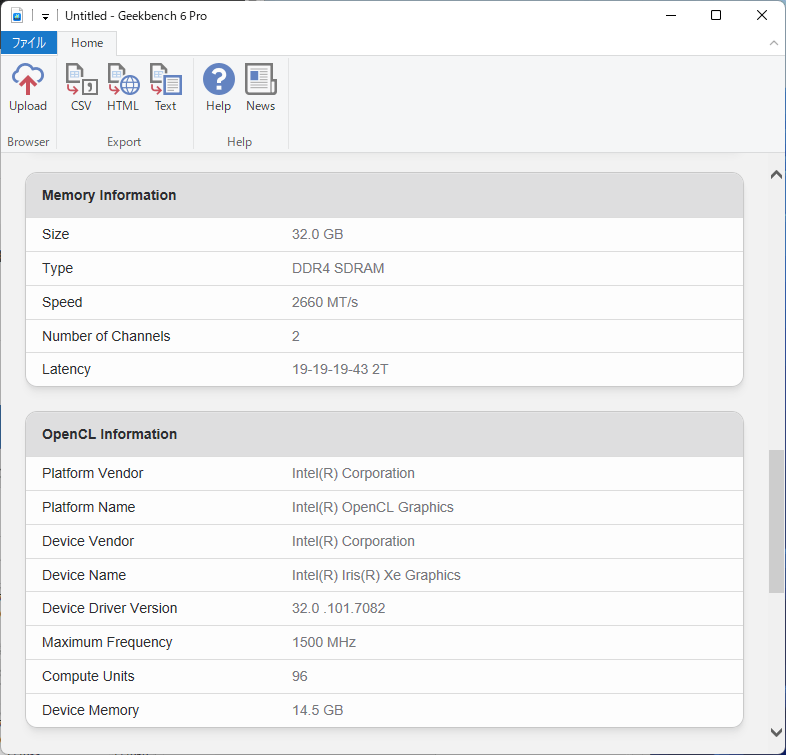
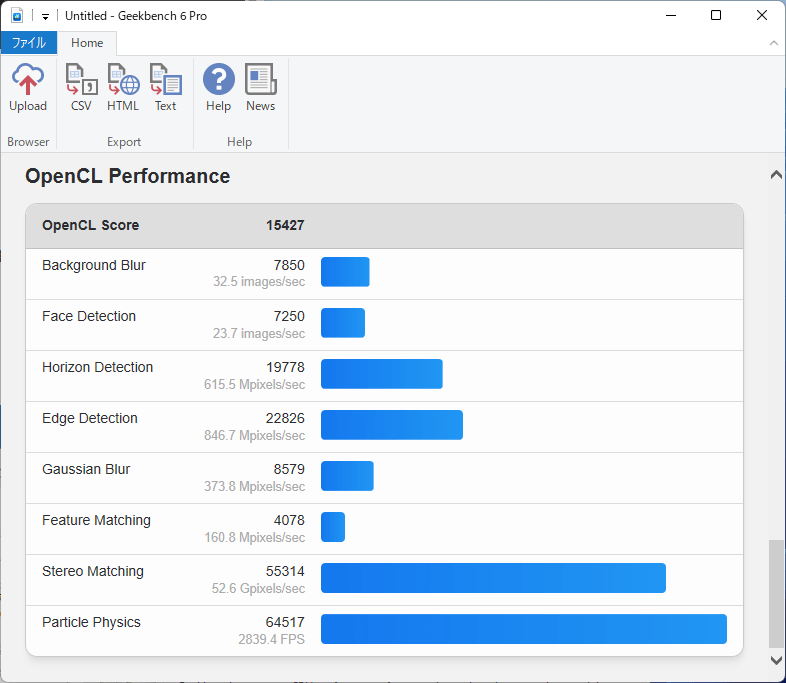
The GPU computational performance score in OpenCL was 15,427.
The score on Vulkan was 19,103.


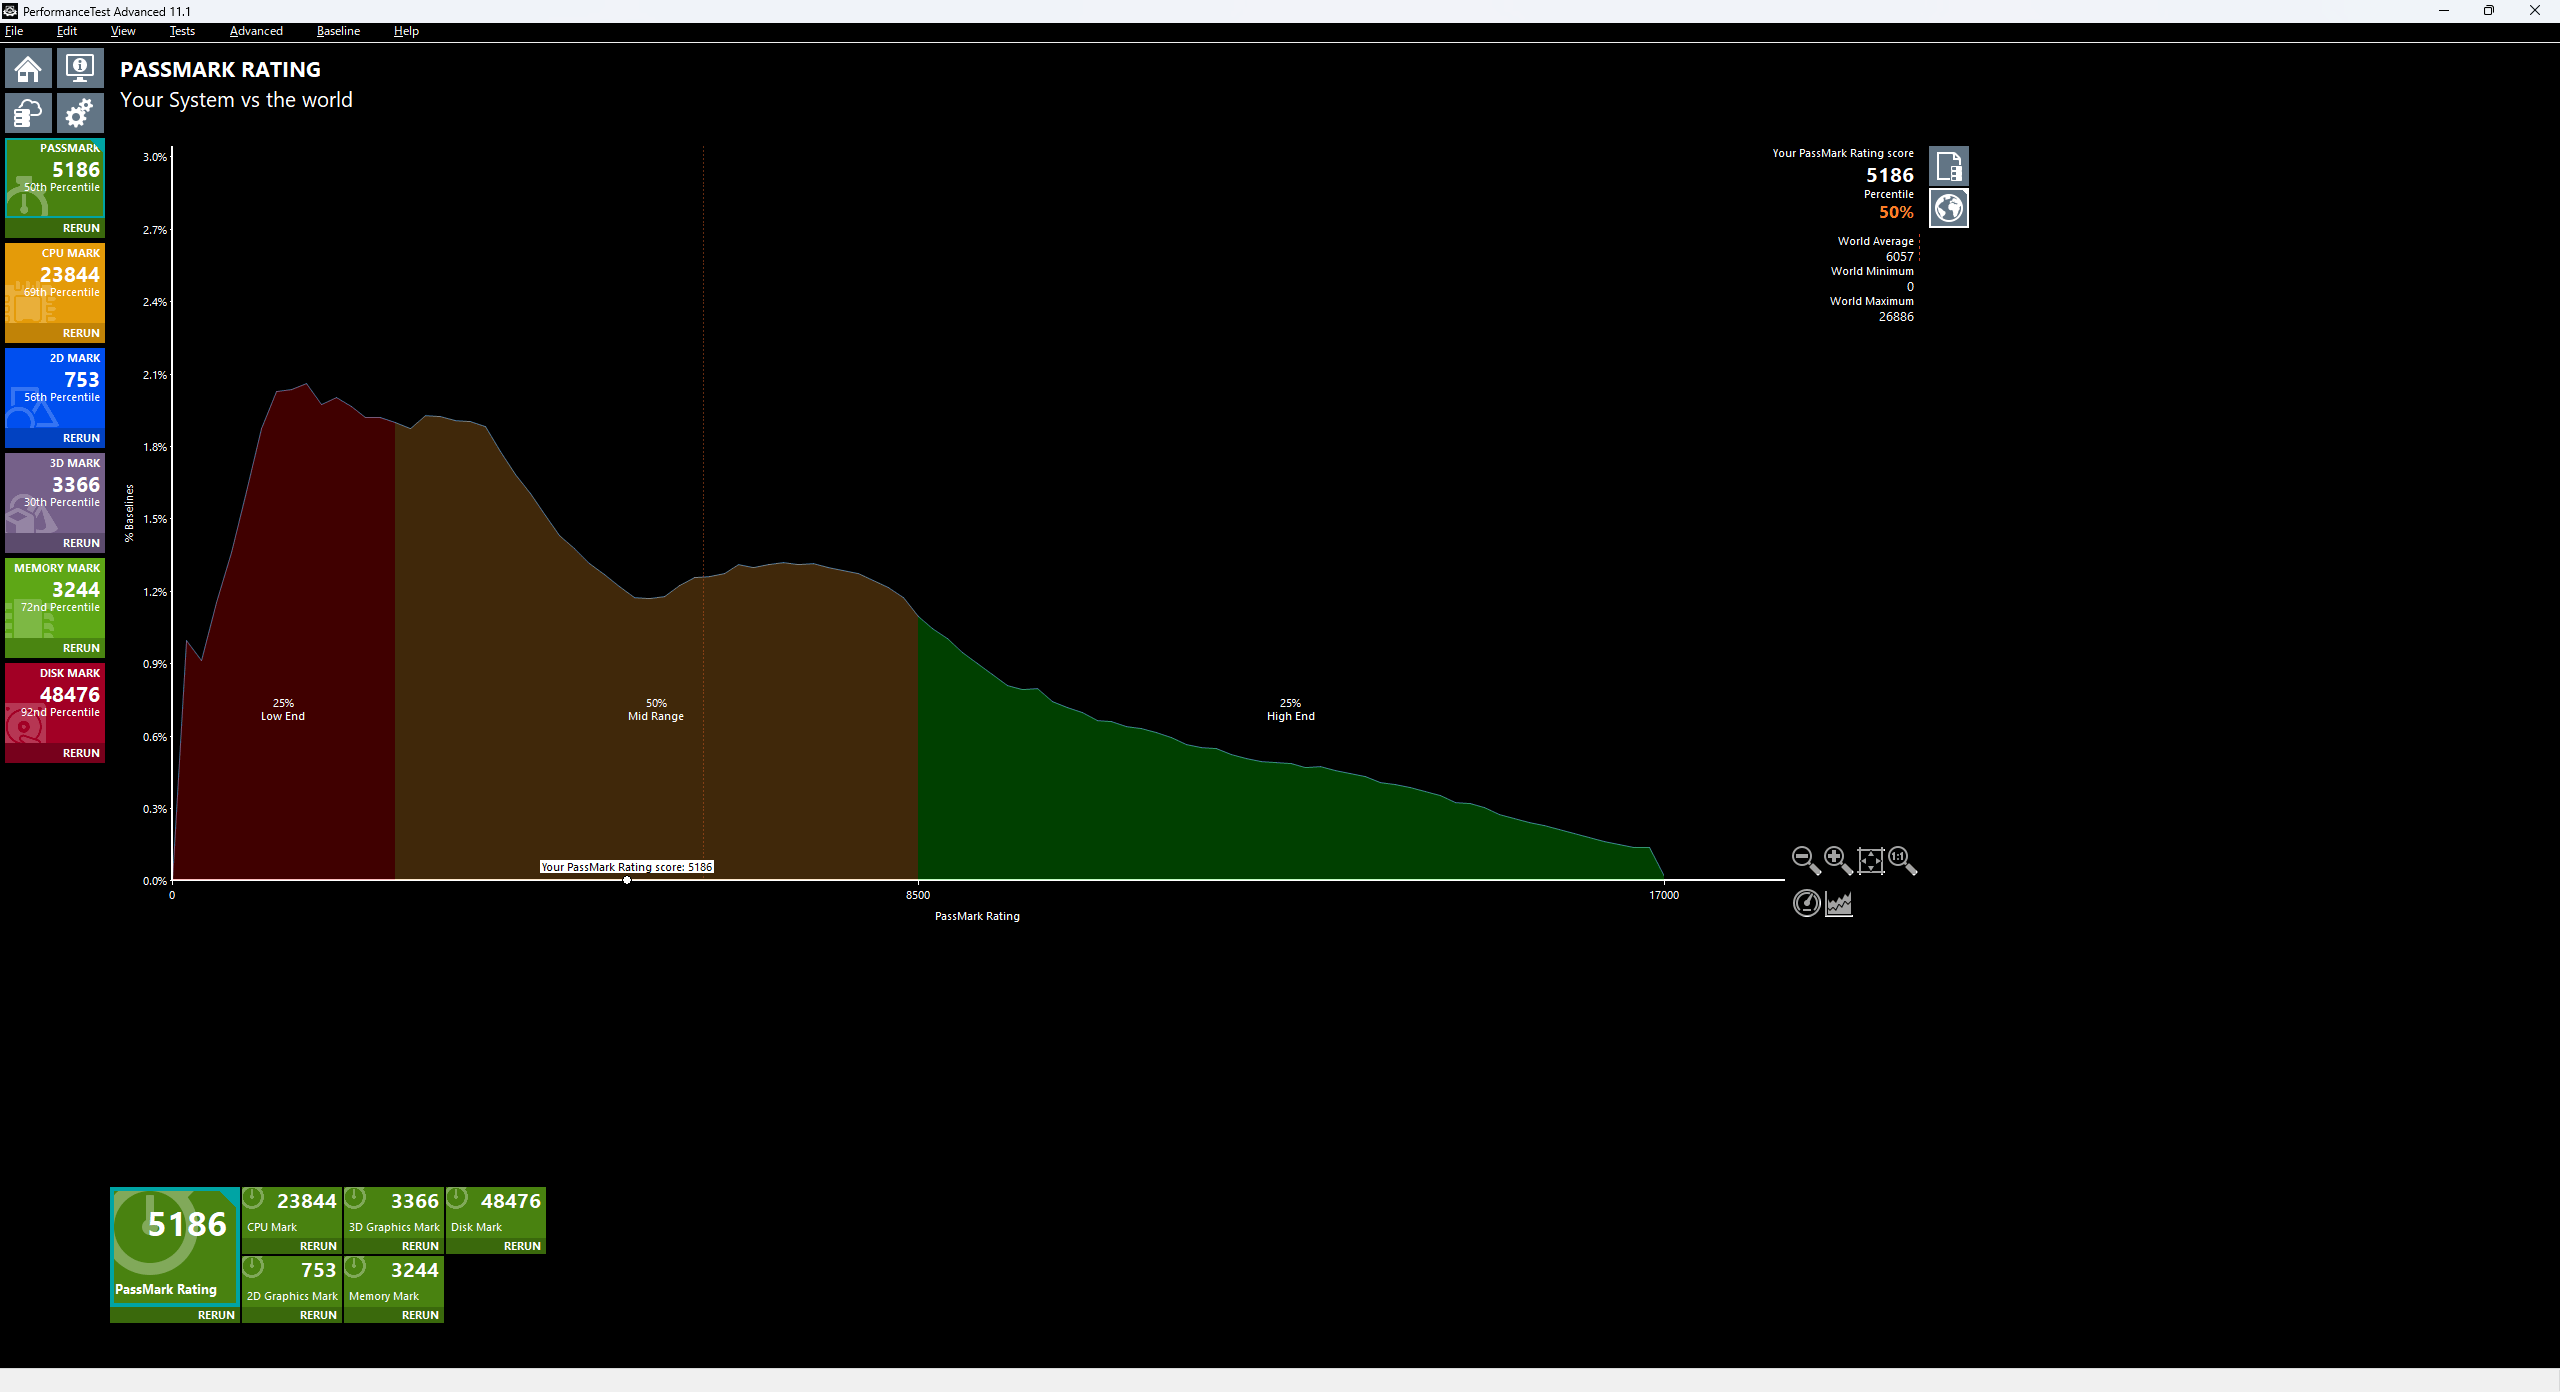
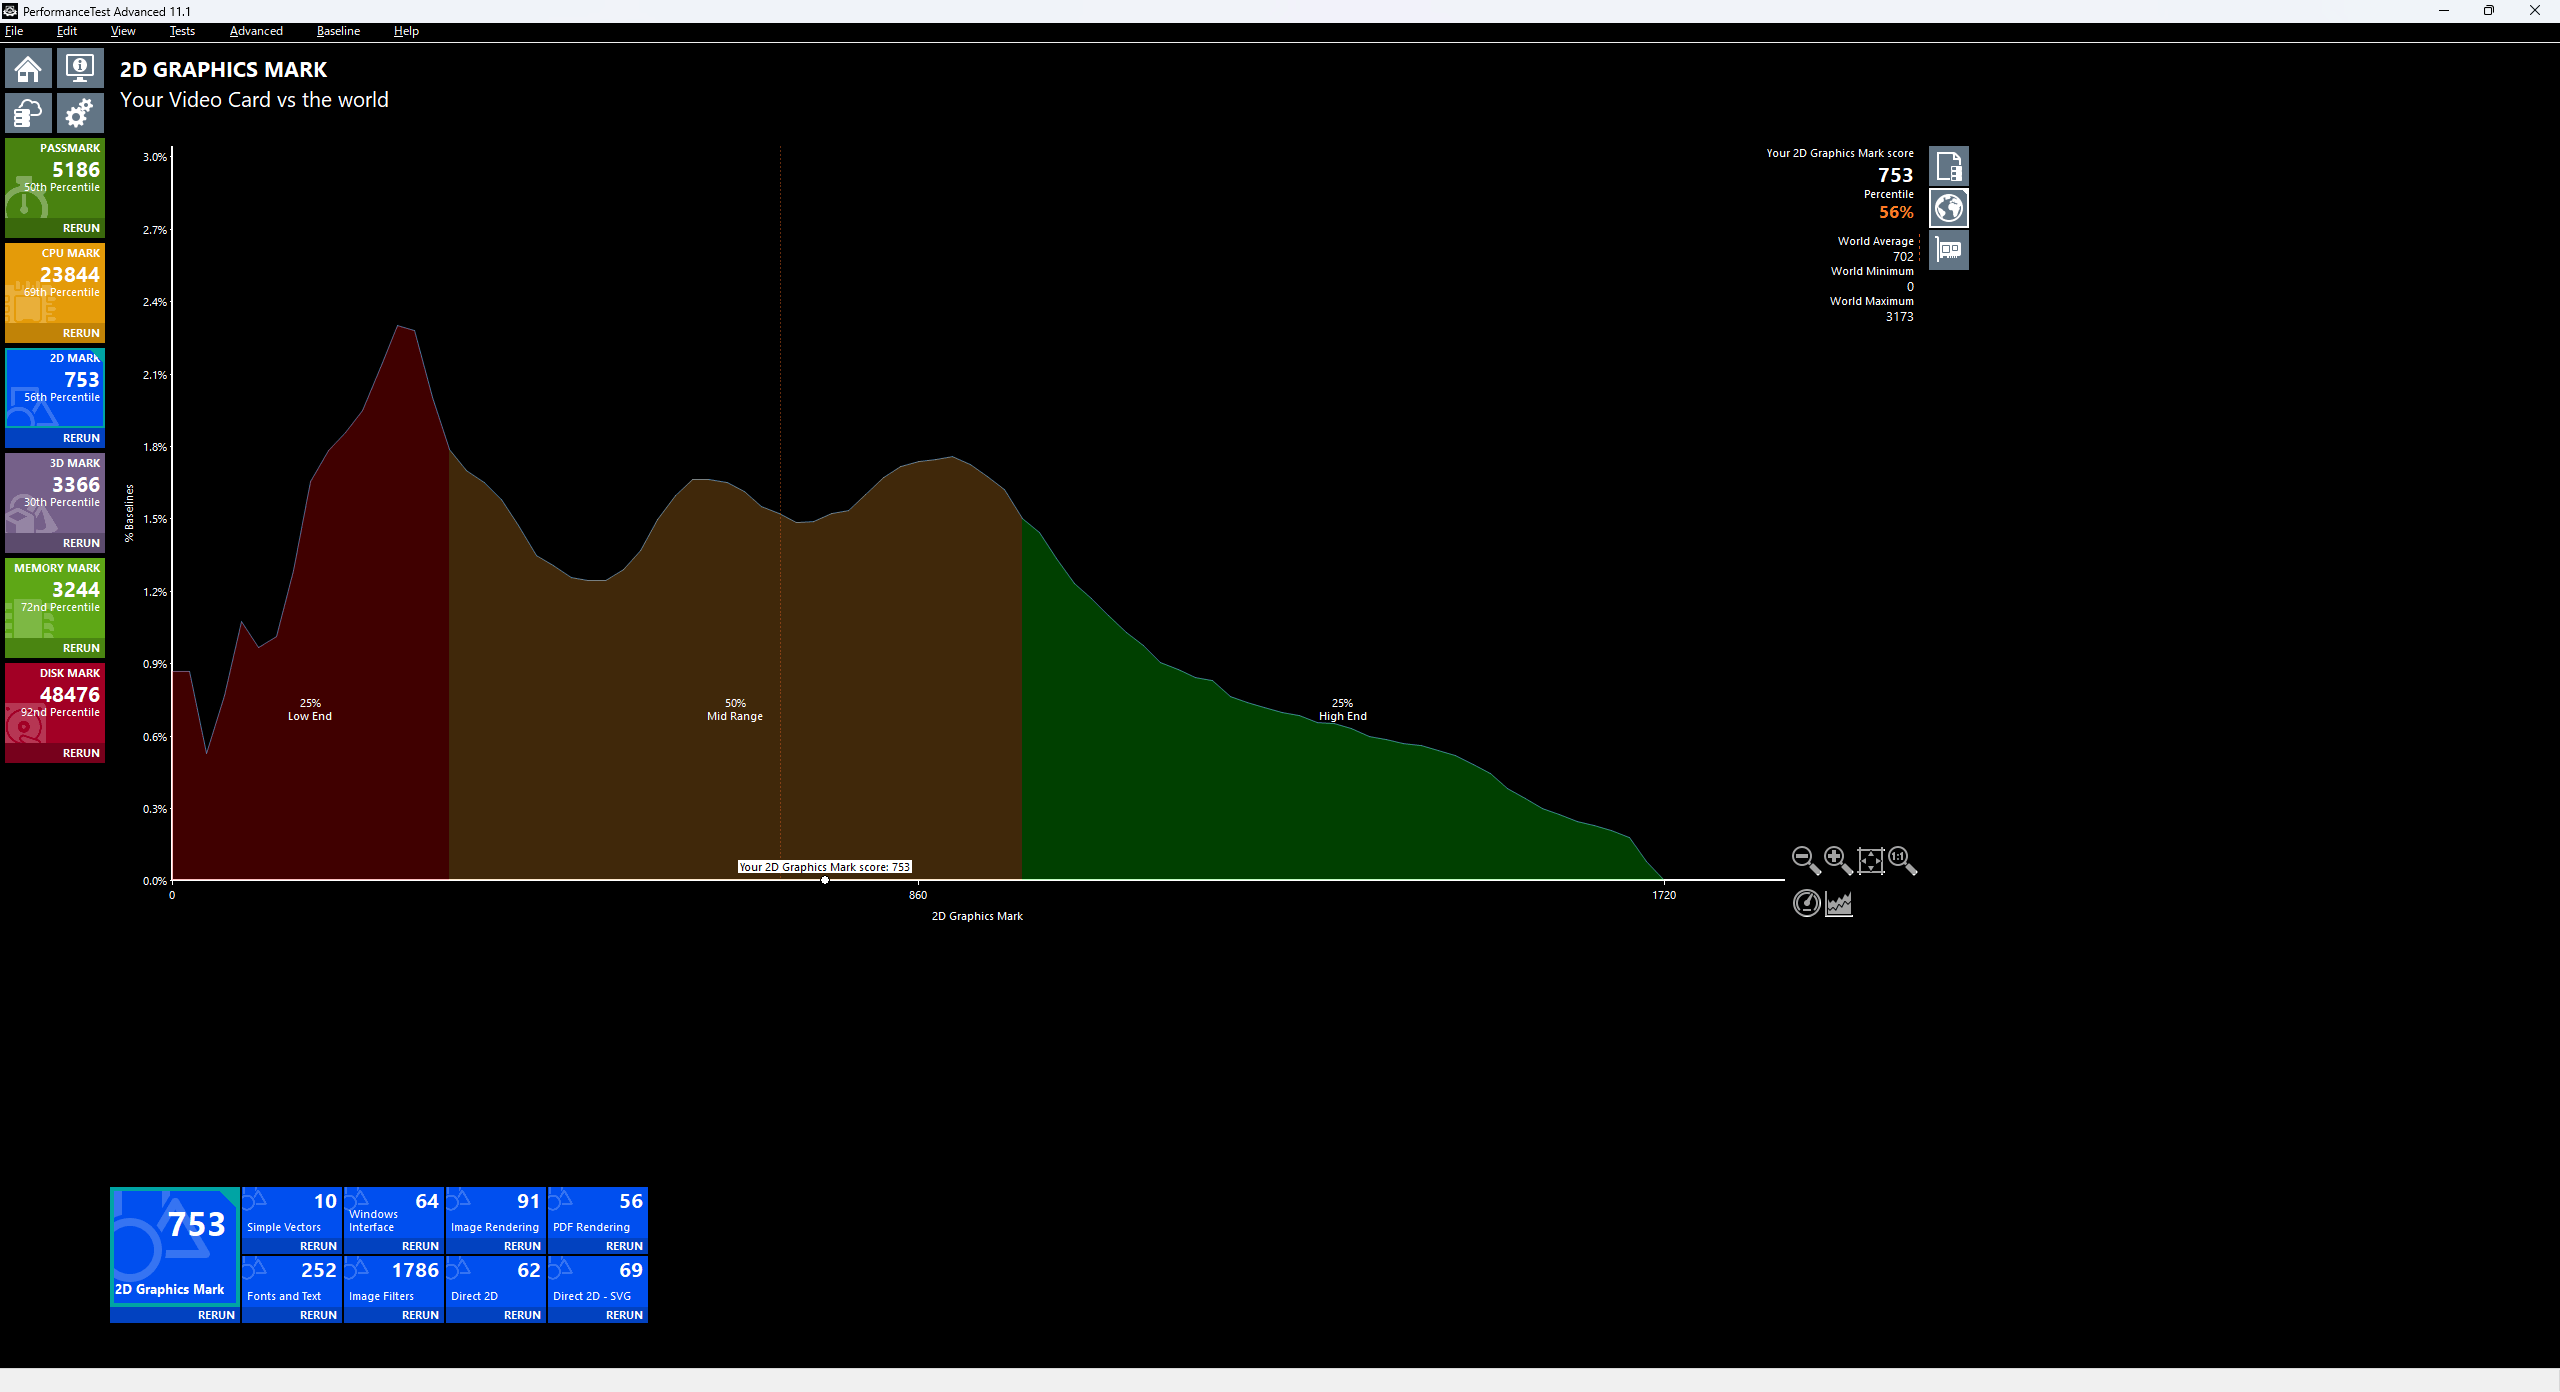
・Passmark PerformanceTest
We compared CPU and GPU performance with users worldwide using '
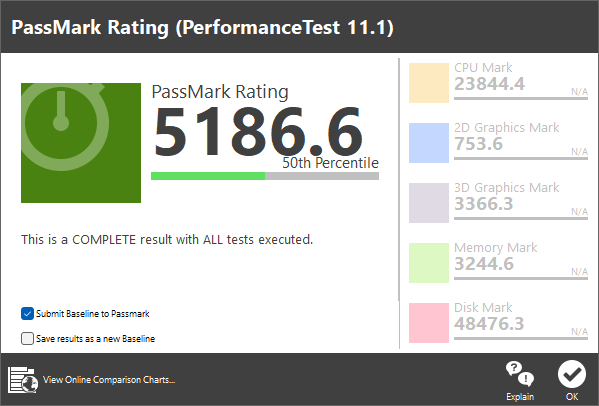
The Passmark rating result is 5186 points, which is 50%, meaning it's exactly average.
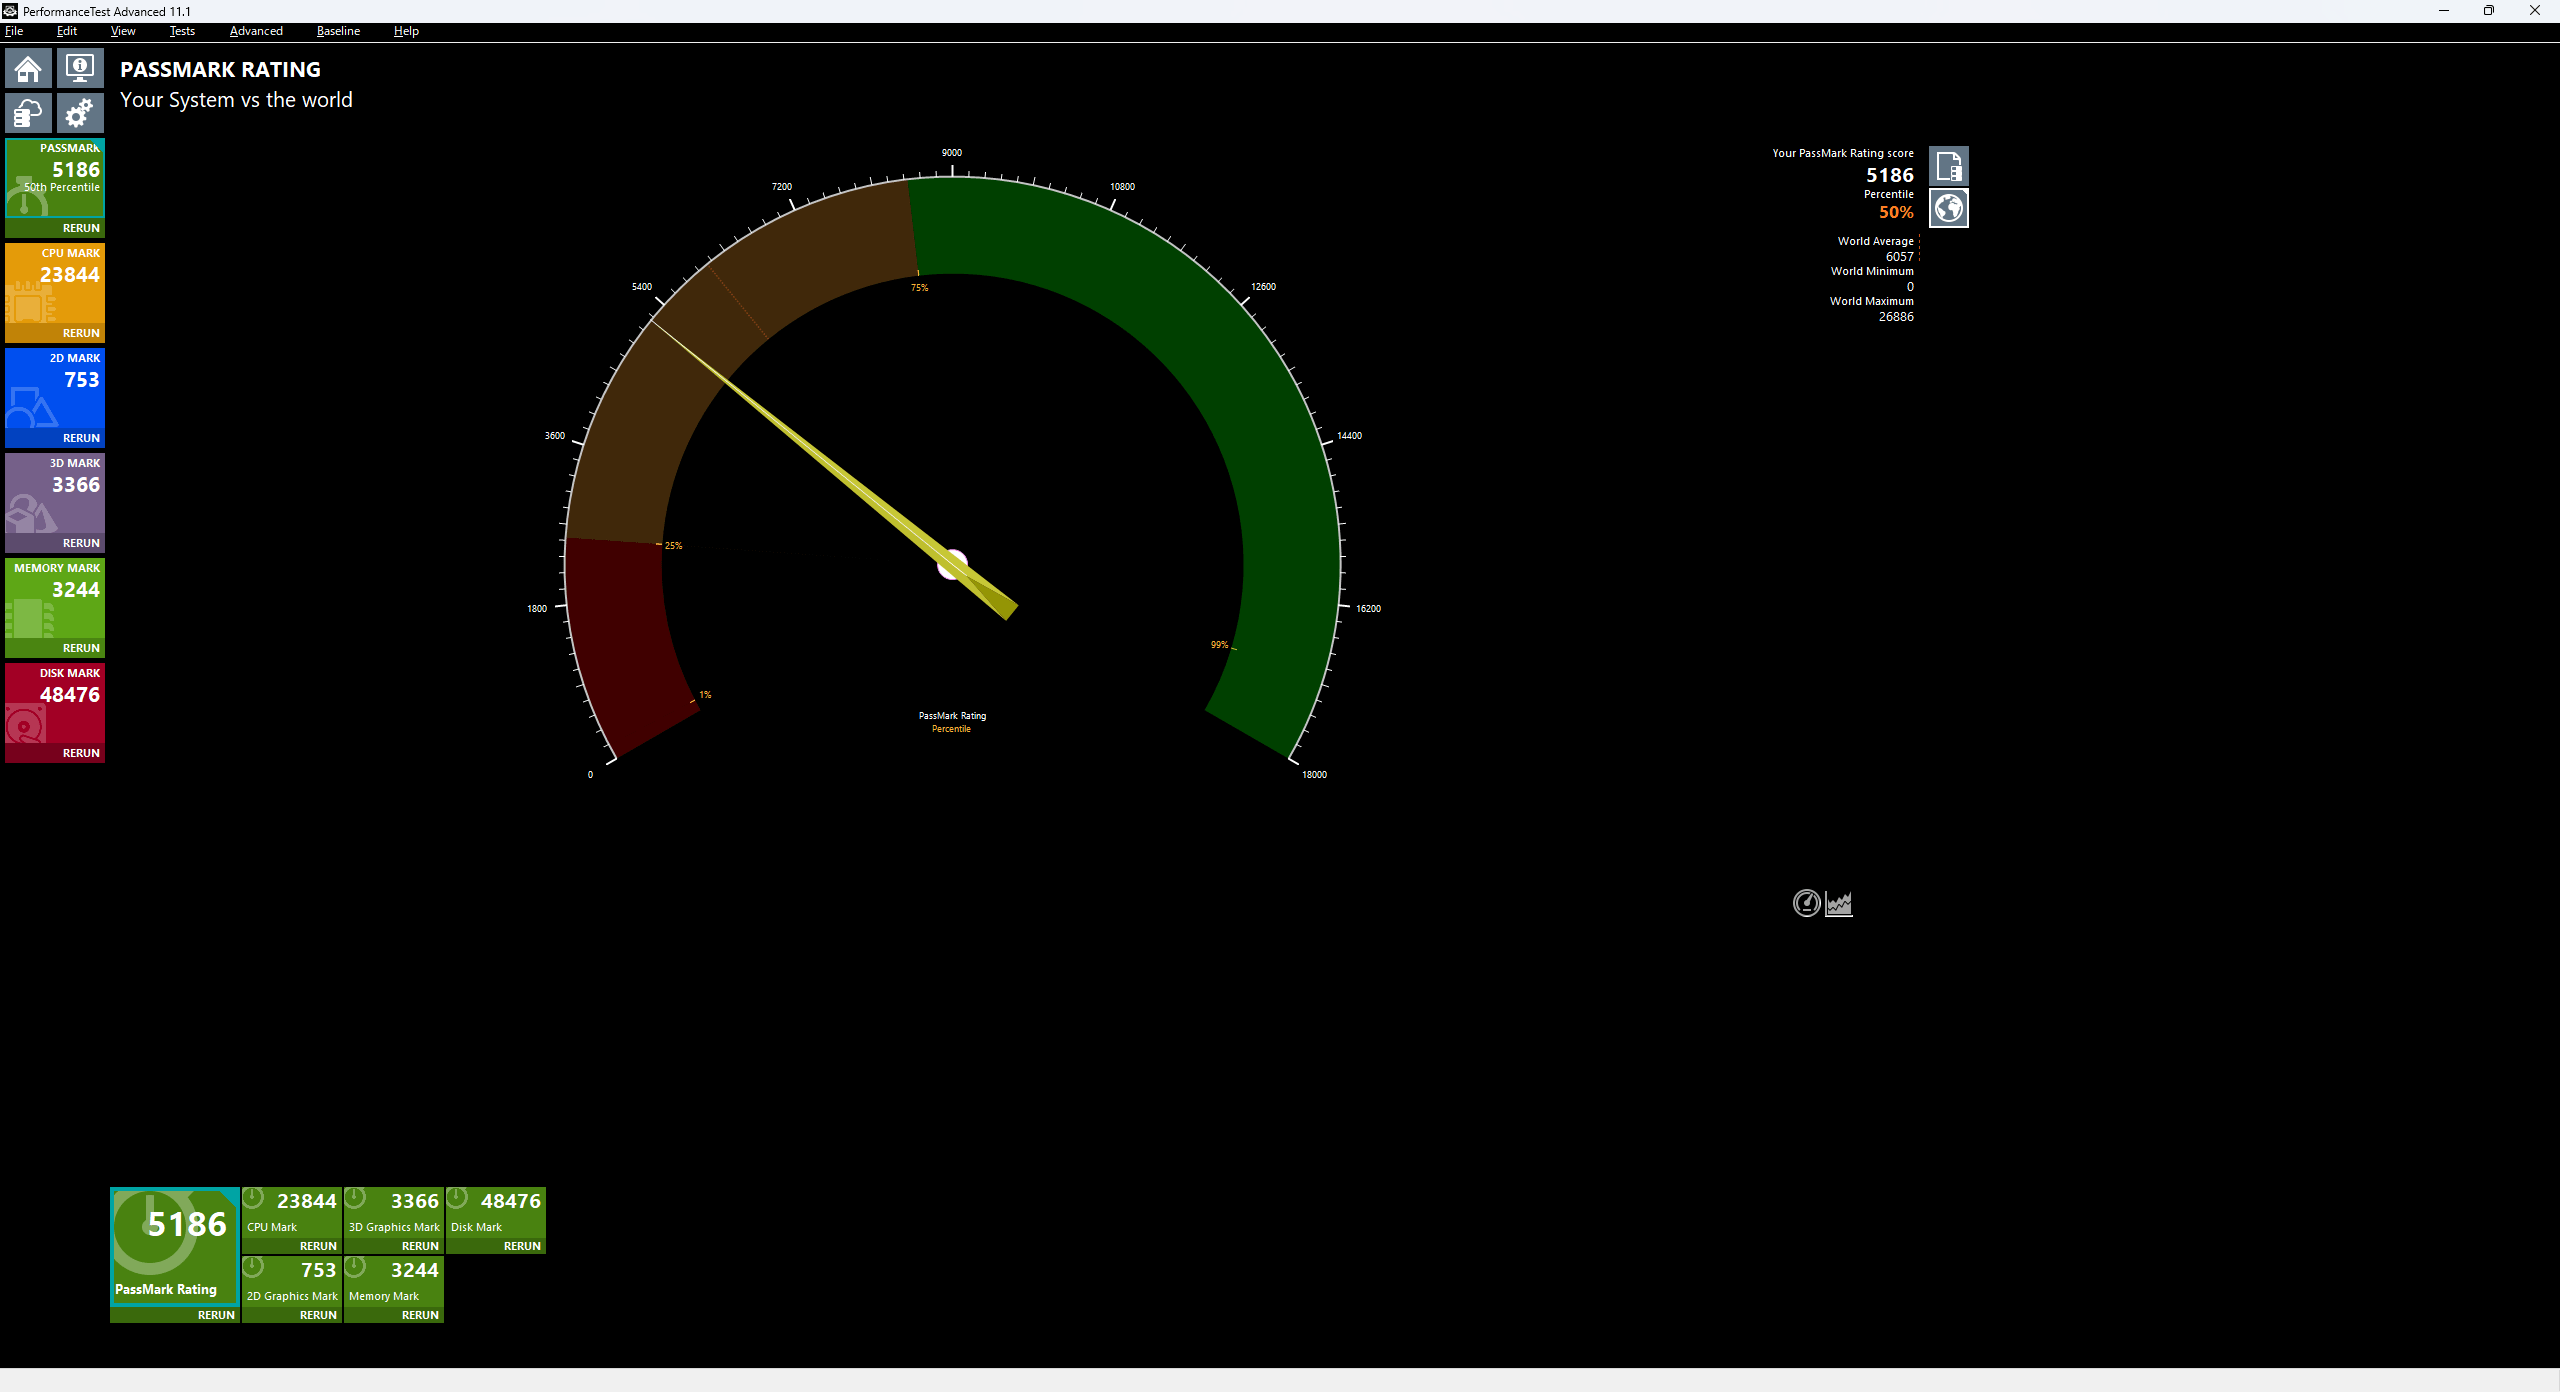
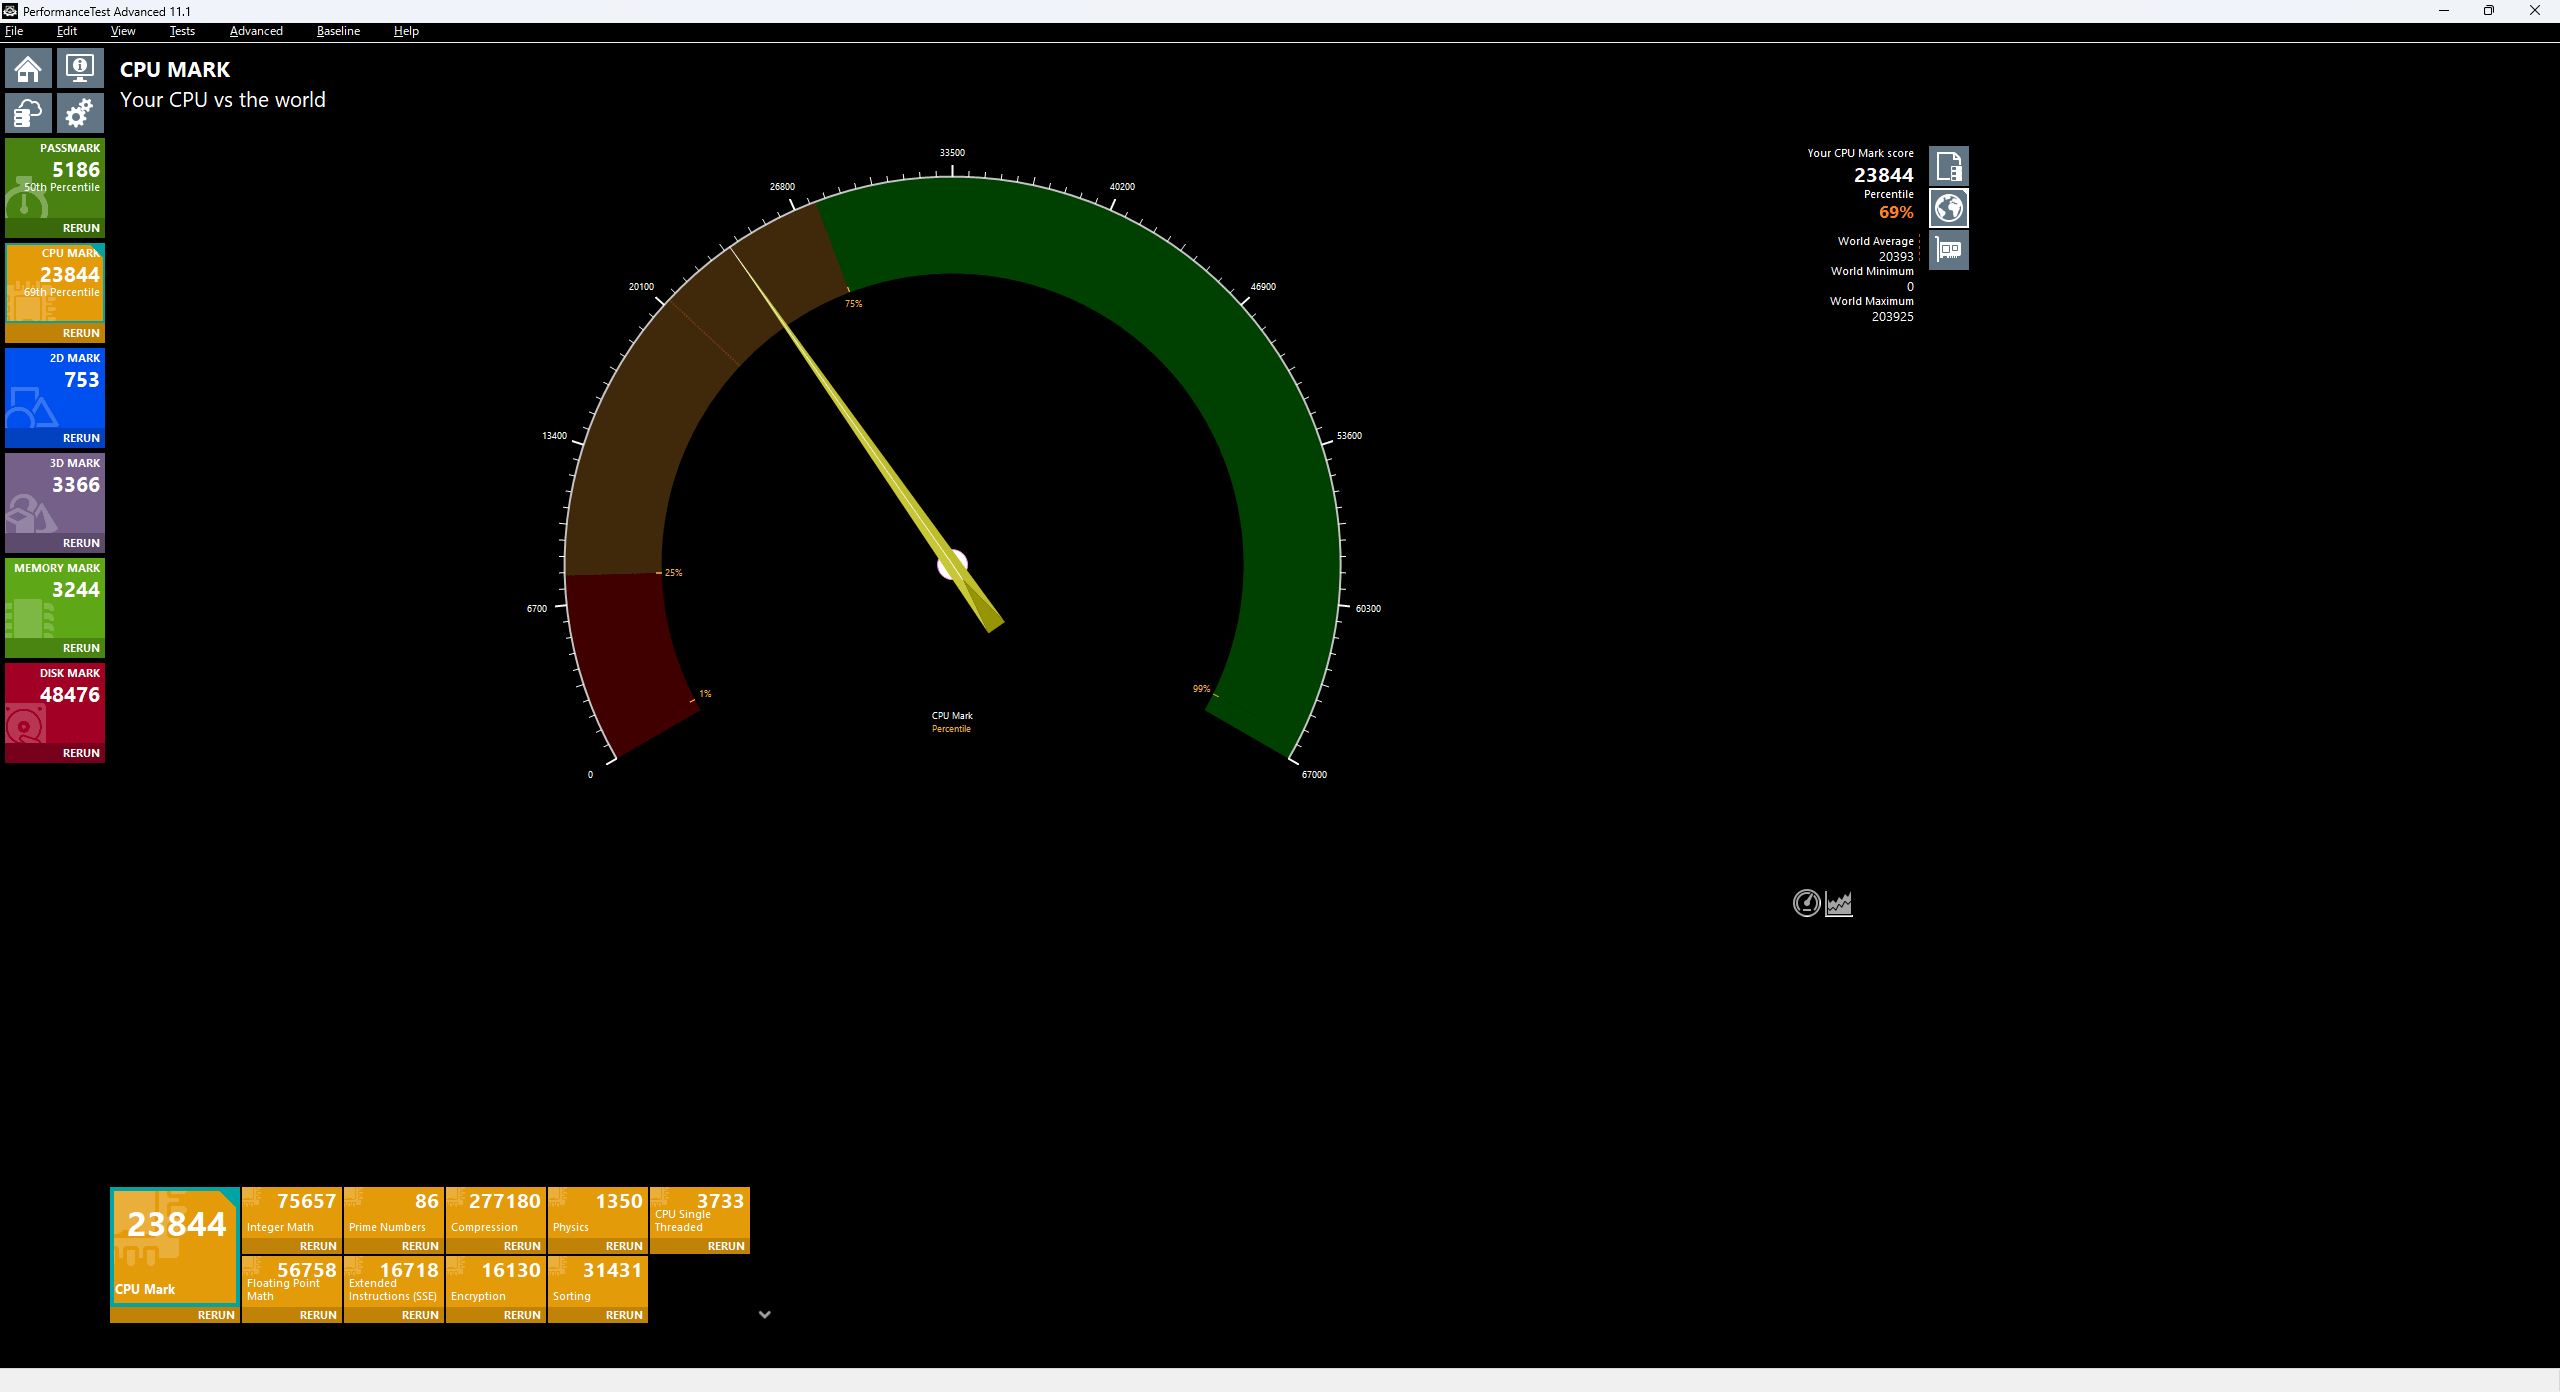
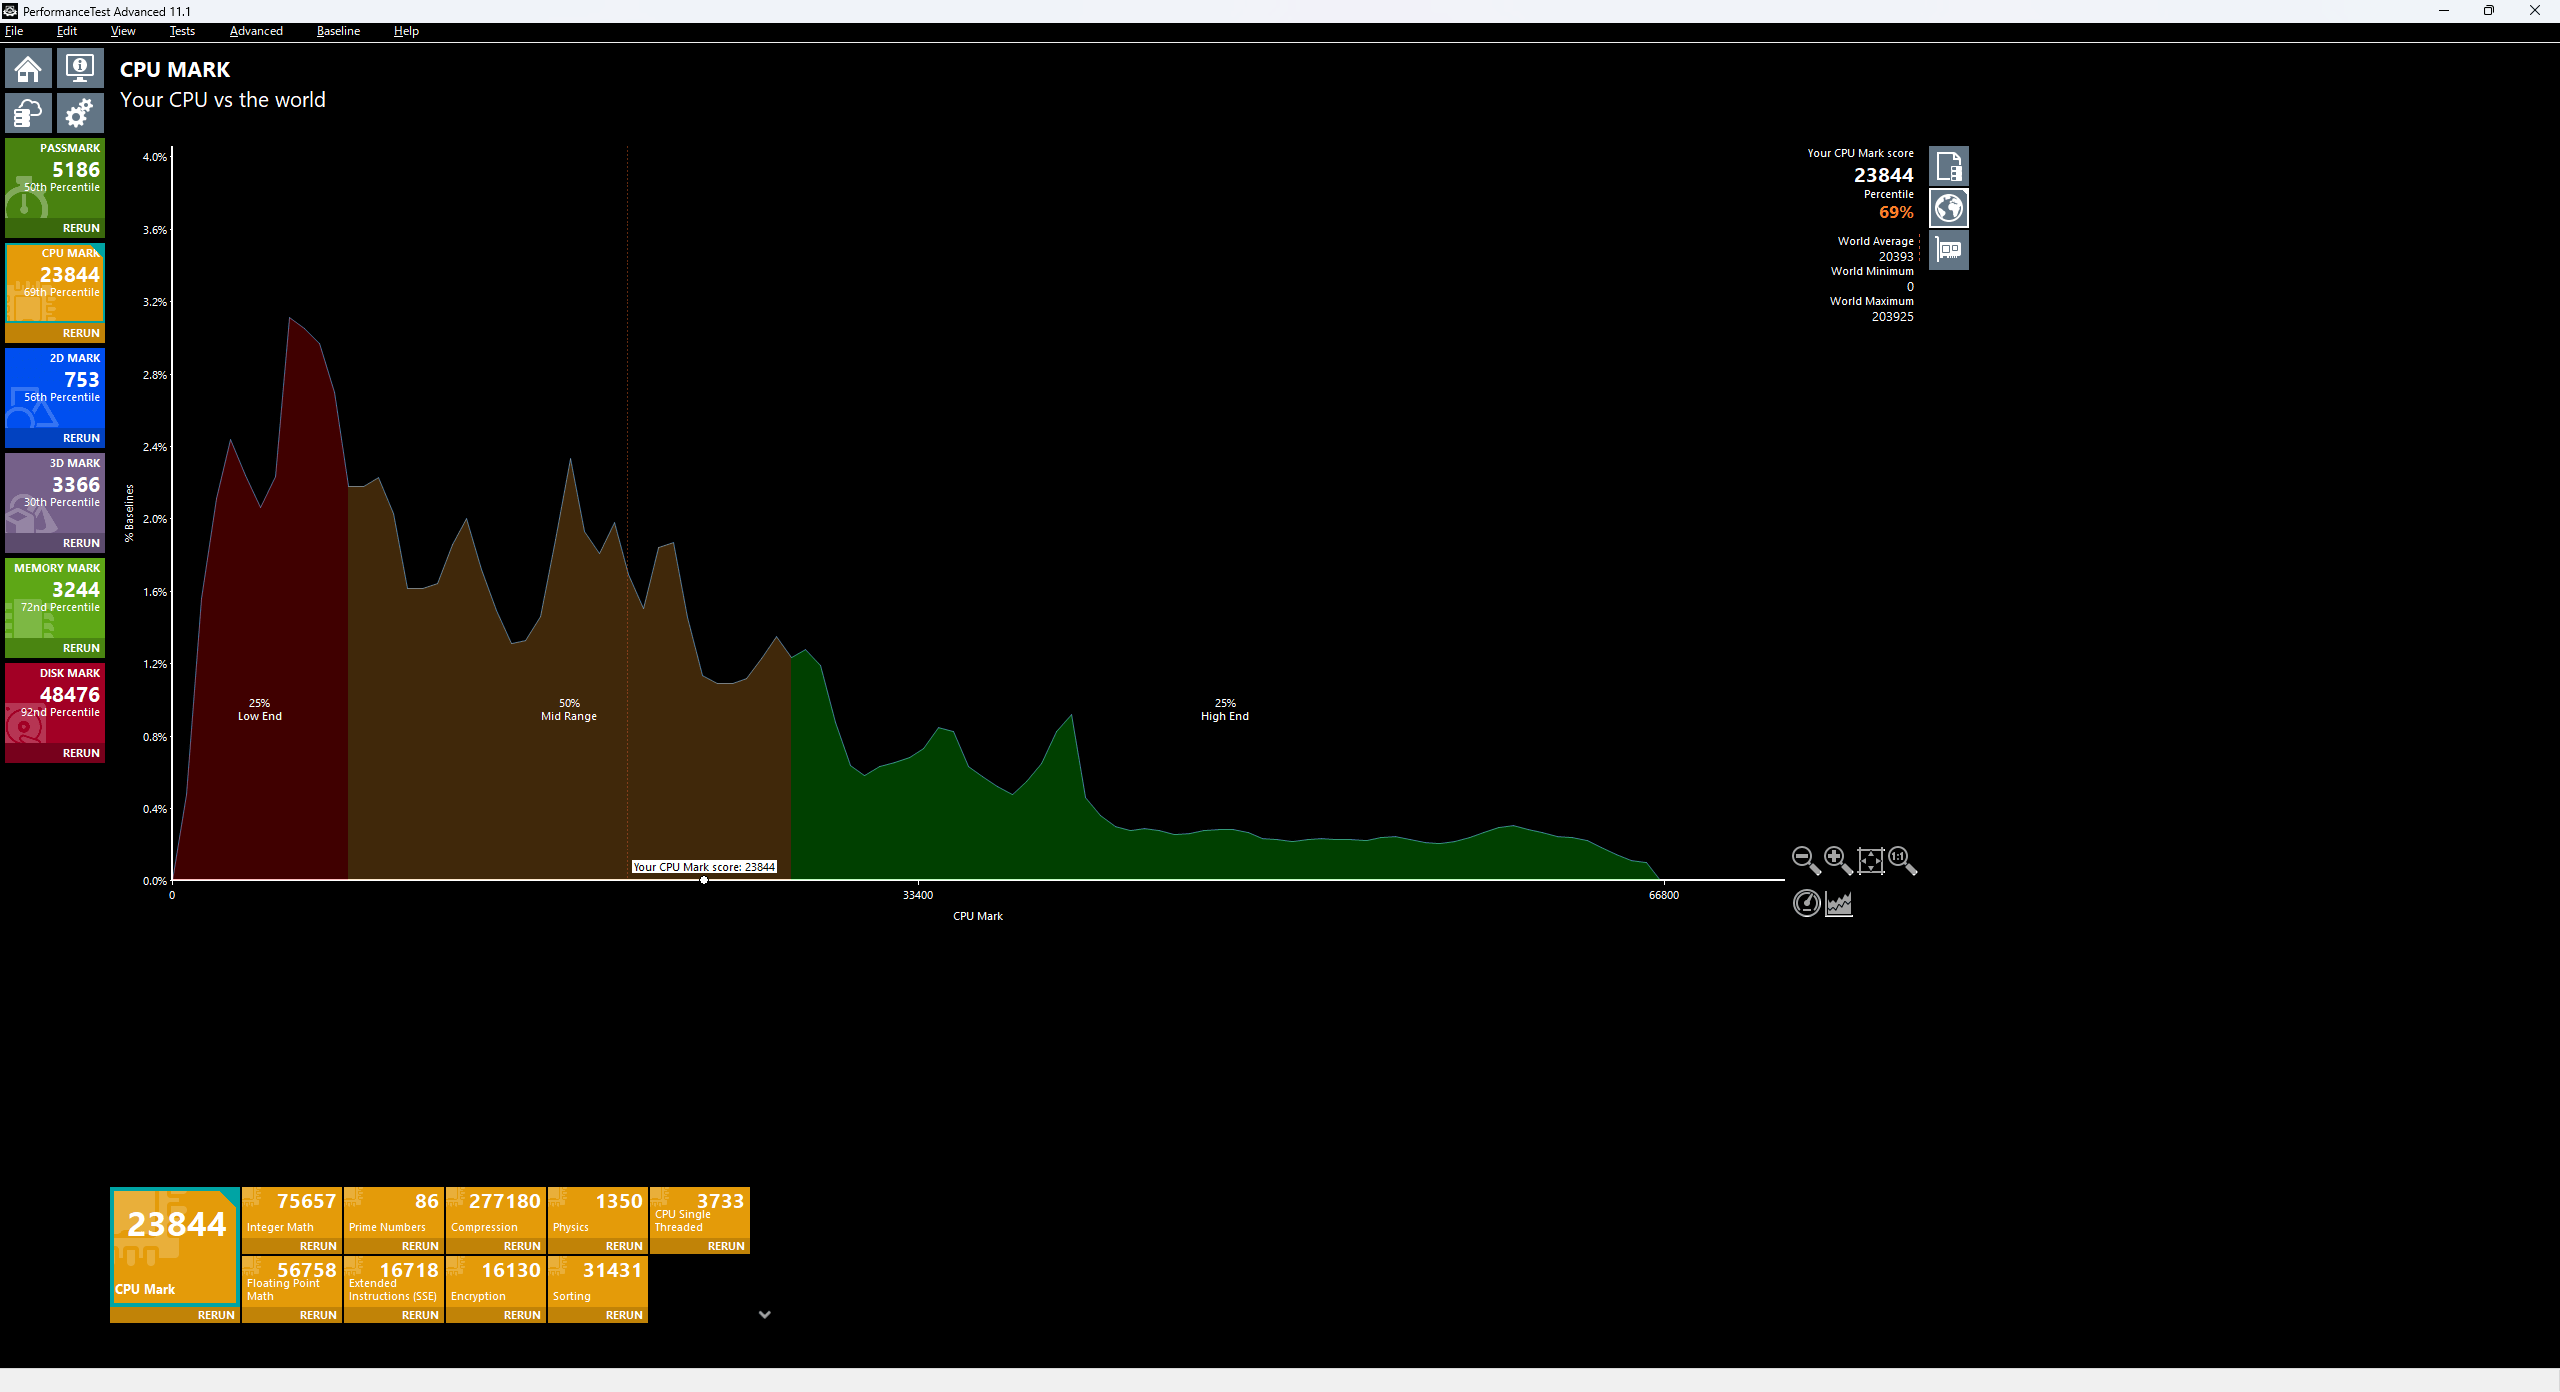
The CPU Mark result was a respectable 23844 score and 69%.
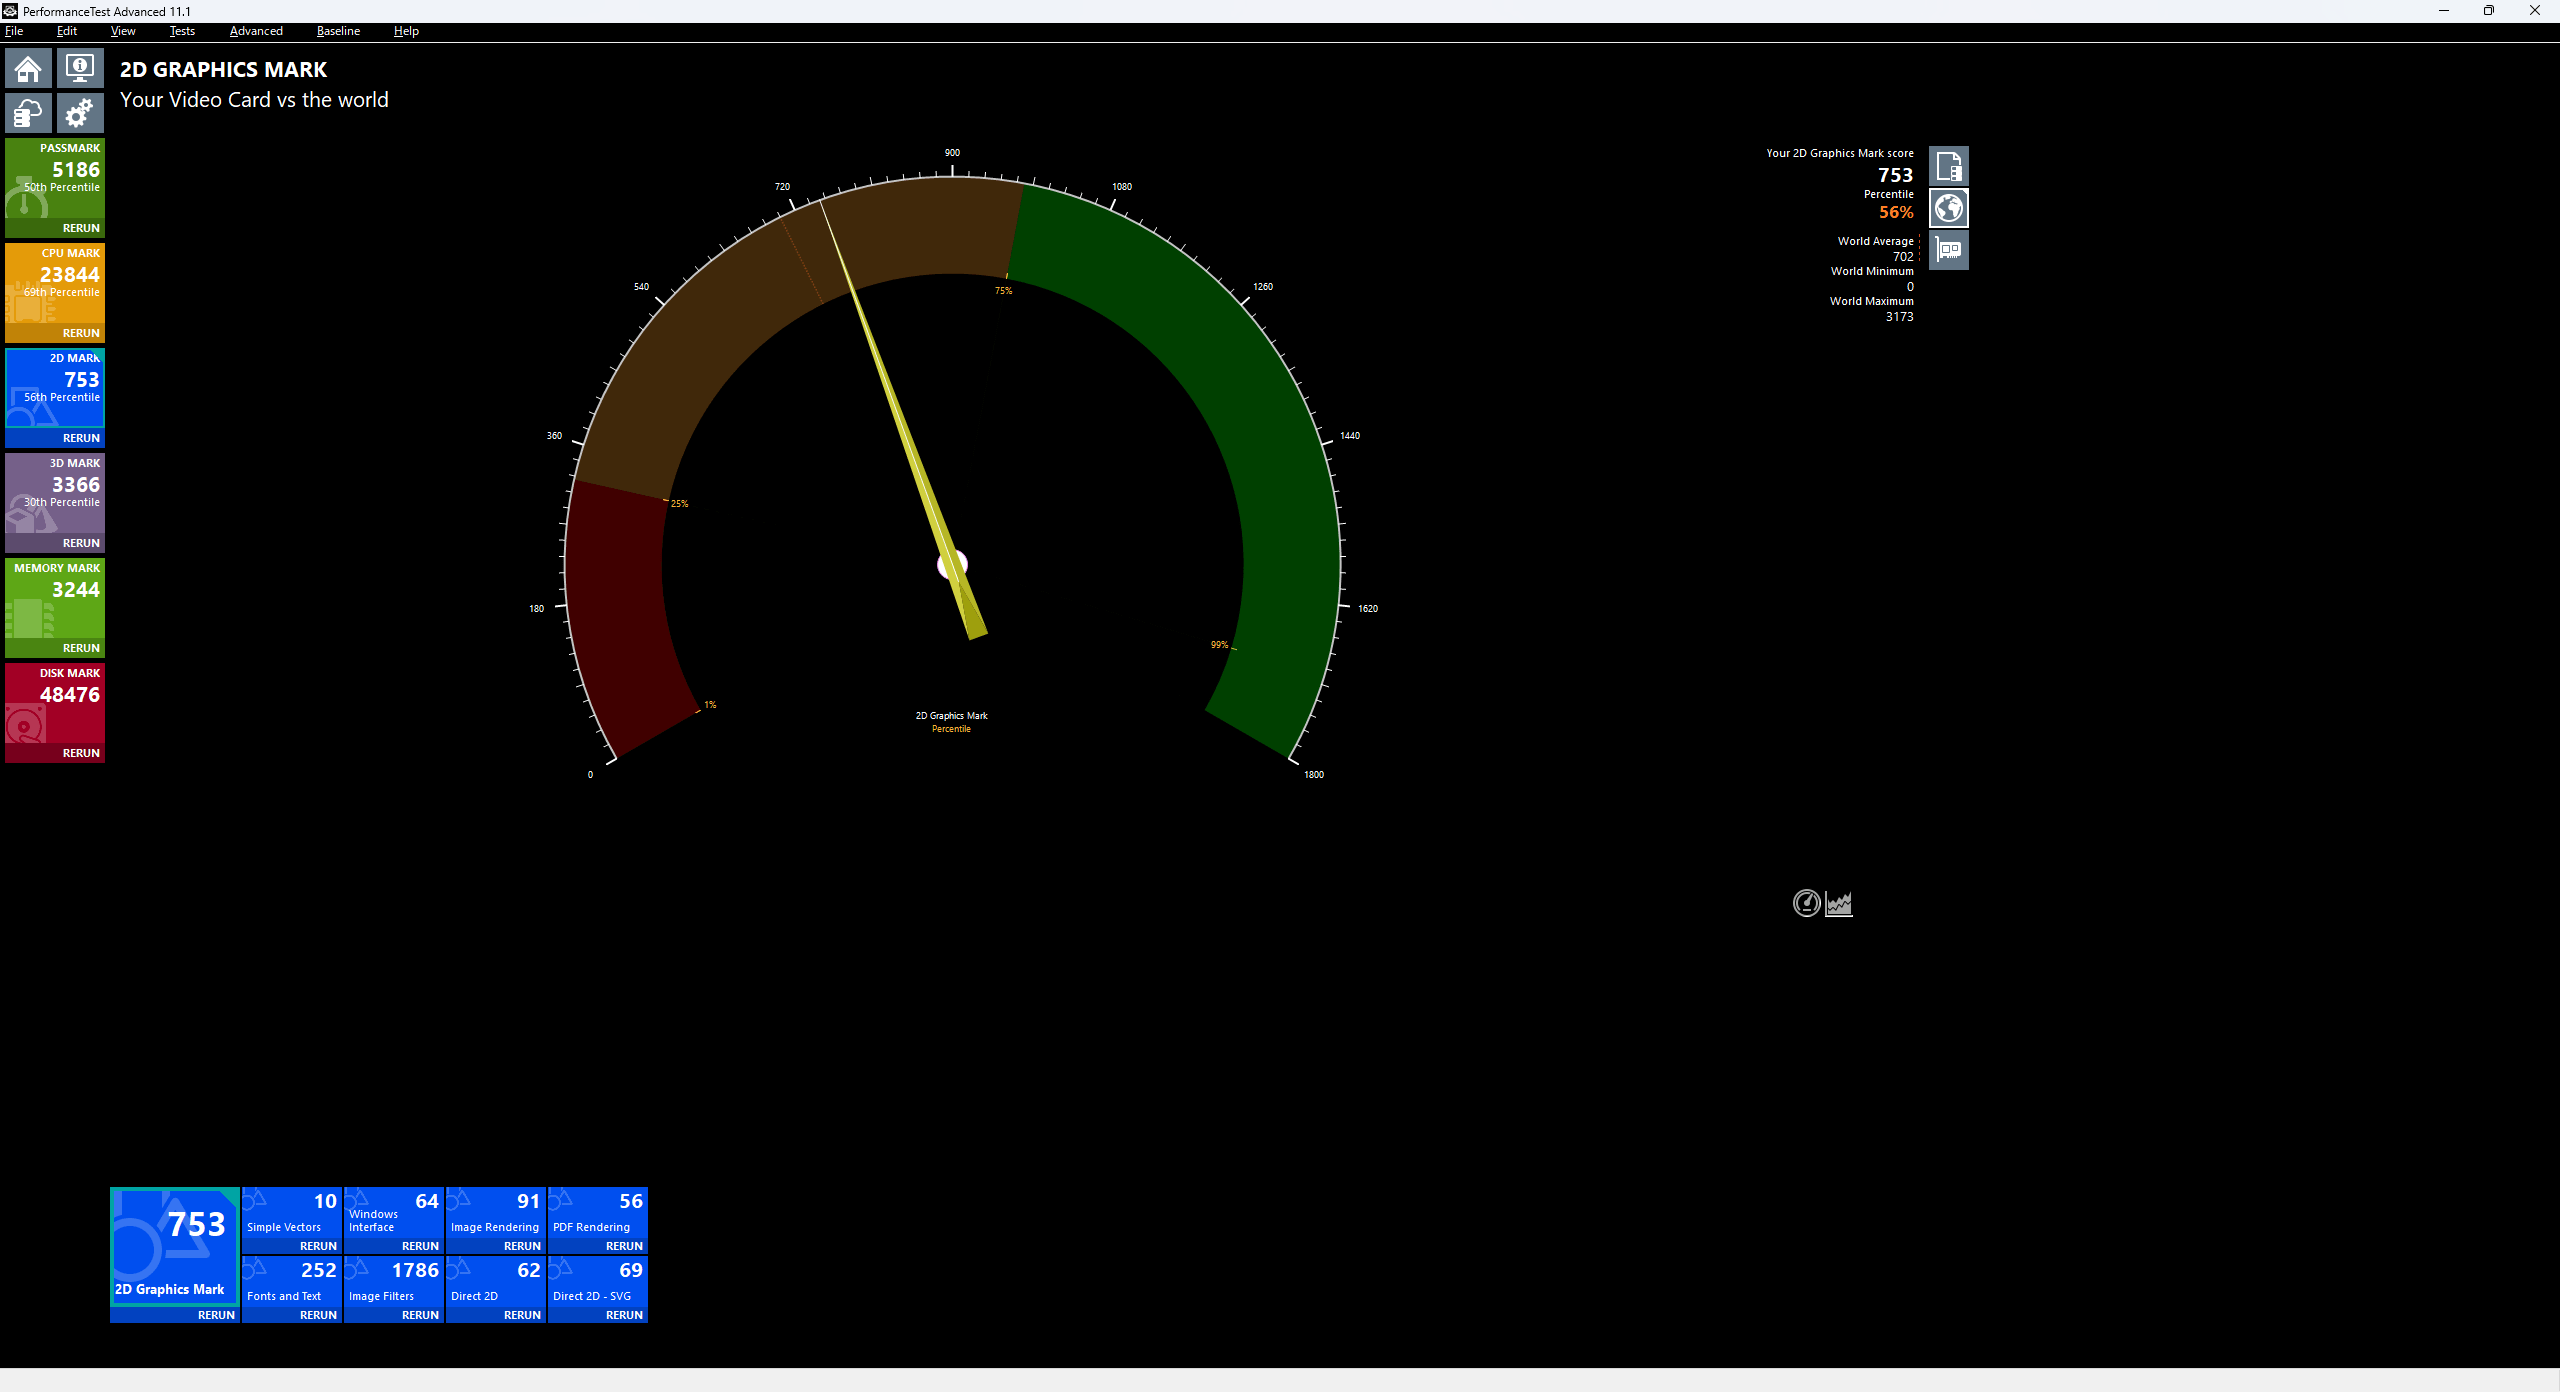
The 2D Graphics Mark result was 753 points, which is close to average at 56%.
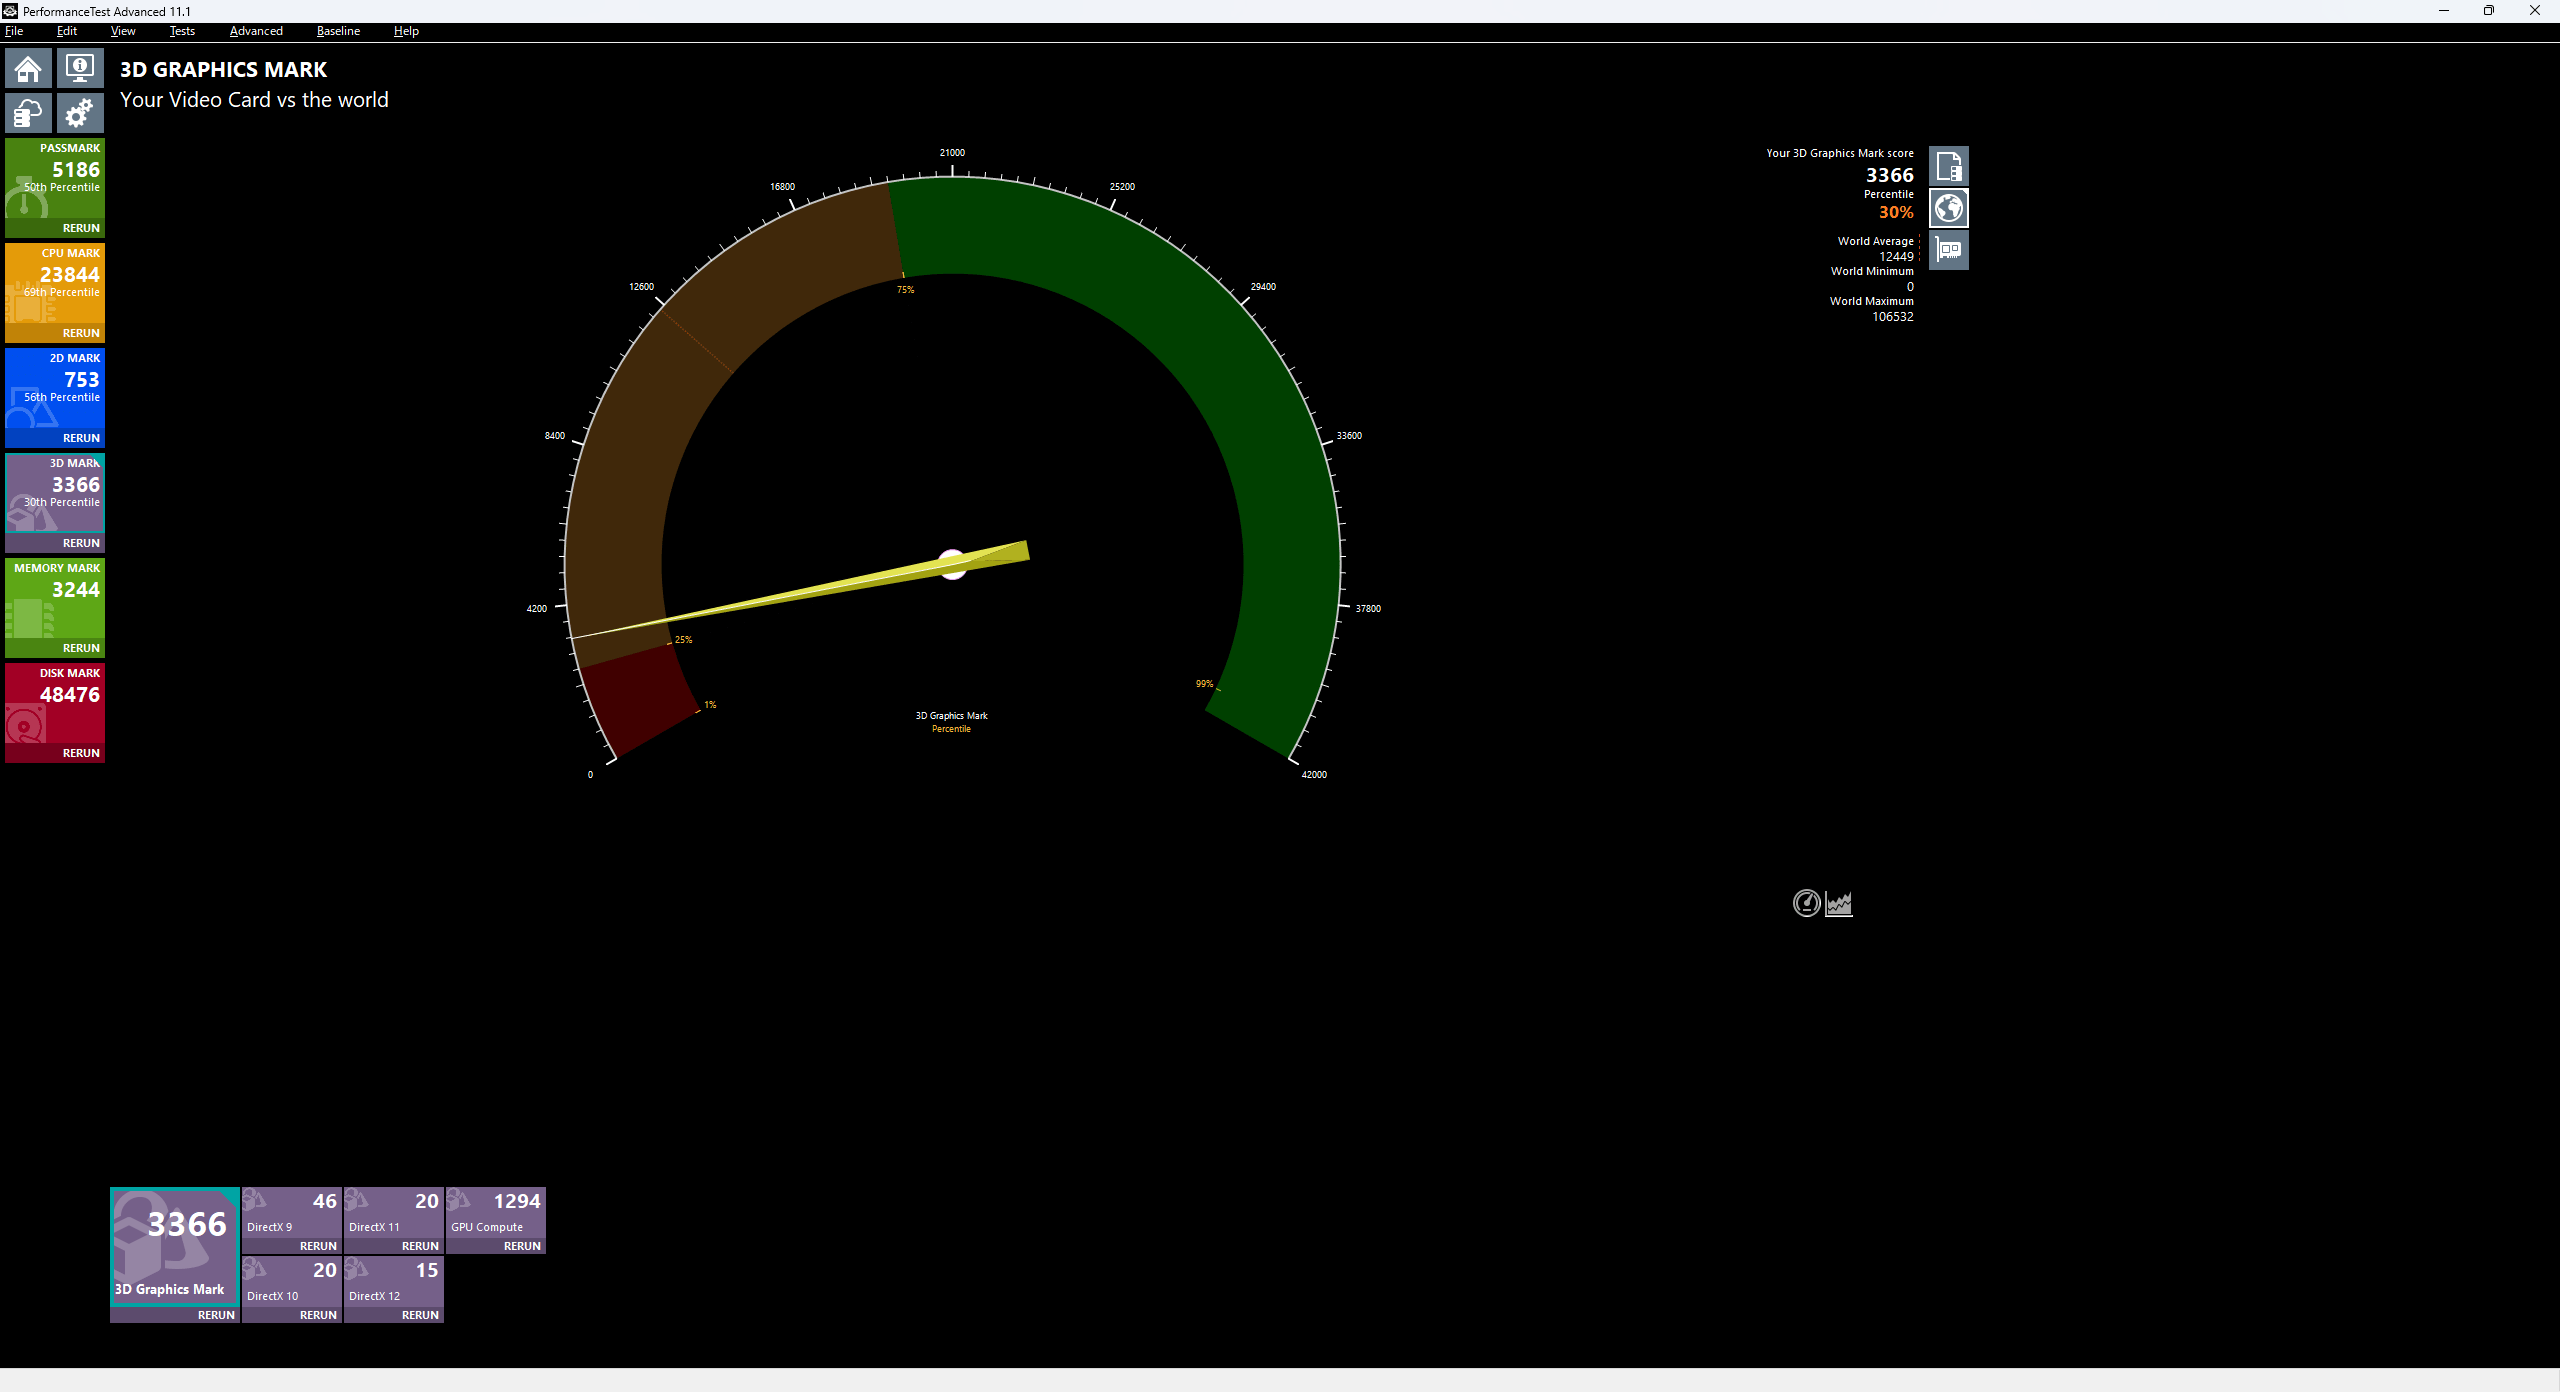
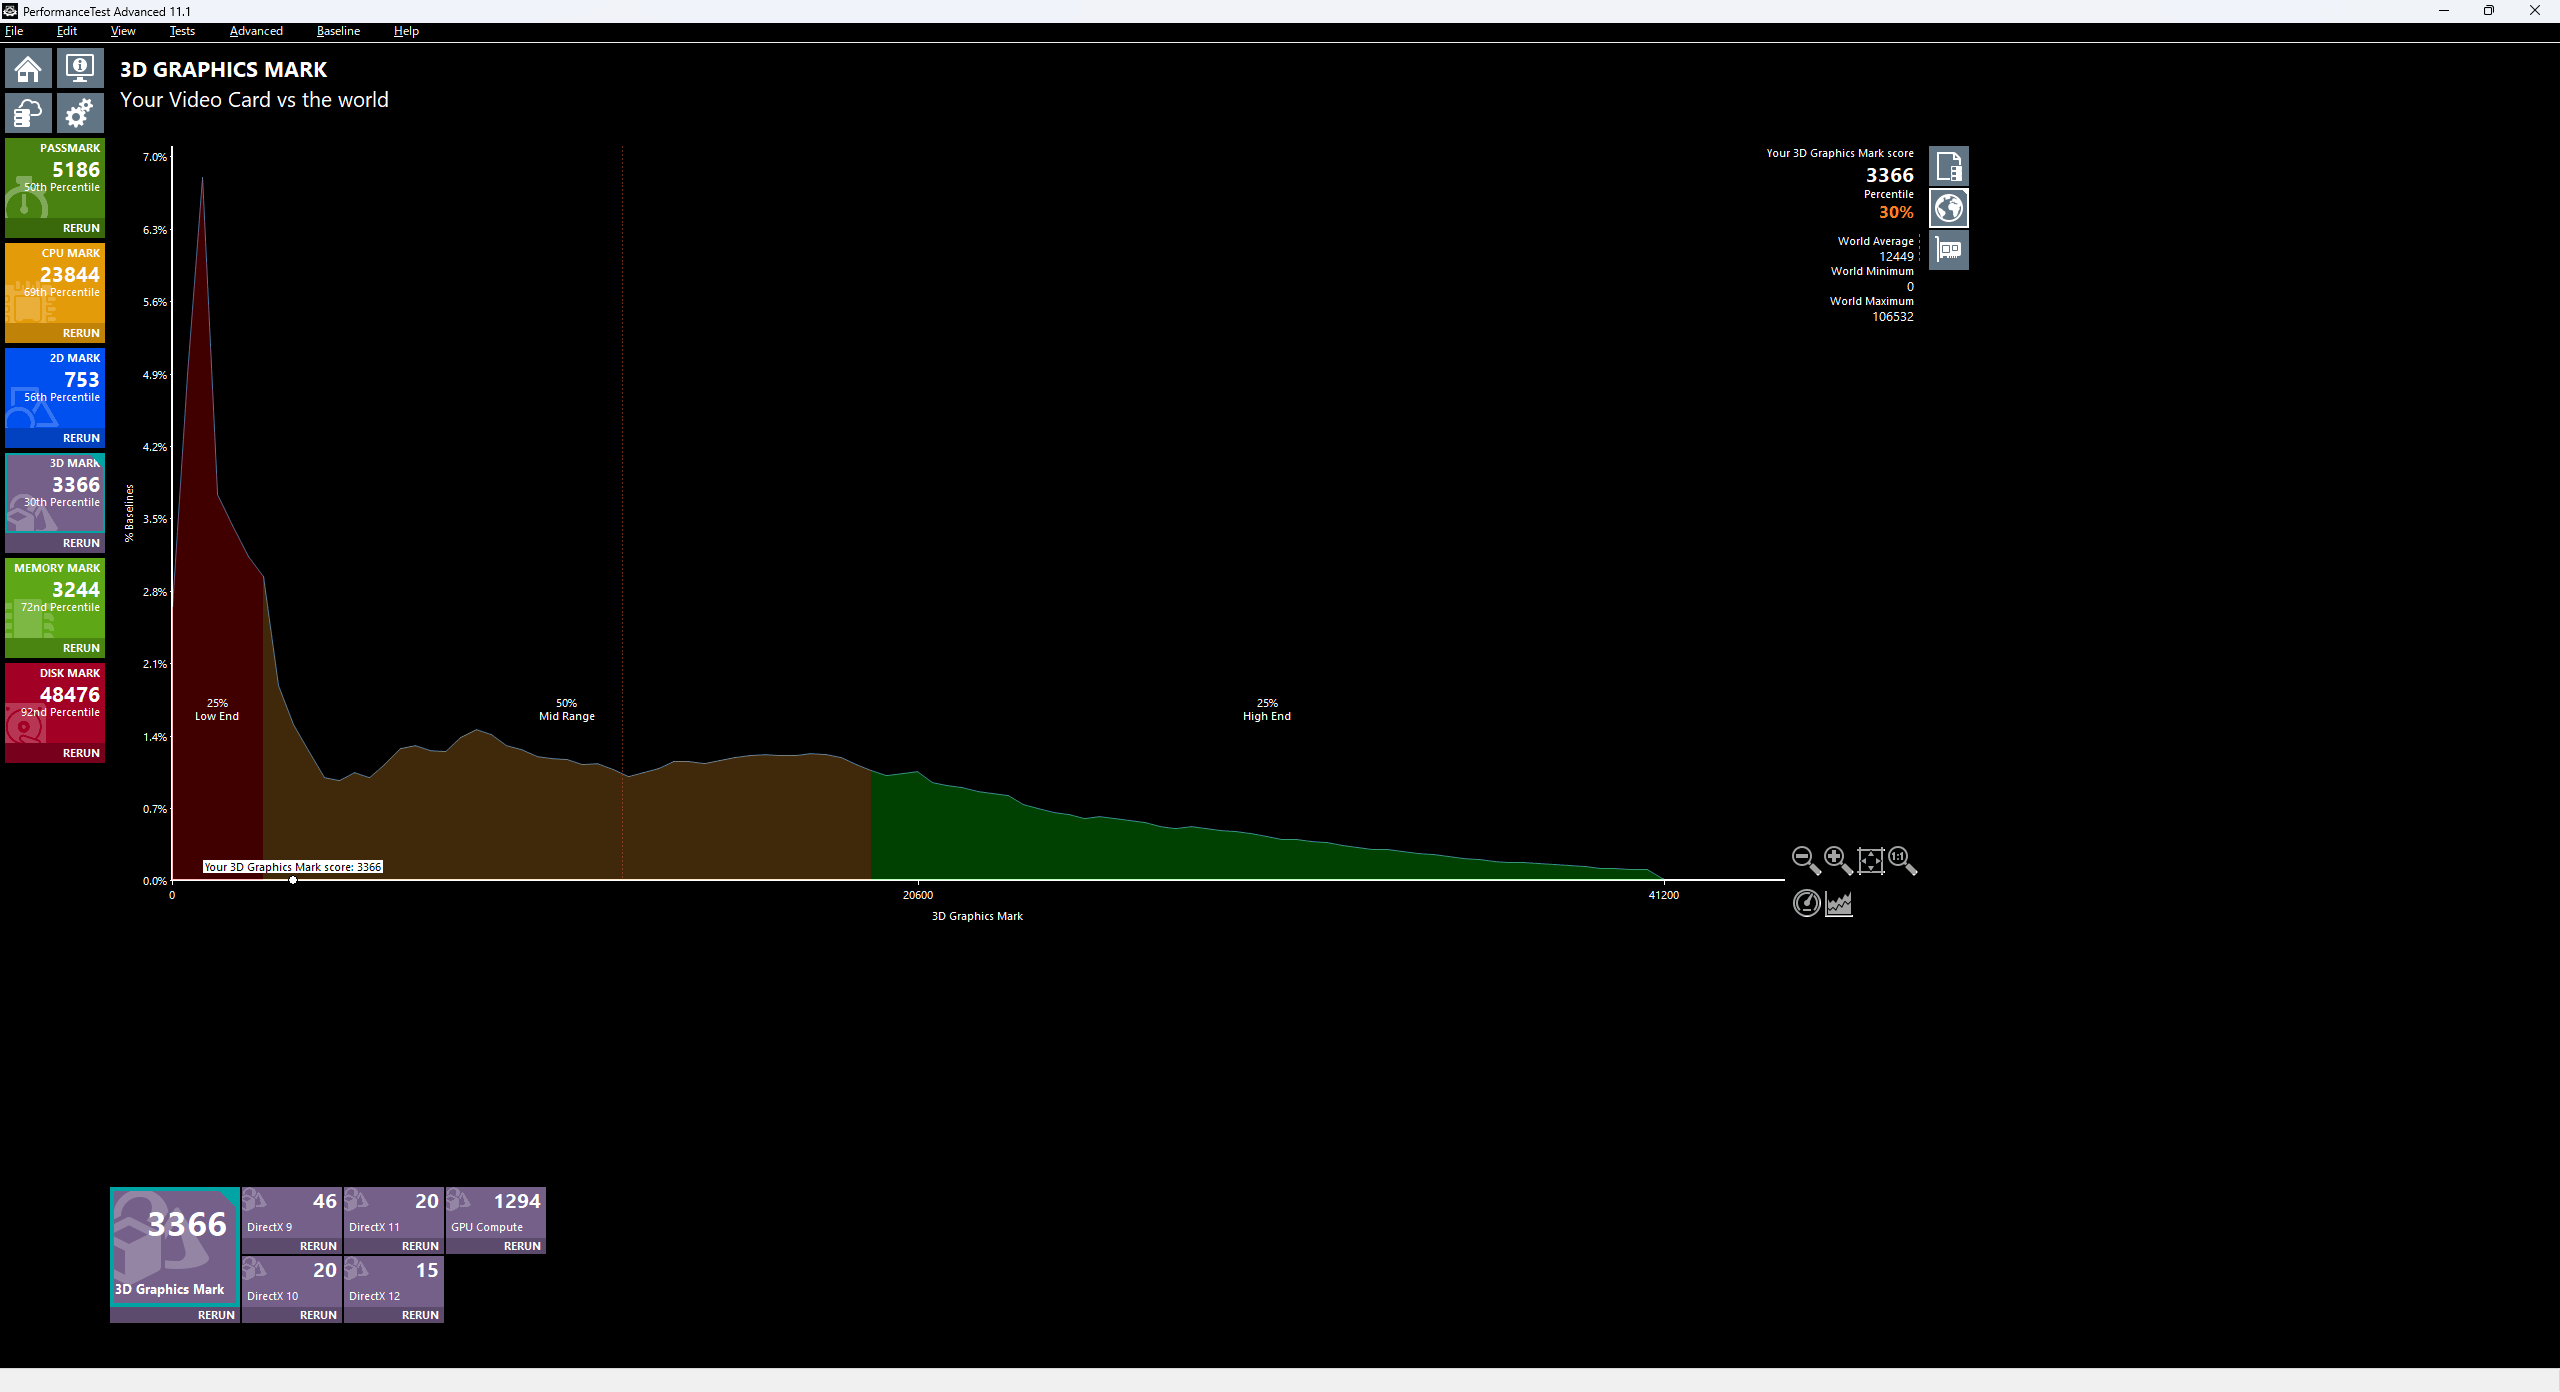
The 3D Graphics Mark result was a score of 3366, which is significantly below average at 30%.
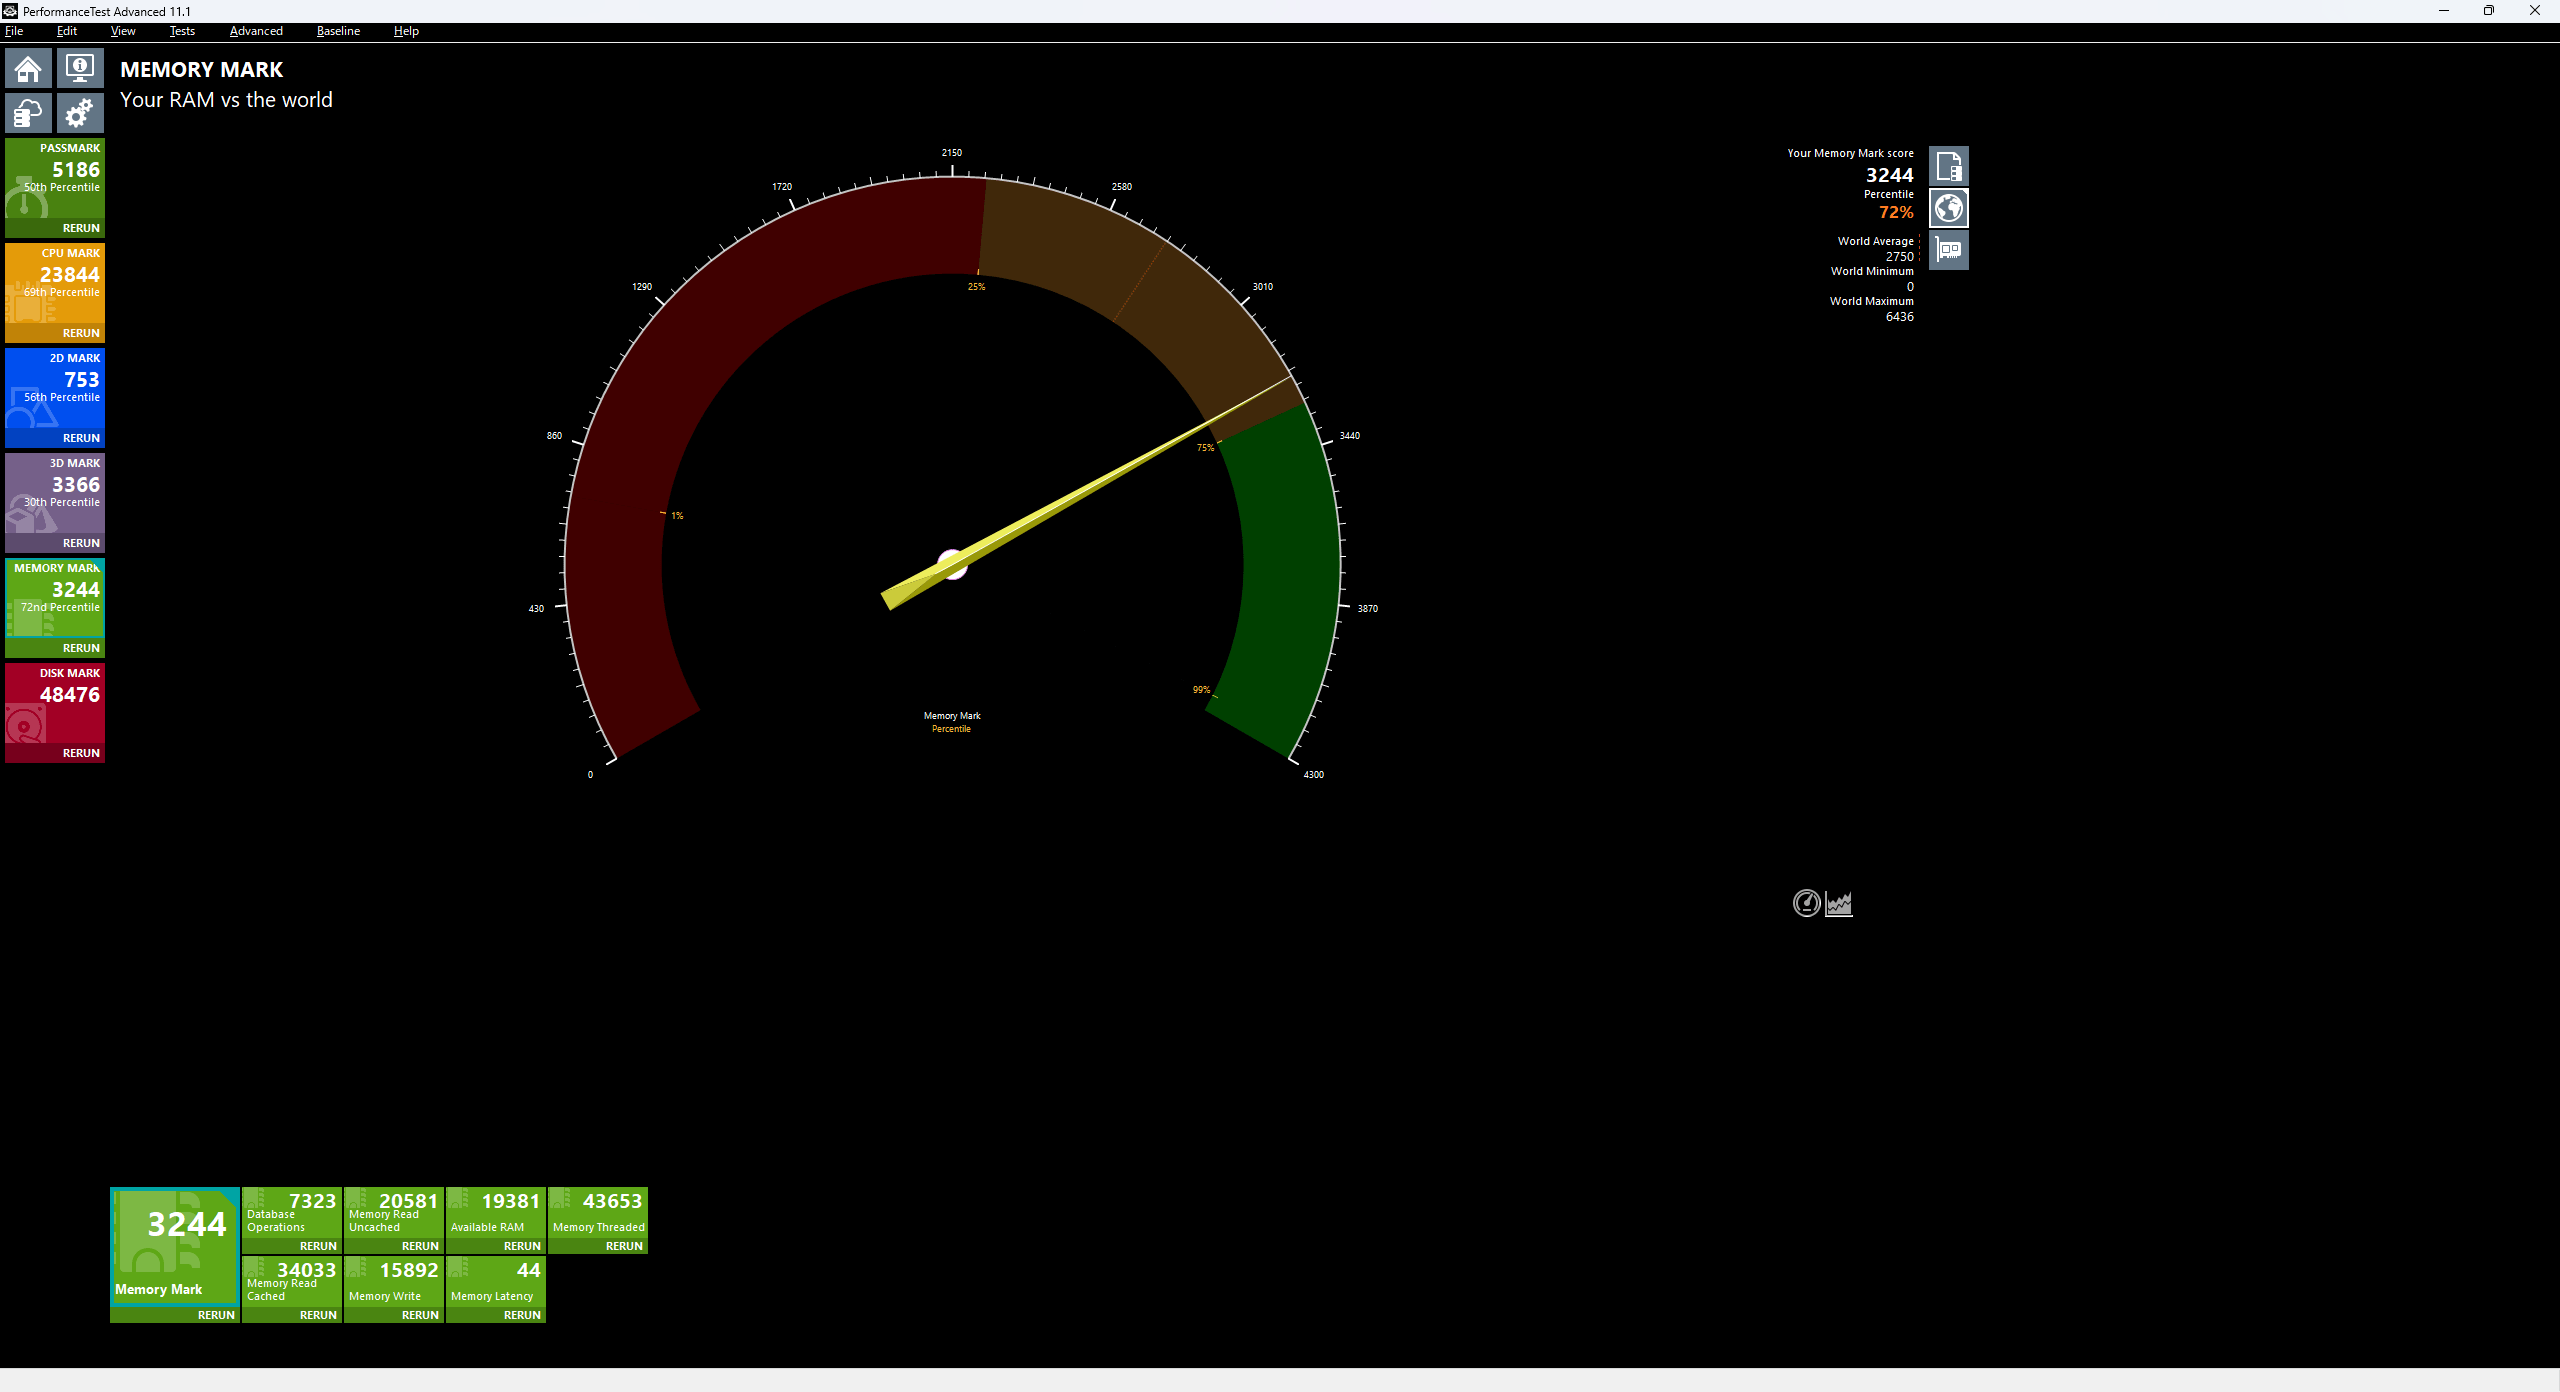
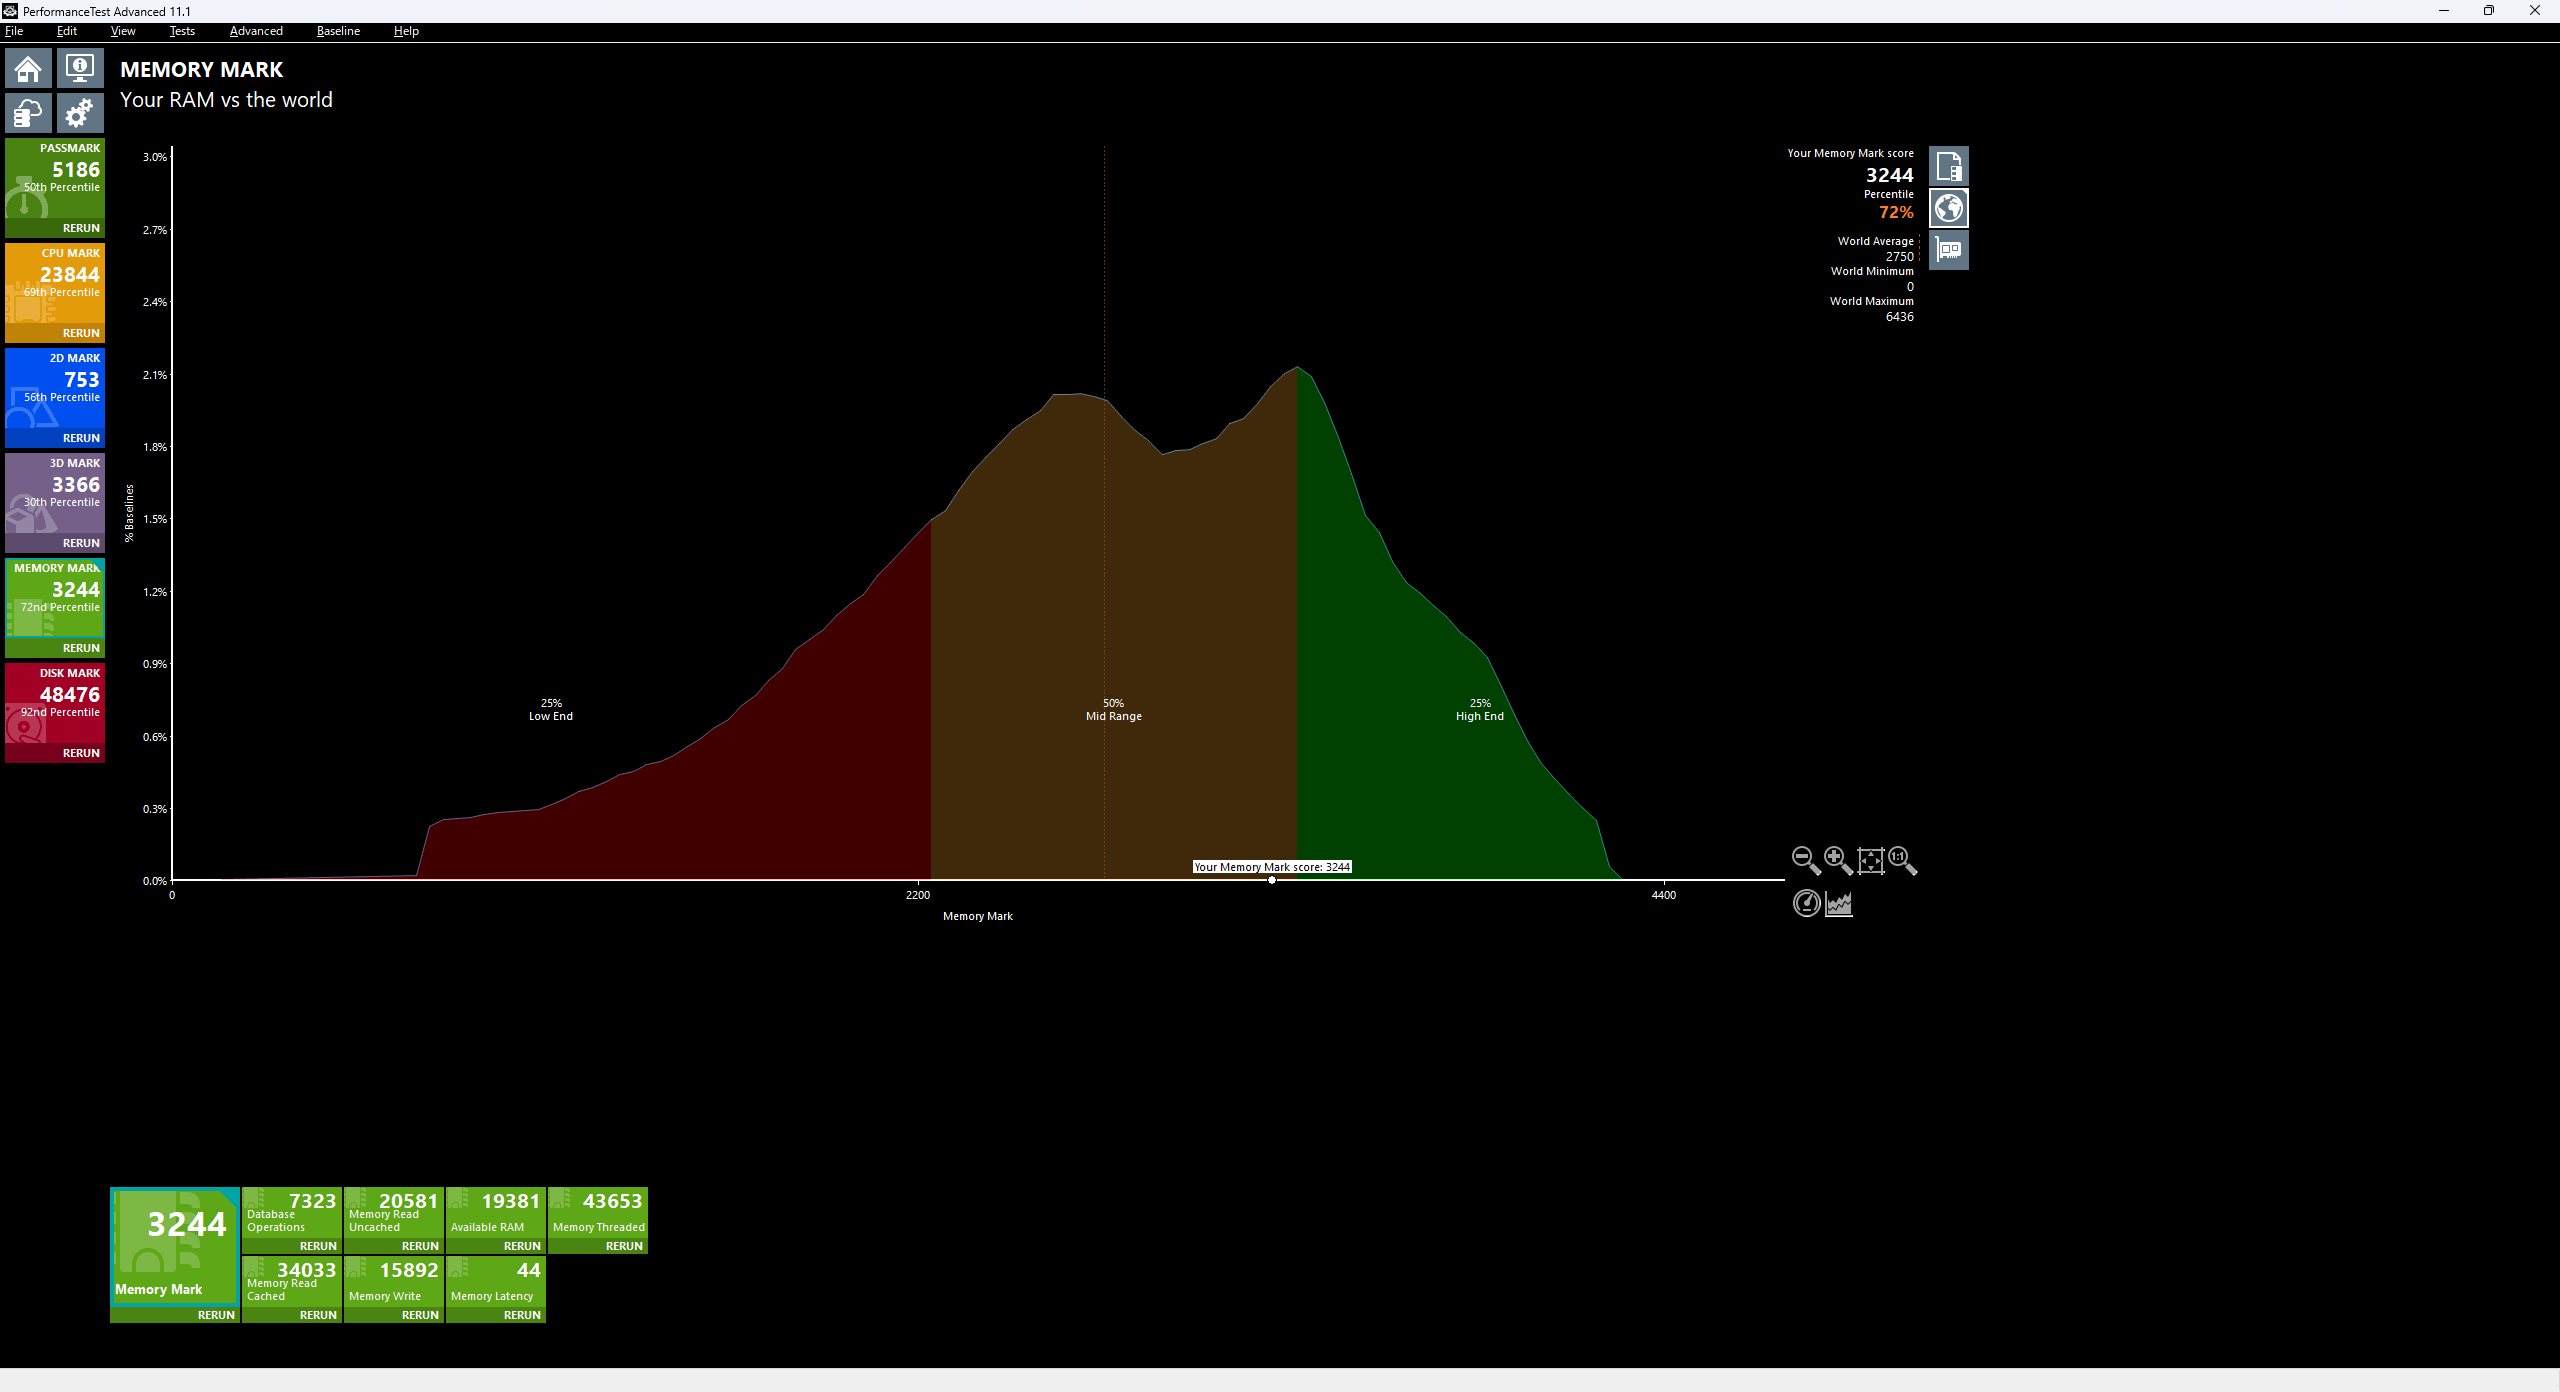
The Memory Mark score was 3244, which is 72%, and is quite good.
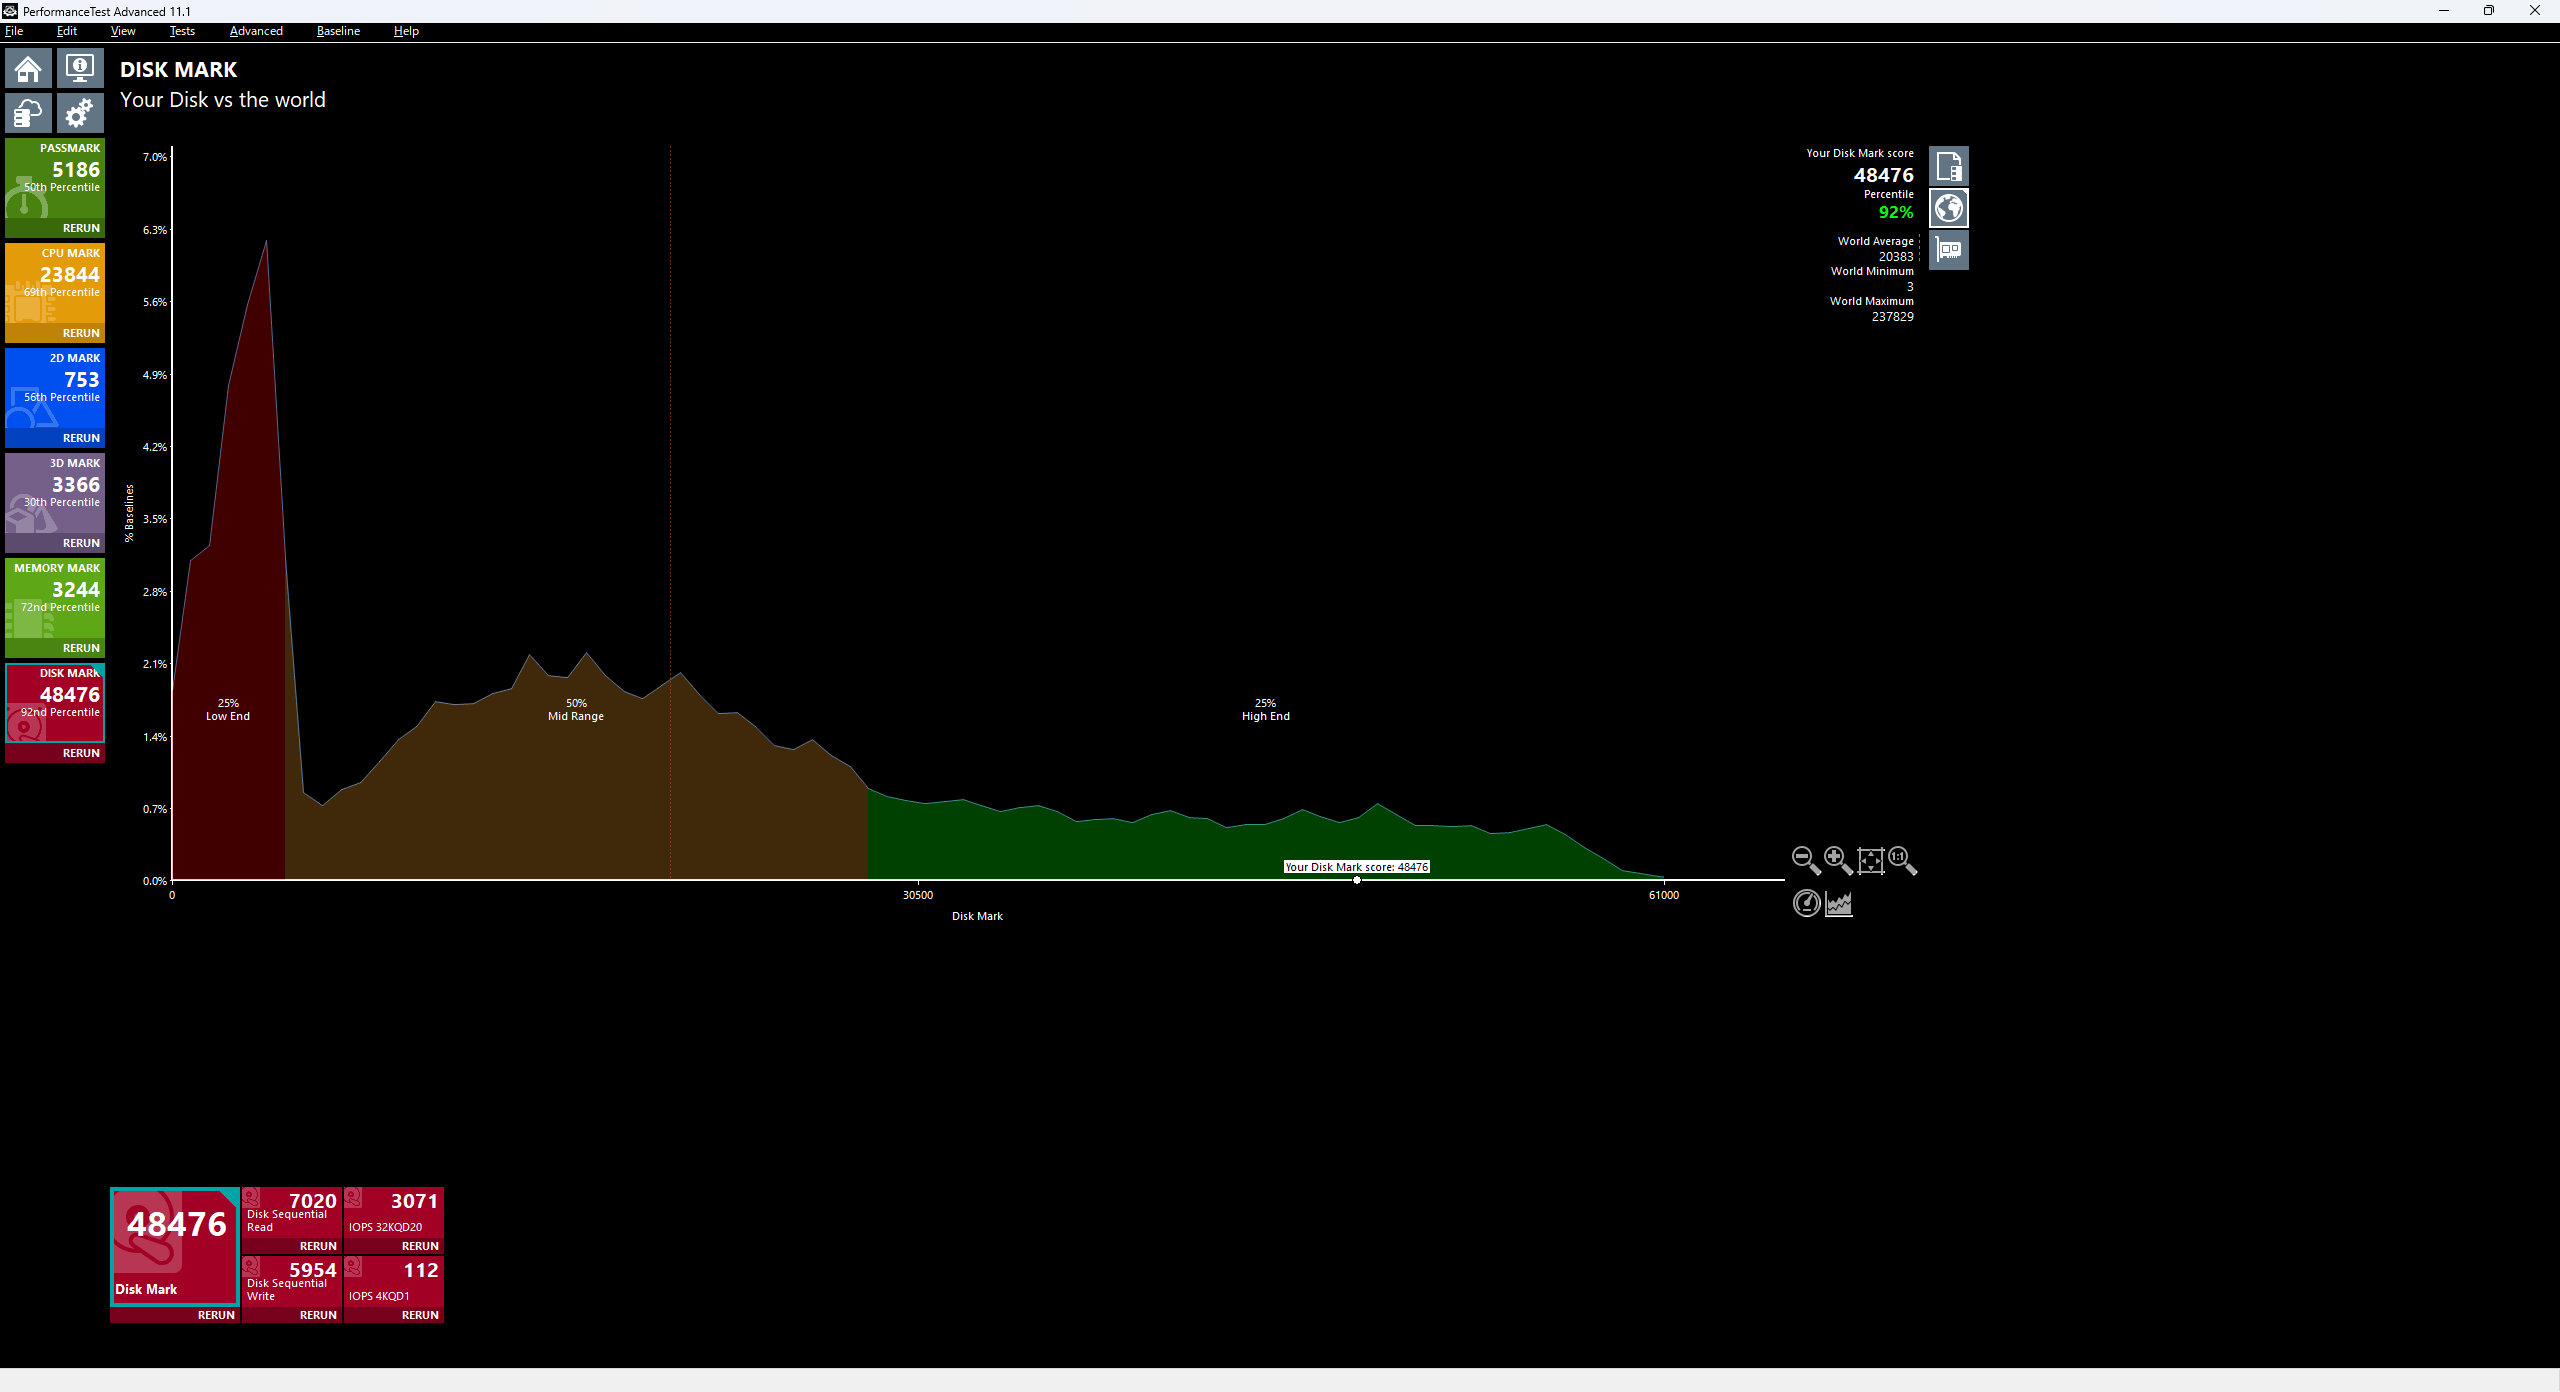
DiskMark scored an impressive 48476 points, a remarkable 92%, demonstrating the benefits of the upgrade.

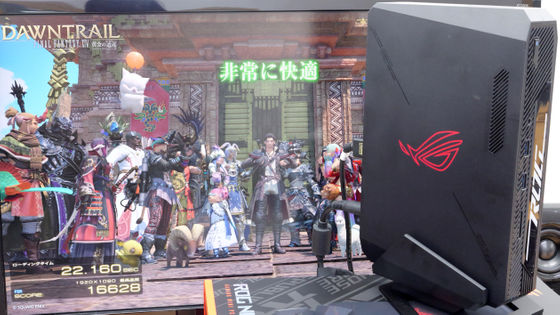
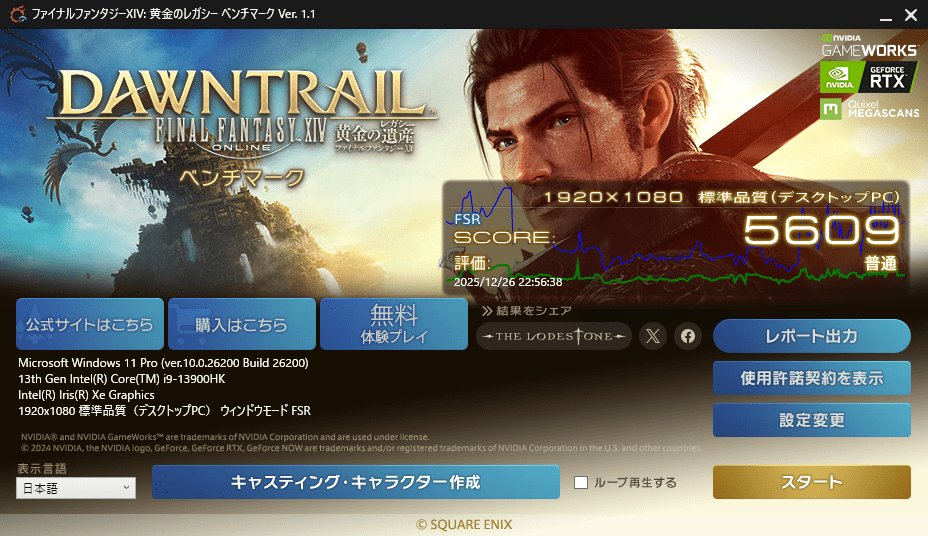
Final Fantasy XIV: Golden Legacy Benchmark
I ran the '
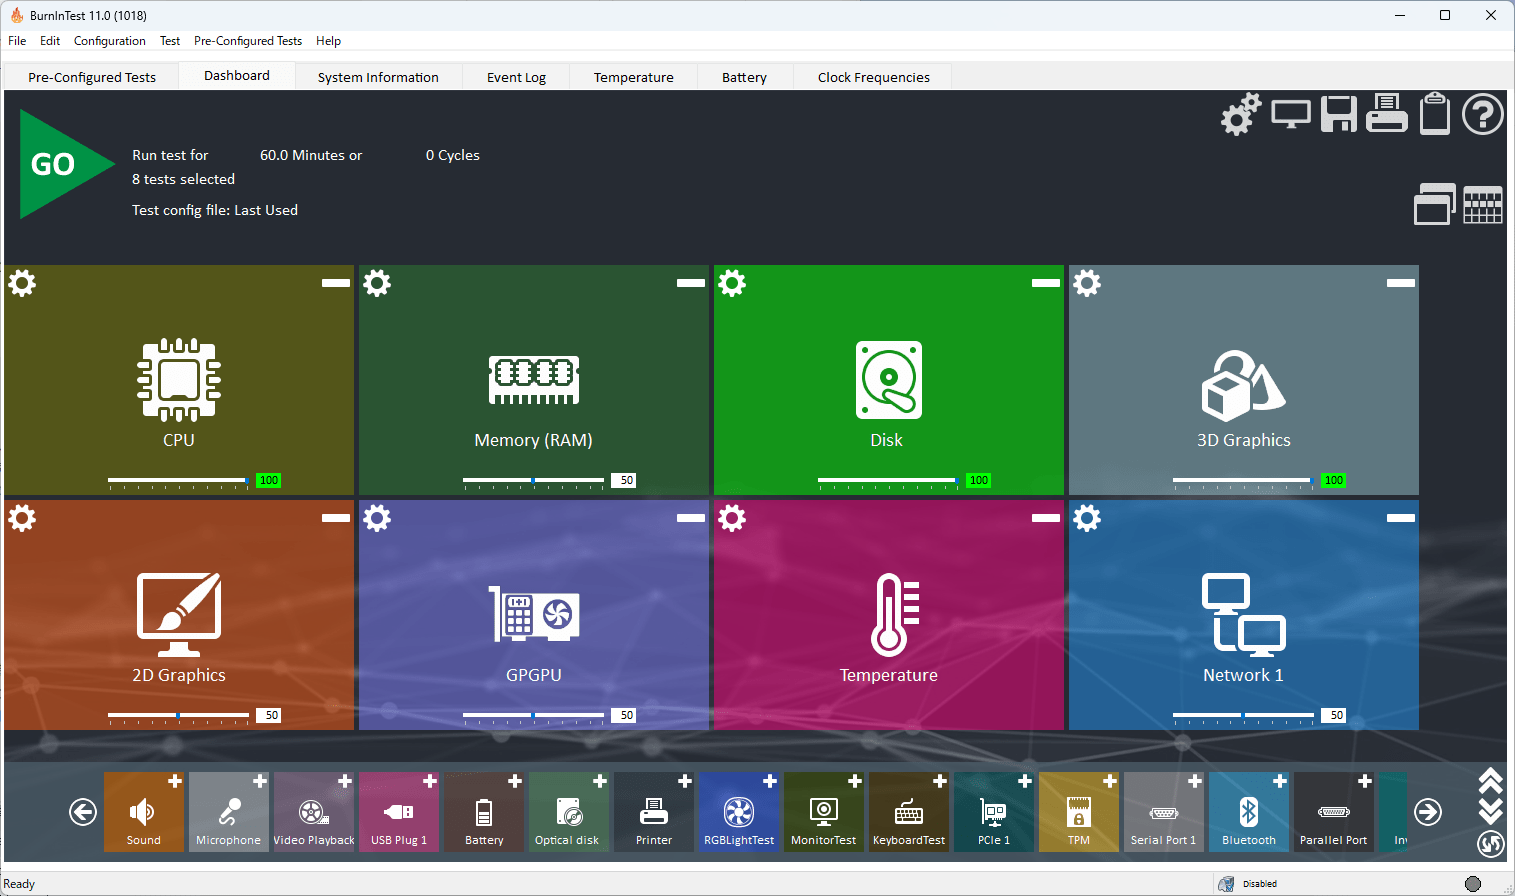
・Passmark BurnInTest
The test items are CPU, Memory, Disk, 3D Graphics, 2D Graphics, GPGPU, Temperature, and Network—eight items in total—and we will apply a load to each for one hour.
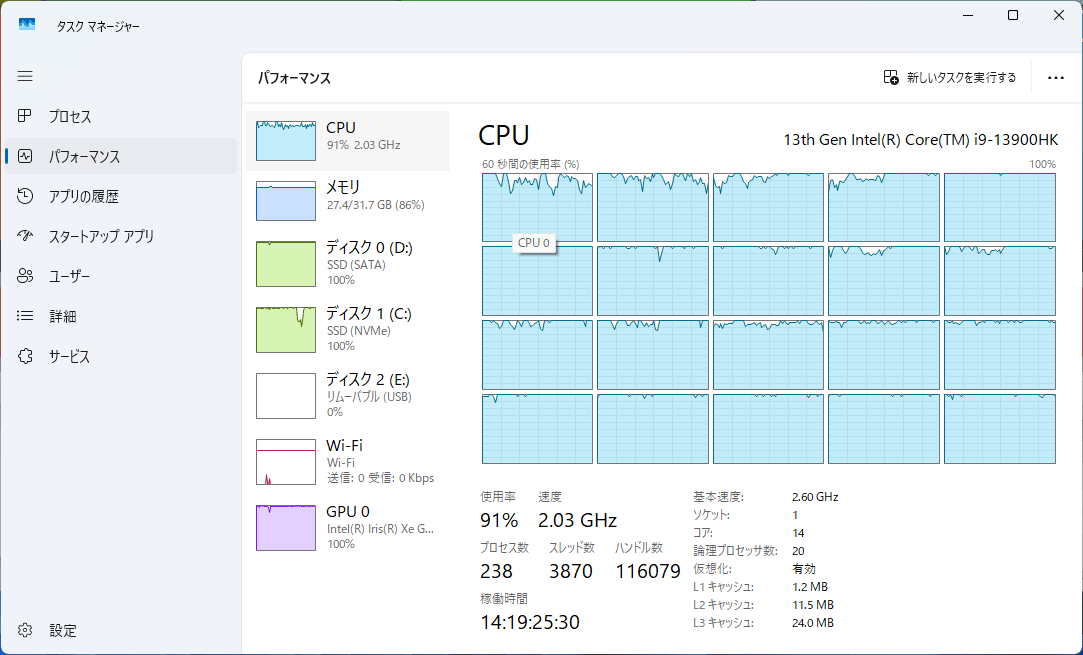
The CPU is running at almost 100% utilization across all threads.
The memory is also being used almost to full capacity.

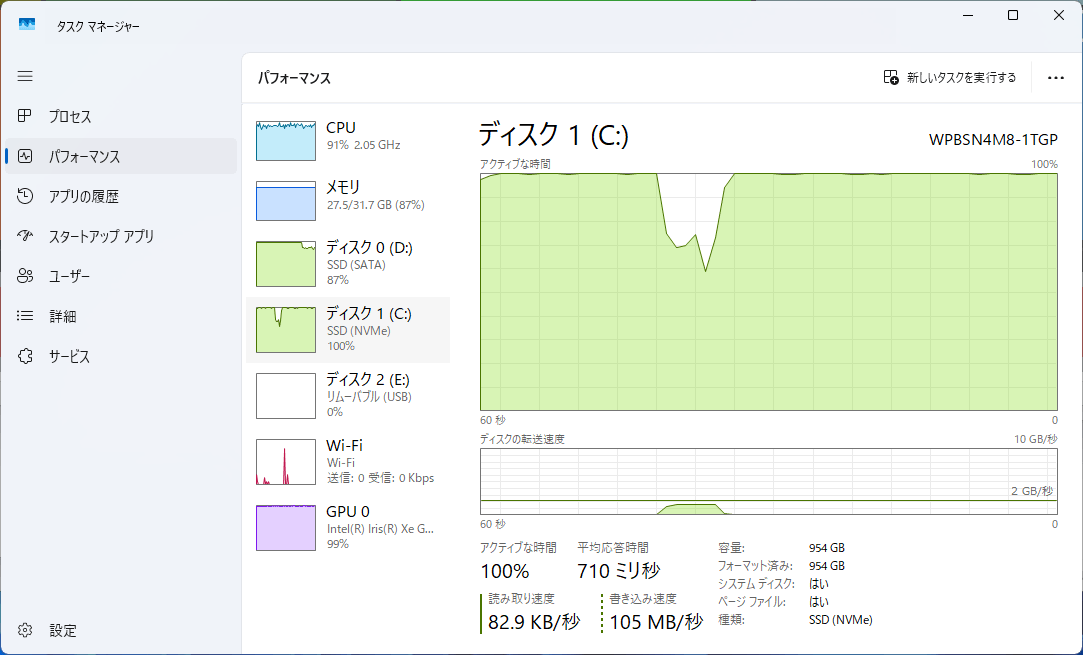
The C drive is 100% active.
The D drive seems to have slightly less usage time, but it's performing well.

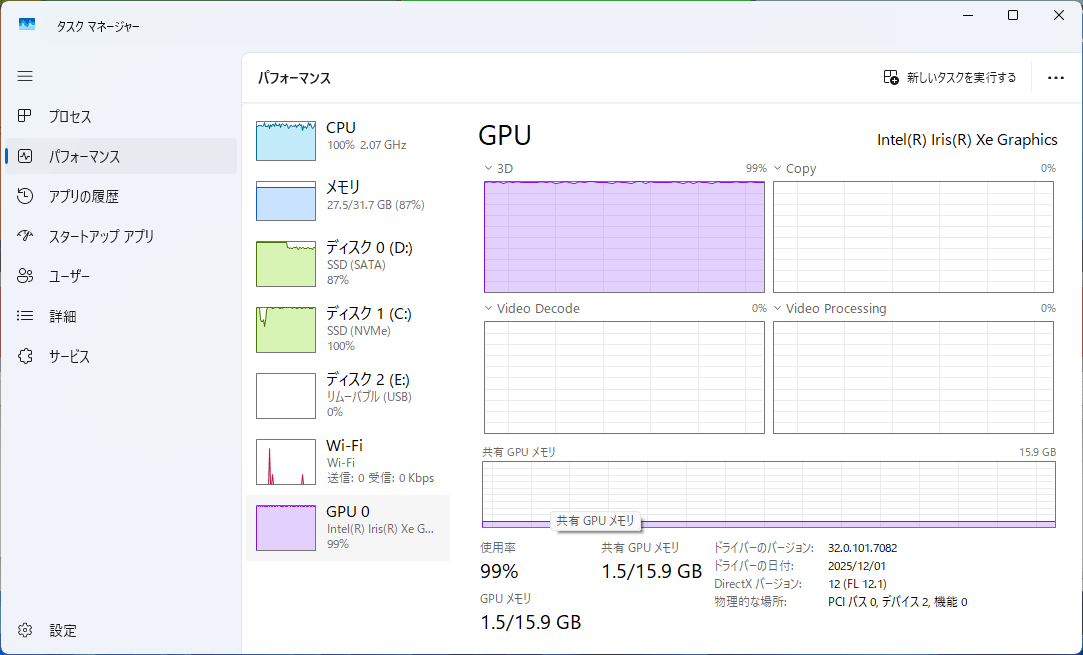
The GPU is almost at 100% utilization, solely for 3D processing.
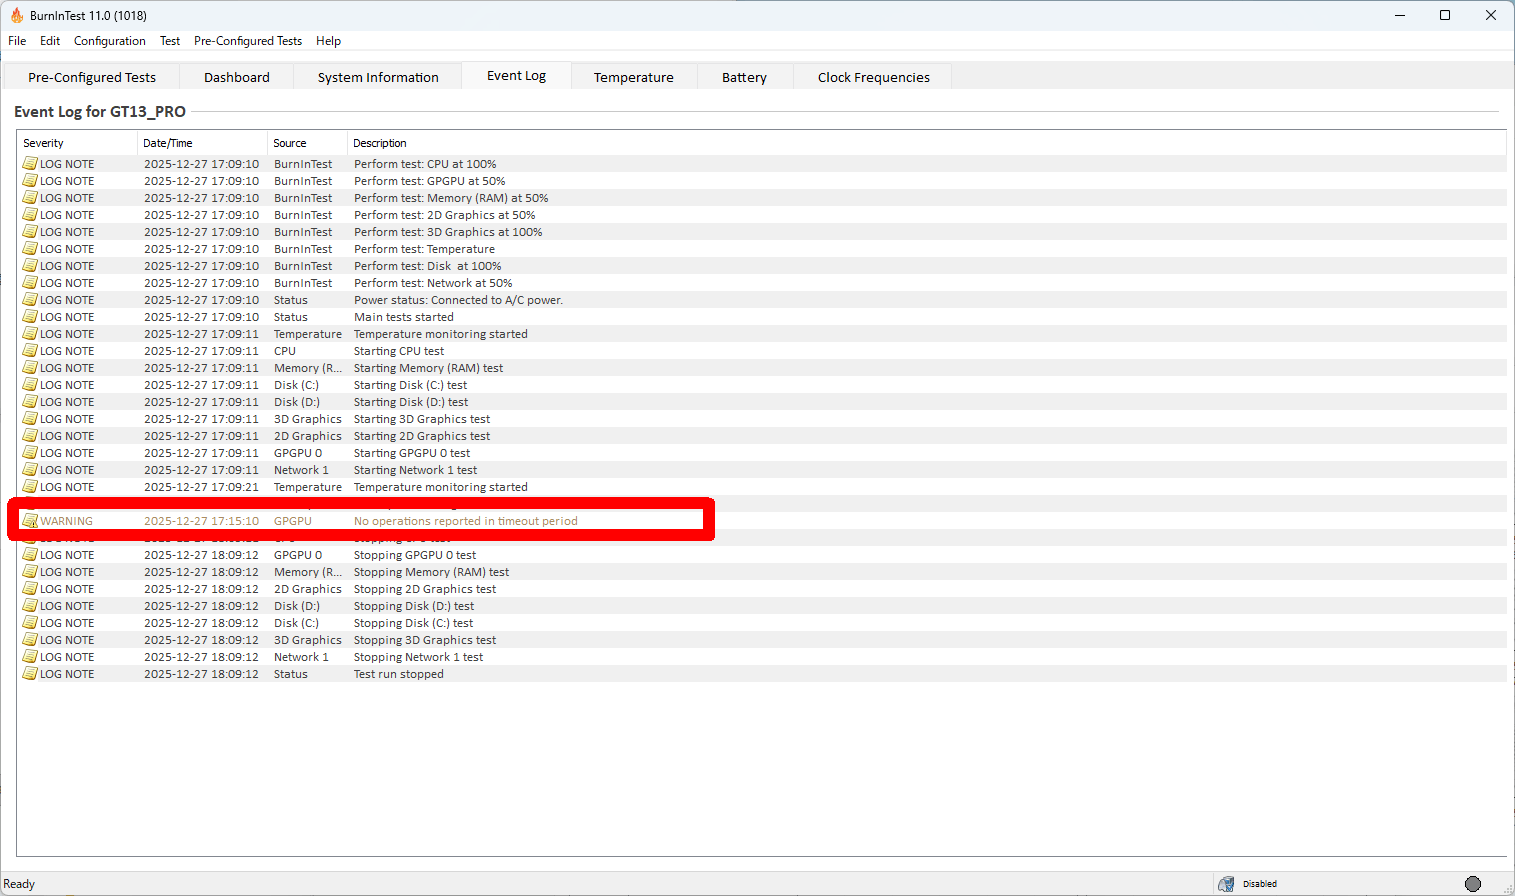
The test results show only one error related to the GPU.
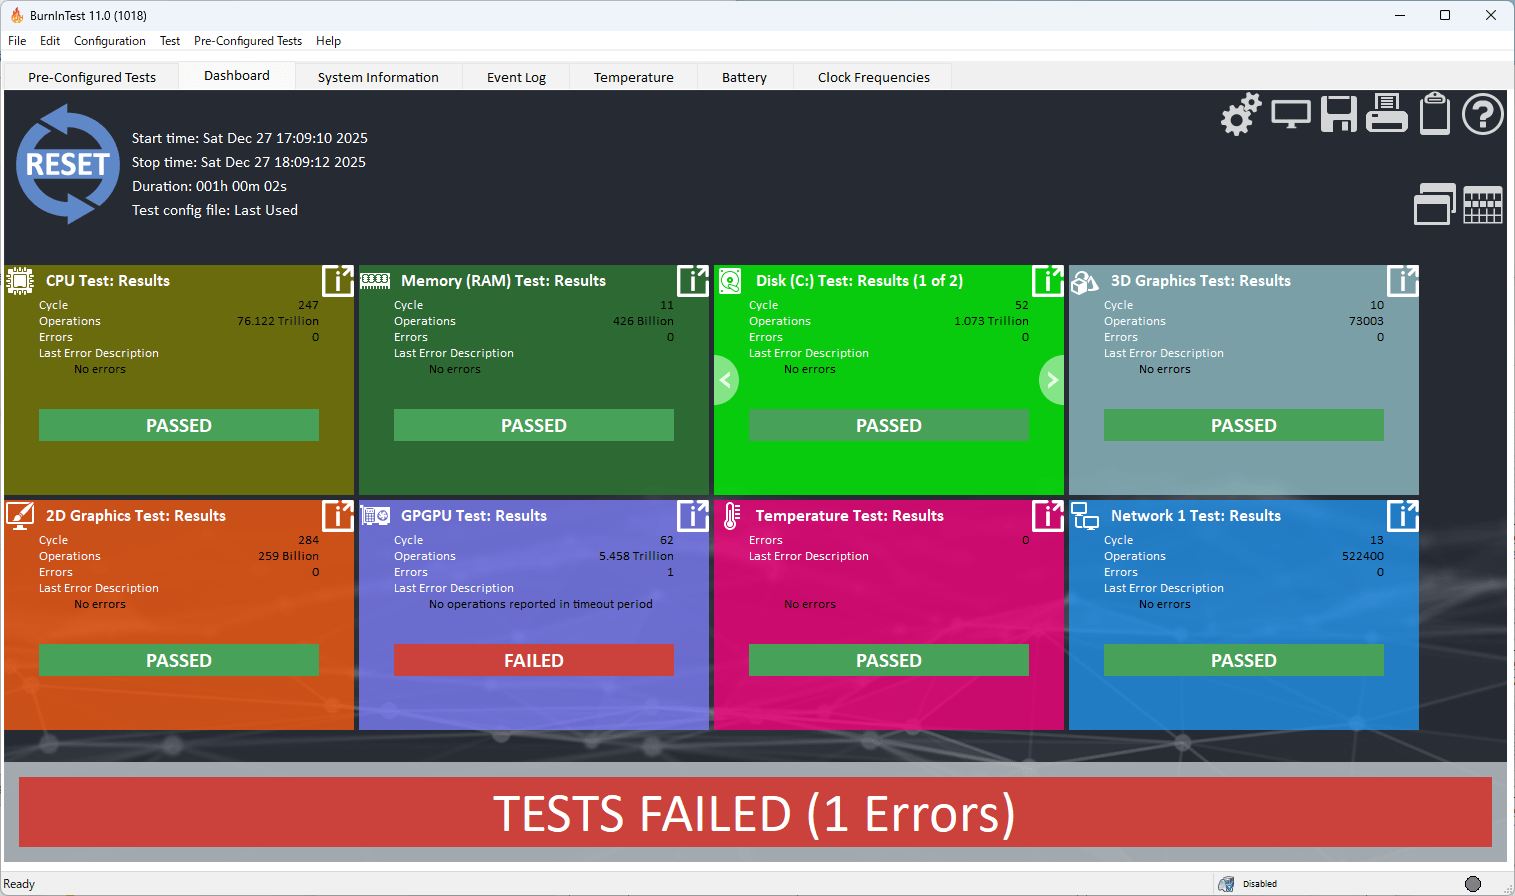
Upon checking the logs for the error, I found a warning that a timeout had occurred.
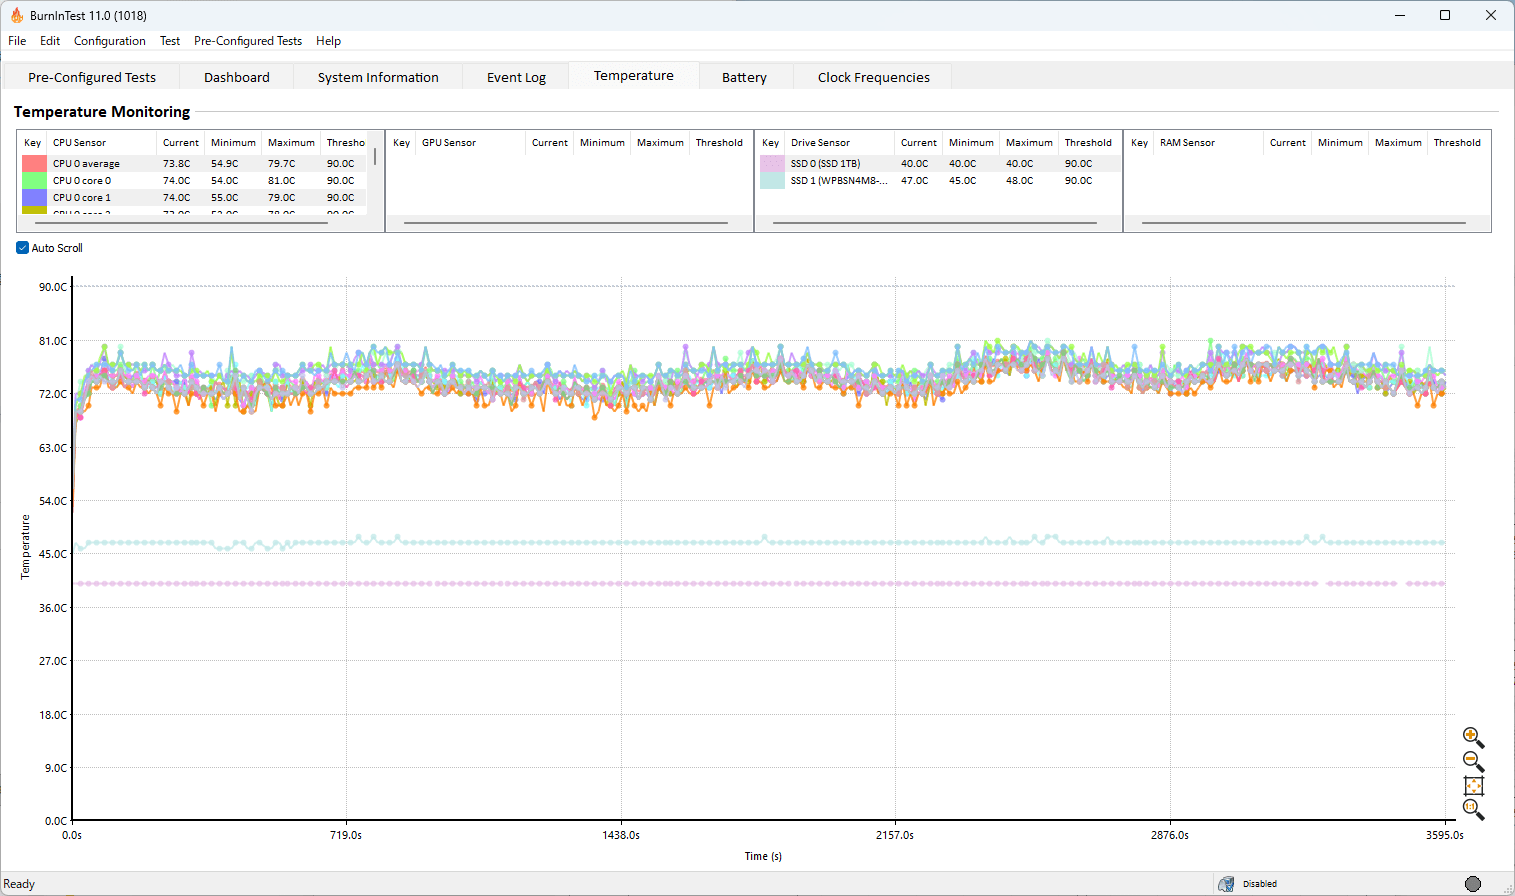
Regarding temperatures, the CPU generally stayed below 90 degrees Celsius, and neither of the SSDs exceeded 50 degrees Celsius.
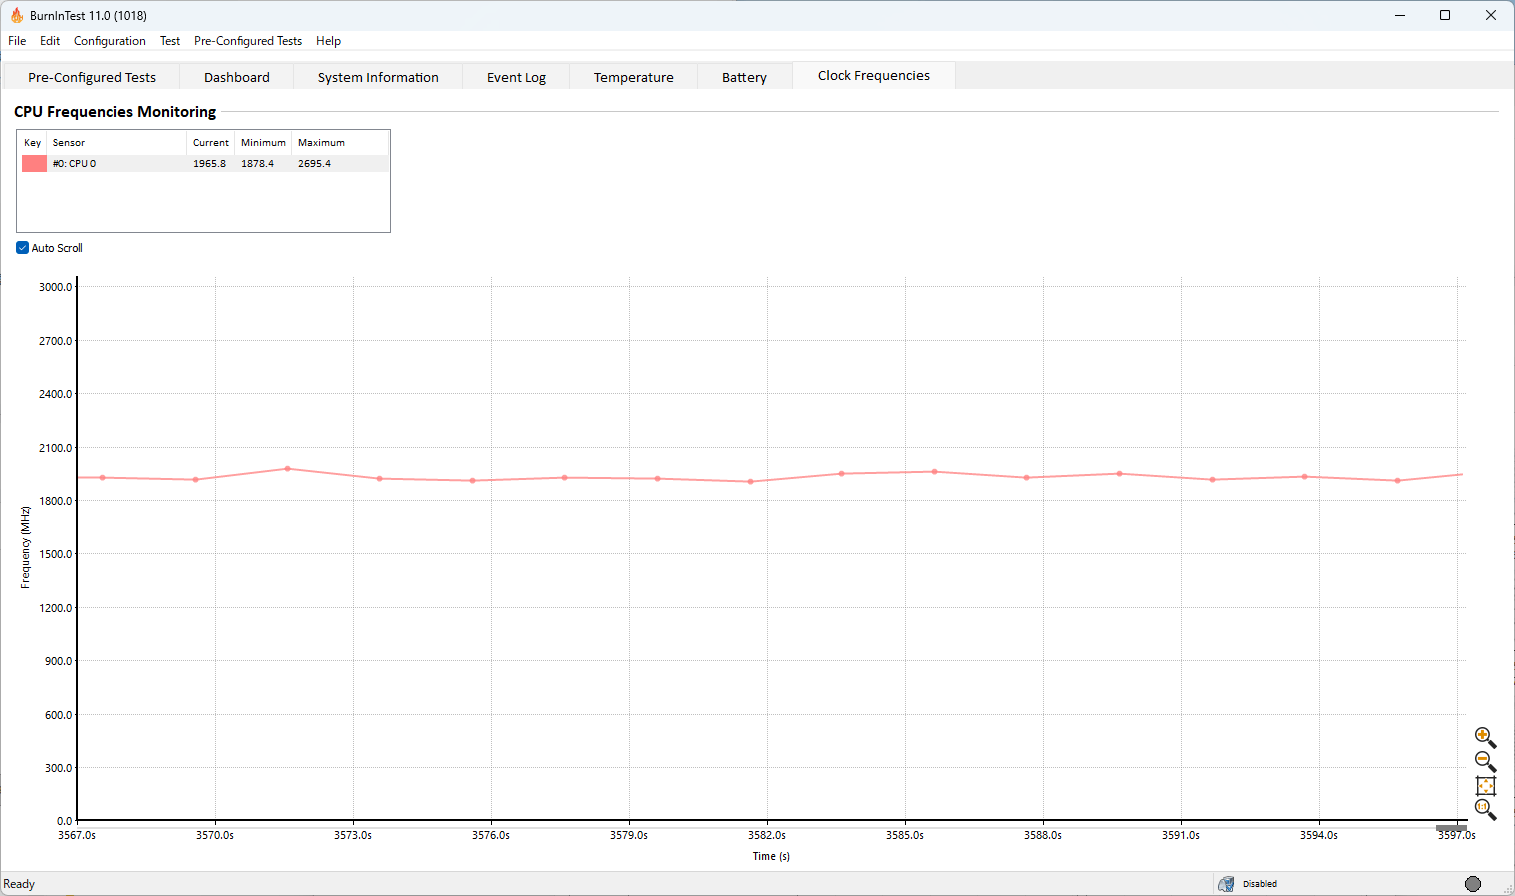
The clock frequency was generally maintained at 2GHz.
Approximately one hour after the start of the test, we measured the sound pressure near the exhaust vent using a digital sound level meter '
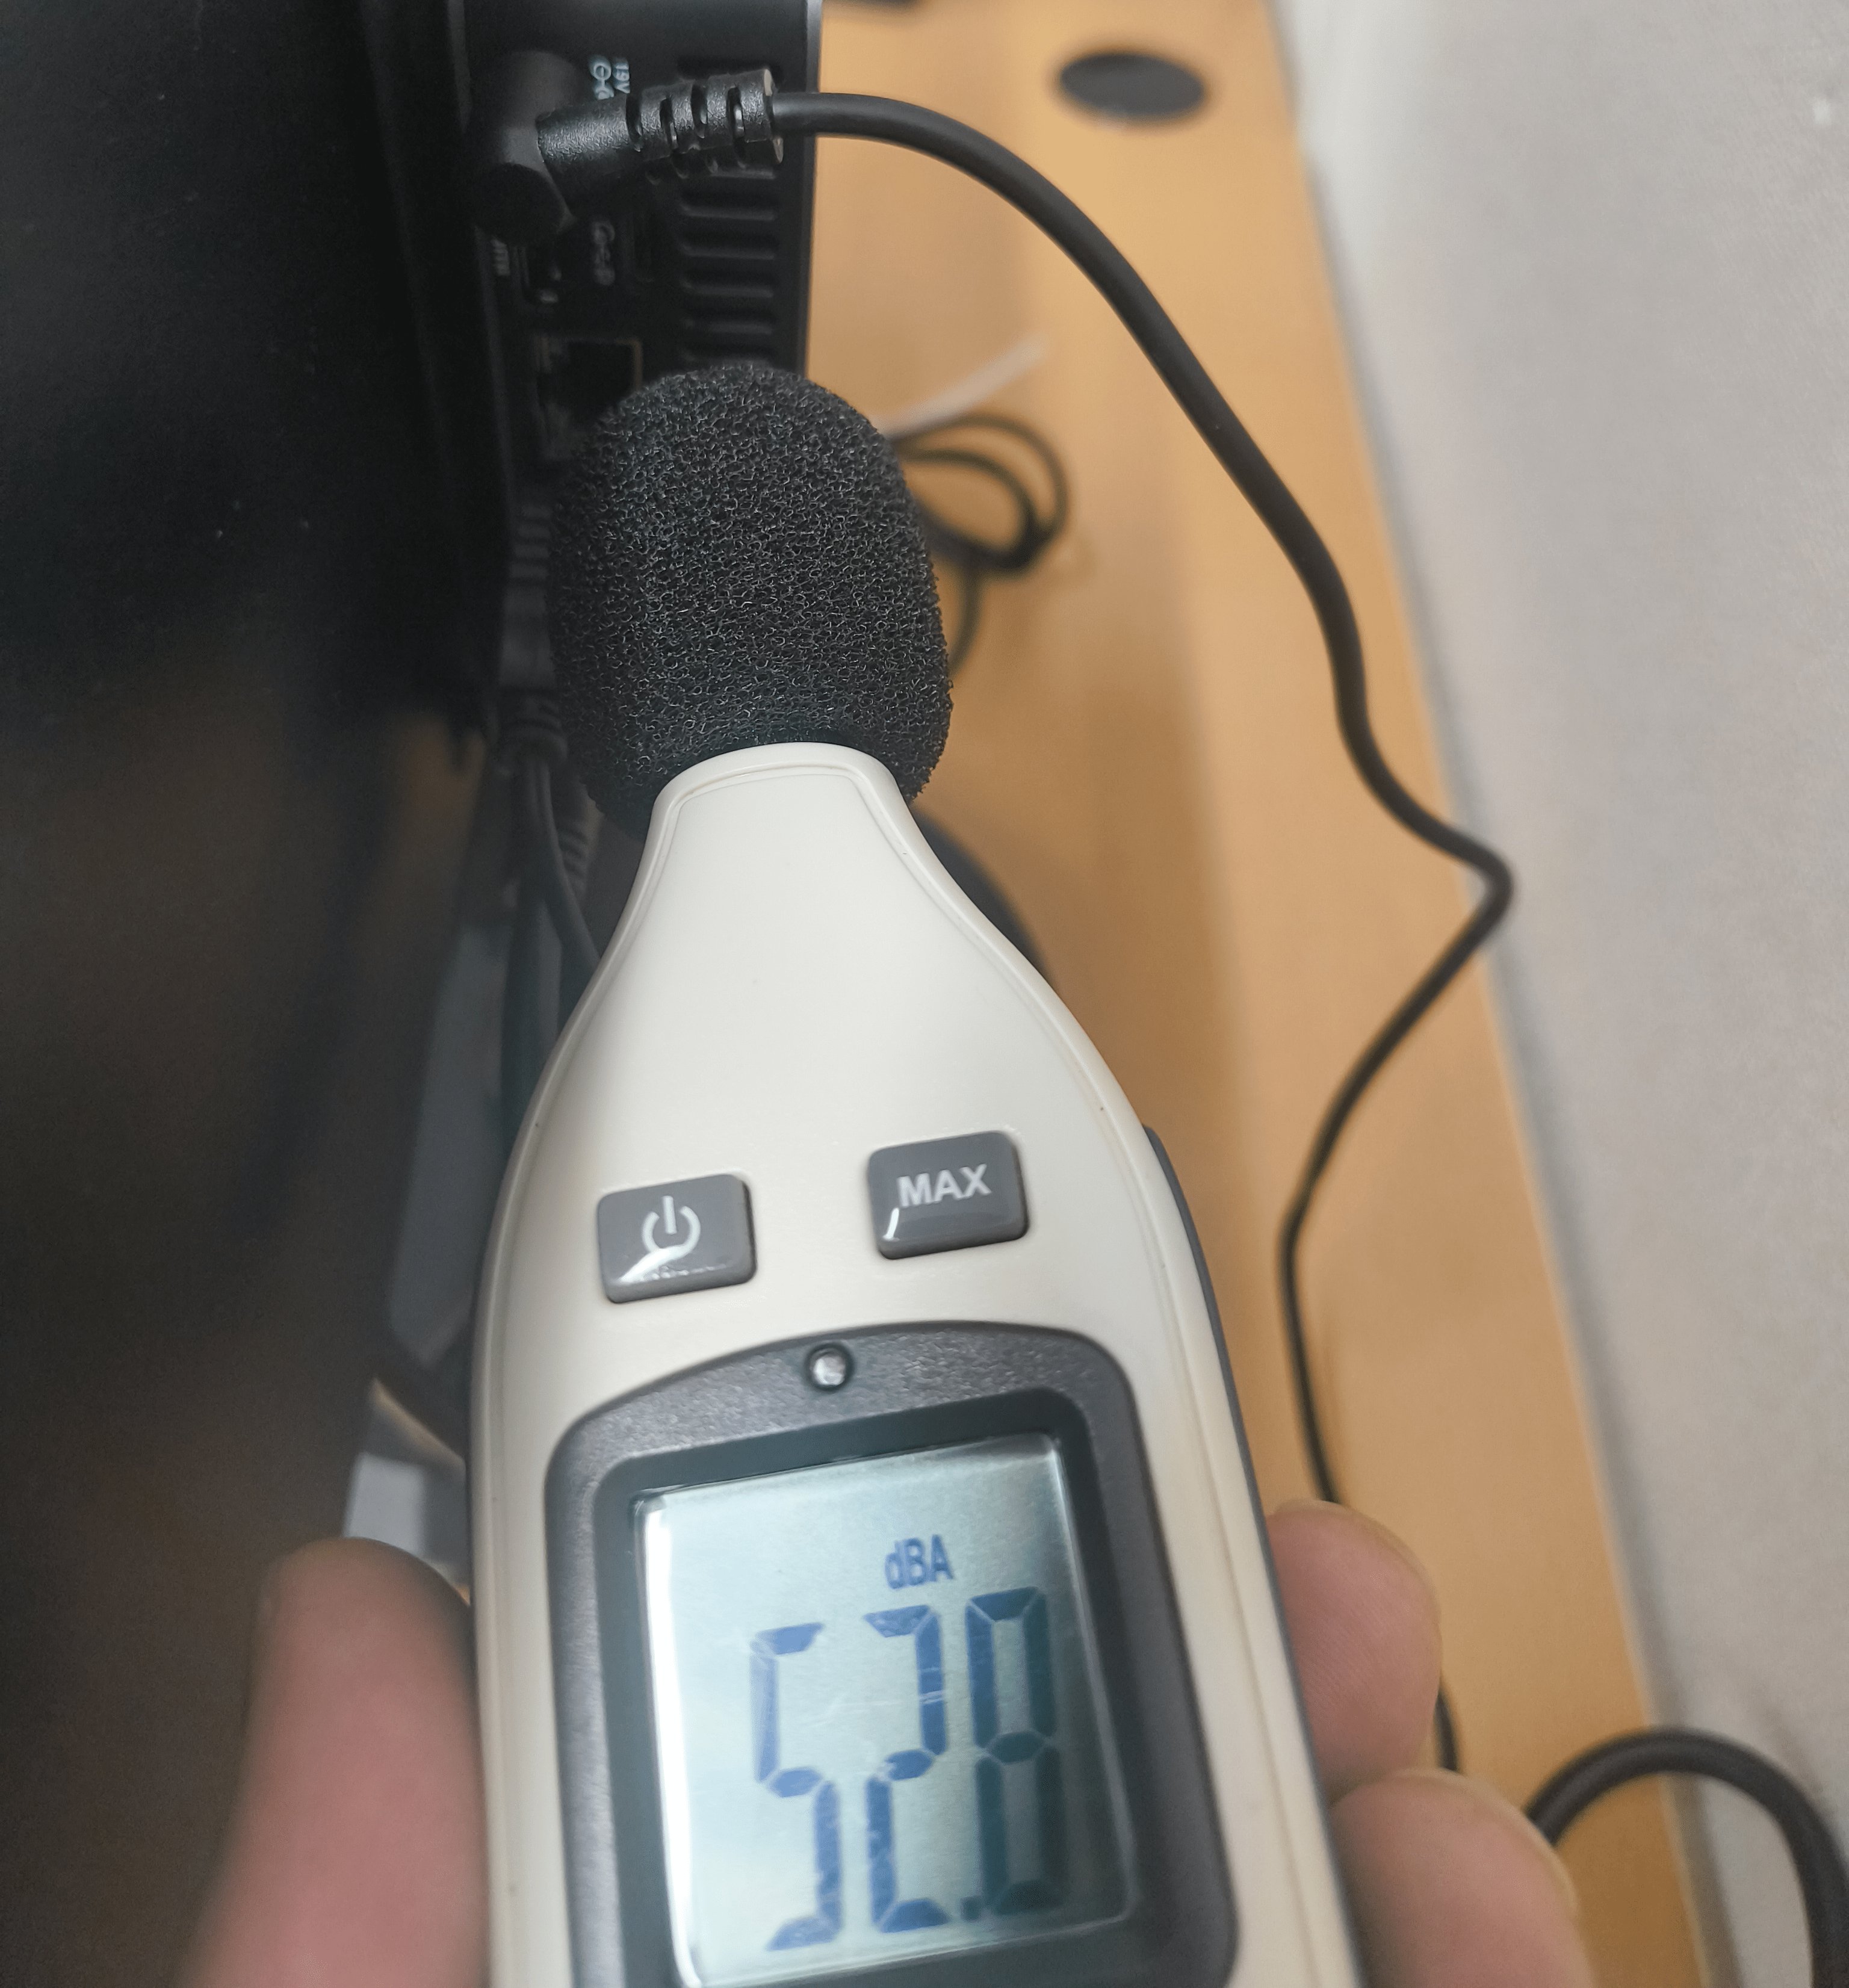
The maximum noise level was 66.0 decibels, so while it wasn't completely silent, it wasn't so loud as to interfere with conversation.

At the same time, we measured the temperature near the exhaust vent using

The AC adapter temperature is around 40 degrees Celsius.
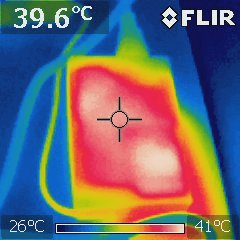
The temperature of the case varied depending on the location, but the area near the exhaust vents was the hottest, reaching just under 50 degrees Celsius.

DaVinci Resolve
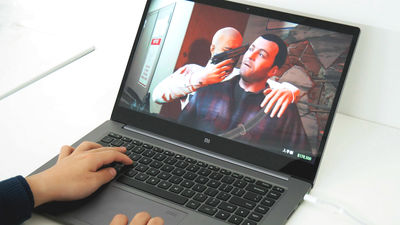
I used the video editing app ' DaVinci Resolve ' to test how long it would take to encode a 12-minute 4K video file of ' Tears of Steel ,' a movie freely available as a Blender project, for YouTube.
• Timeline resolution: 3840×2160 Ultra HD
• Video monitoring resolution: 3840×2160 Ultra HD
• Encoding quality: 2160p
Video codec: H.256
As a result, the encoding process was completed in 9 minutes and 4 seconds. The operation, such as seeking, felt slightly clunky.

◆Summary
I was able to upgrade the storage of my GEEKOM GT13 Pro mini PC, making it more than capable of performing well as a general work PC. At the time of writing, SSD prices are soaring, so this could be a good way to make use of an unused SATA SSD. If you are considering upgrading the storage of your mini PC, please use this as a reference for the procedure.
Related Posts: